Project Overview
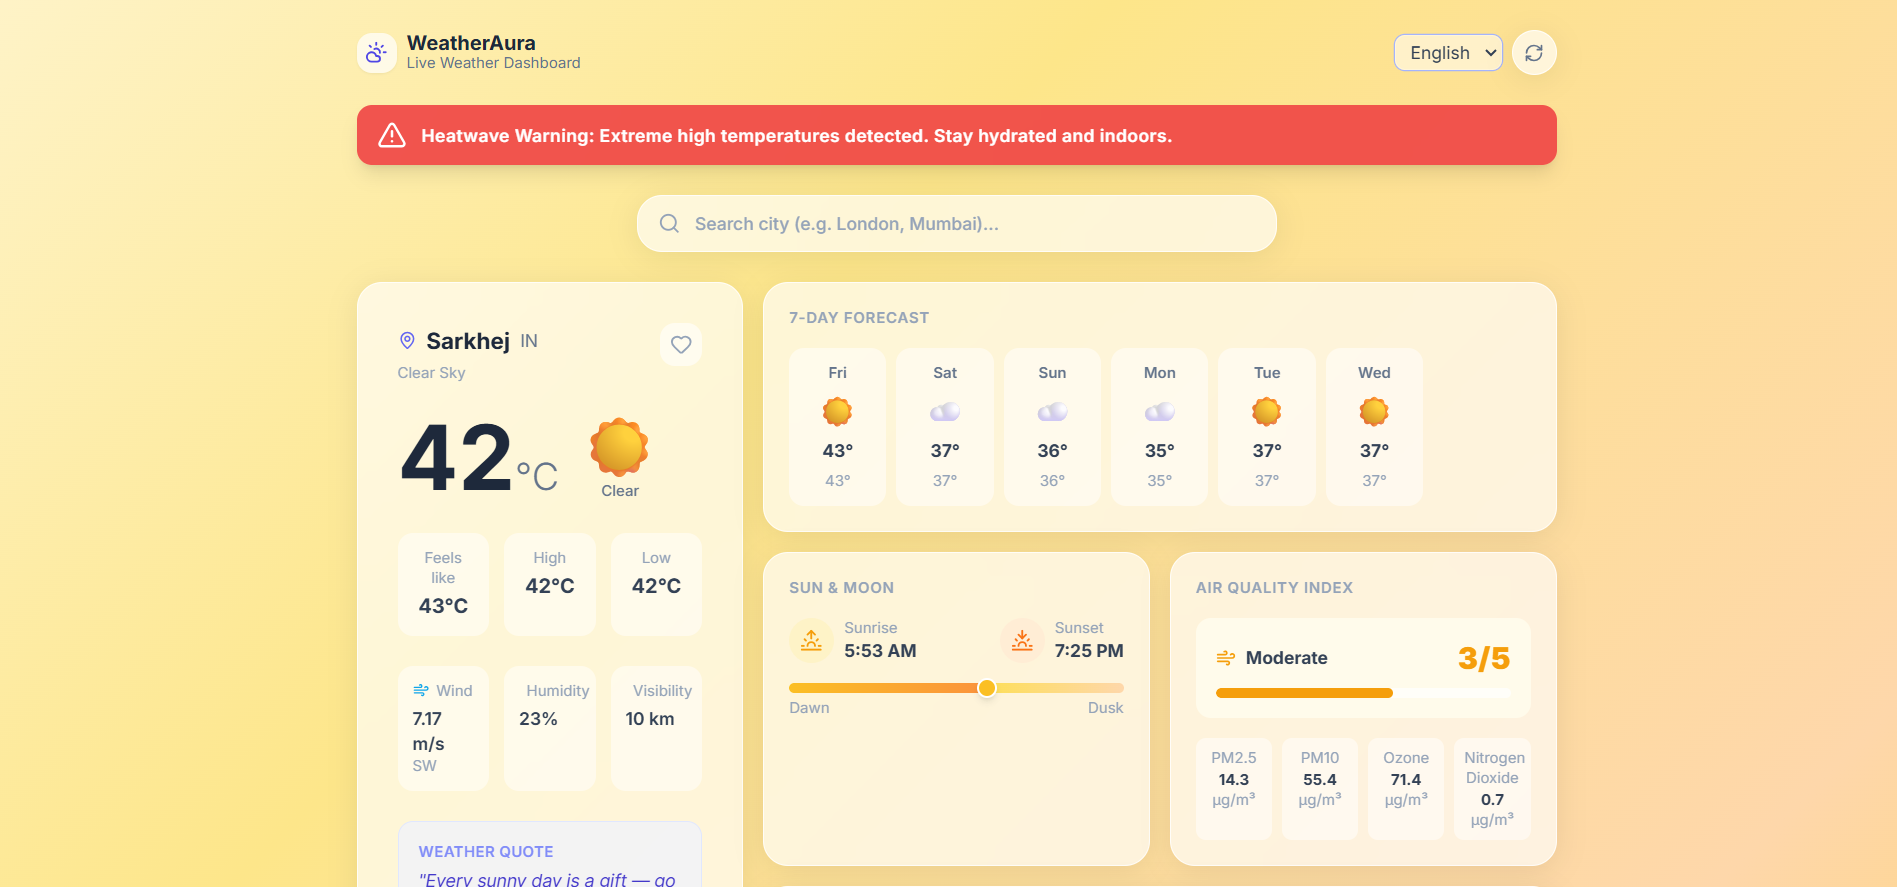
WeatherAura is a beautiful, dynamic, and highly interactive weather dashboard that goes beyond just displaying temperatures. It automatically changes its entire UI theme and animations based on real-time weather conditions. Designed with a premium glassmorphism aesthetic, it acts as a personal weather assistant by providing outfit recommendations, music suggestions, severe weather alerts, and multi-language support.
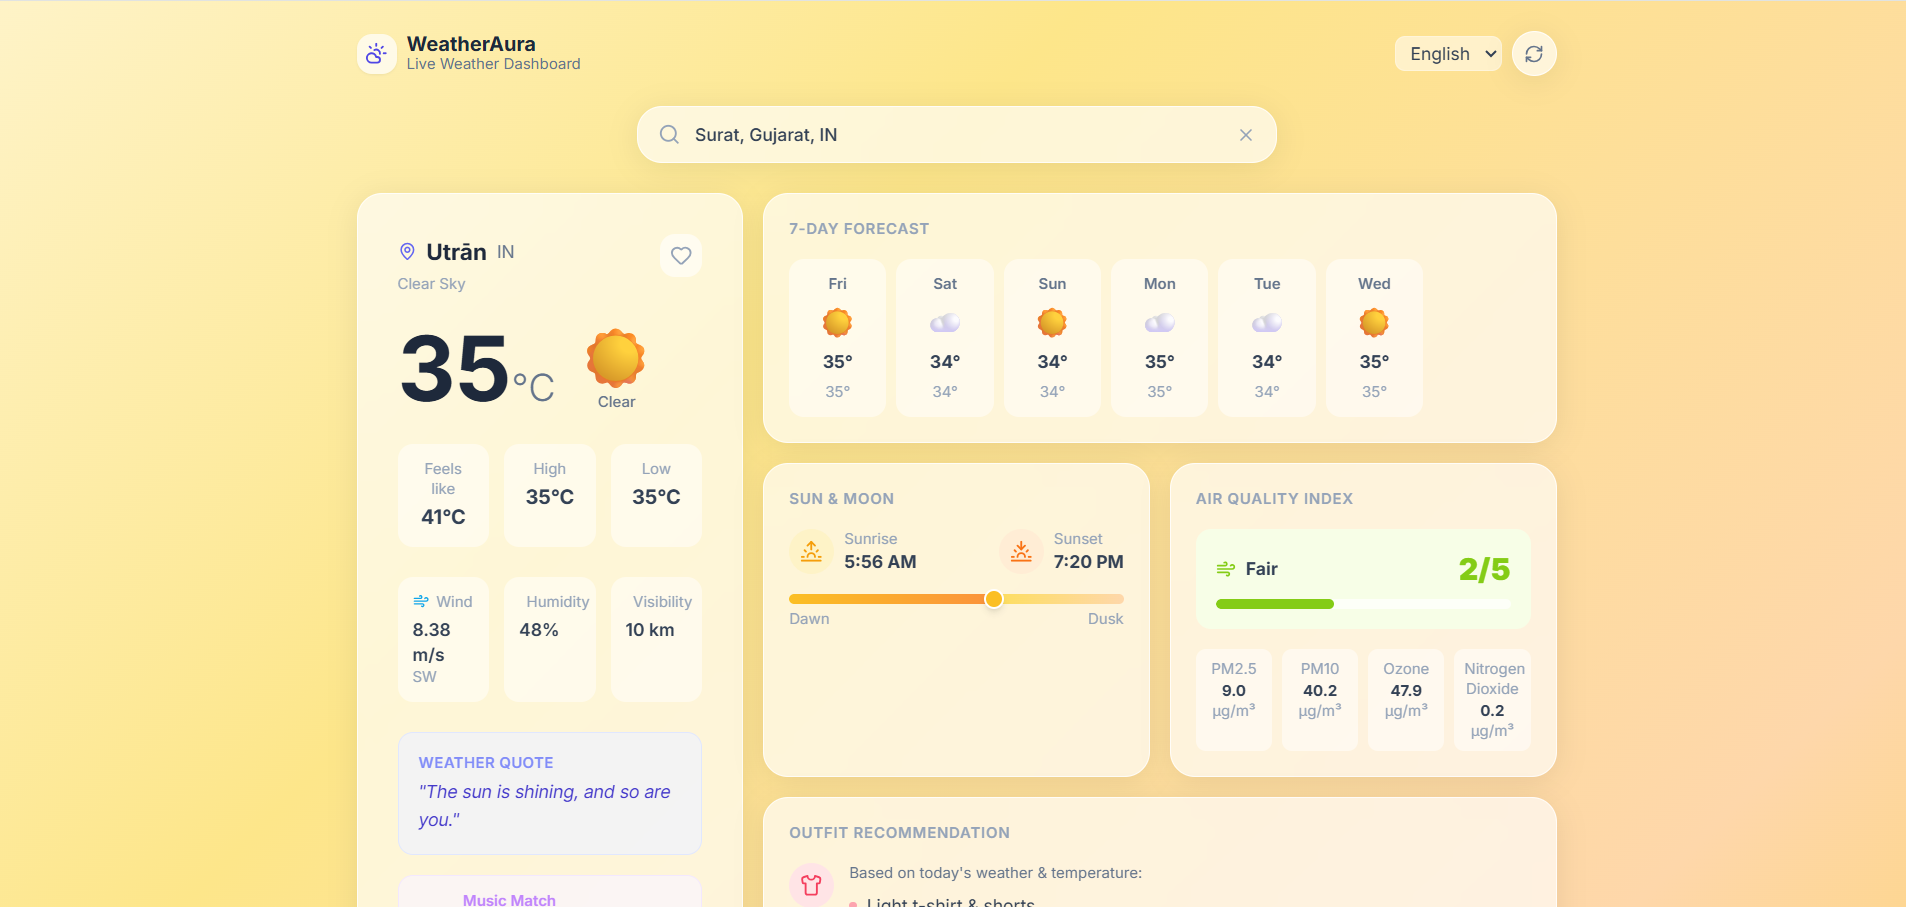
Screenshots
Key Features
- Dynamic UI & Live Animations:The background gradients and animations (rain, snow, fog) change in real-time to match the current weather.
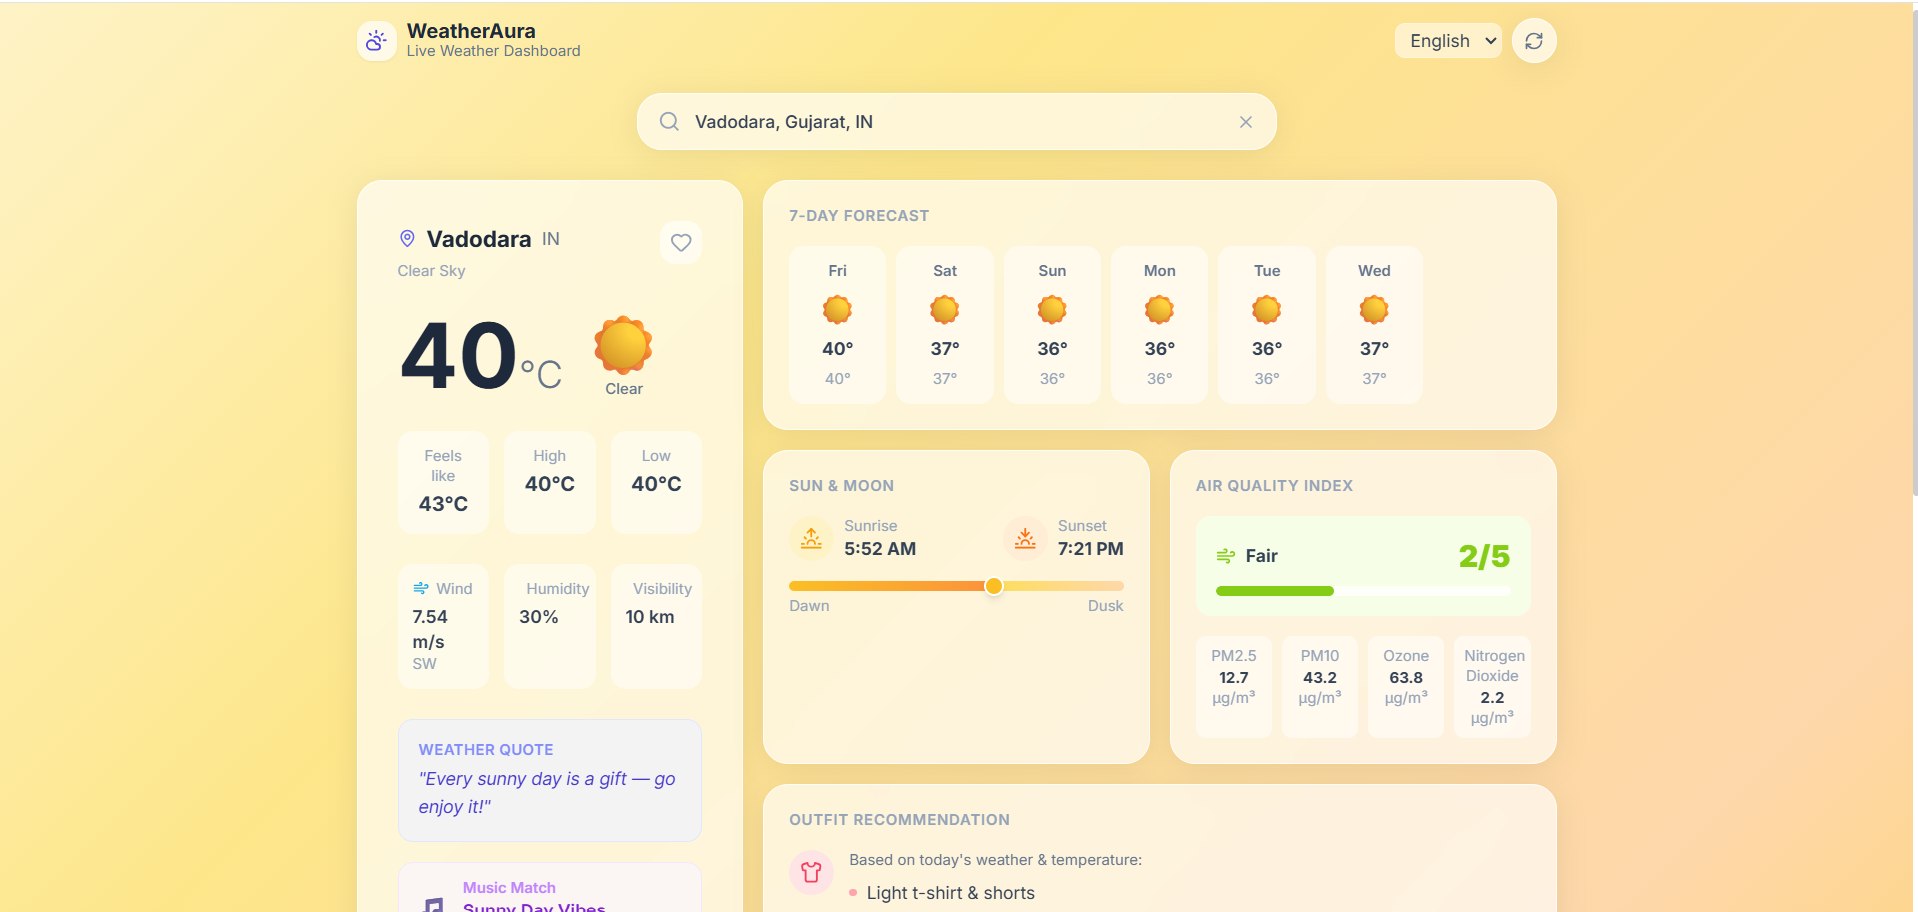
- Comprehensive Weather Data:Displays current temperature, ‘feels like’ temp, humidity, wind speed/direction, and a detailed 7-Day forecast.
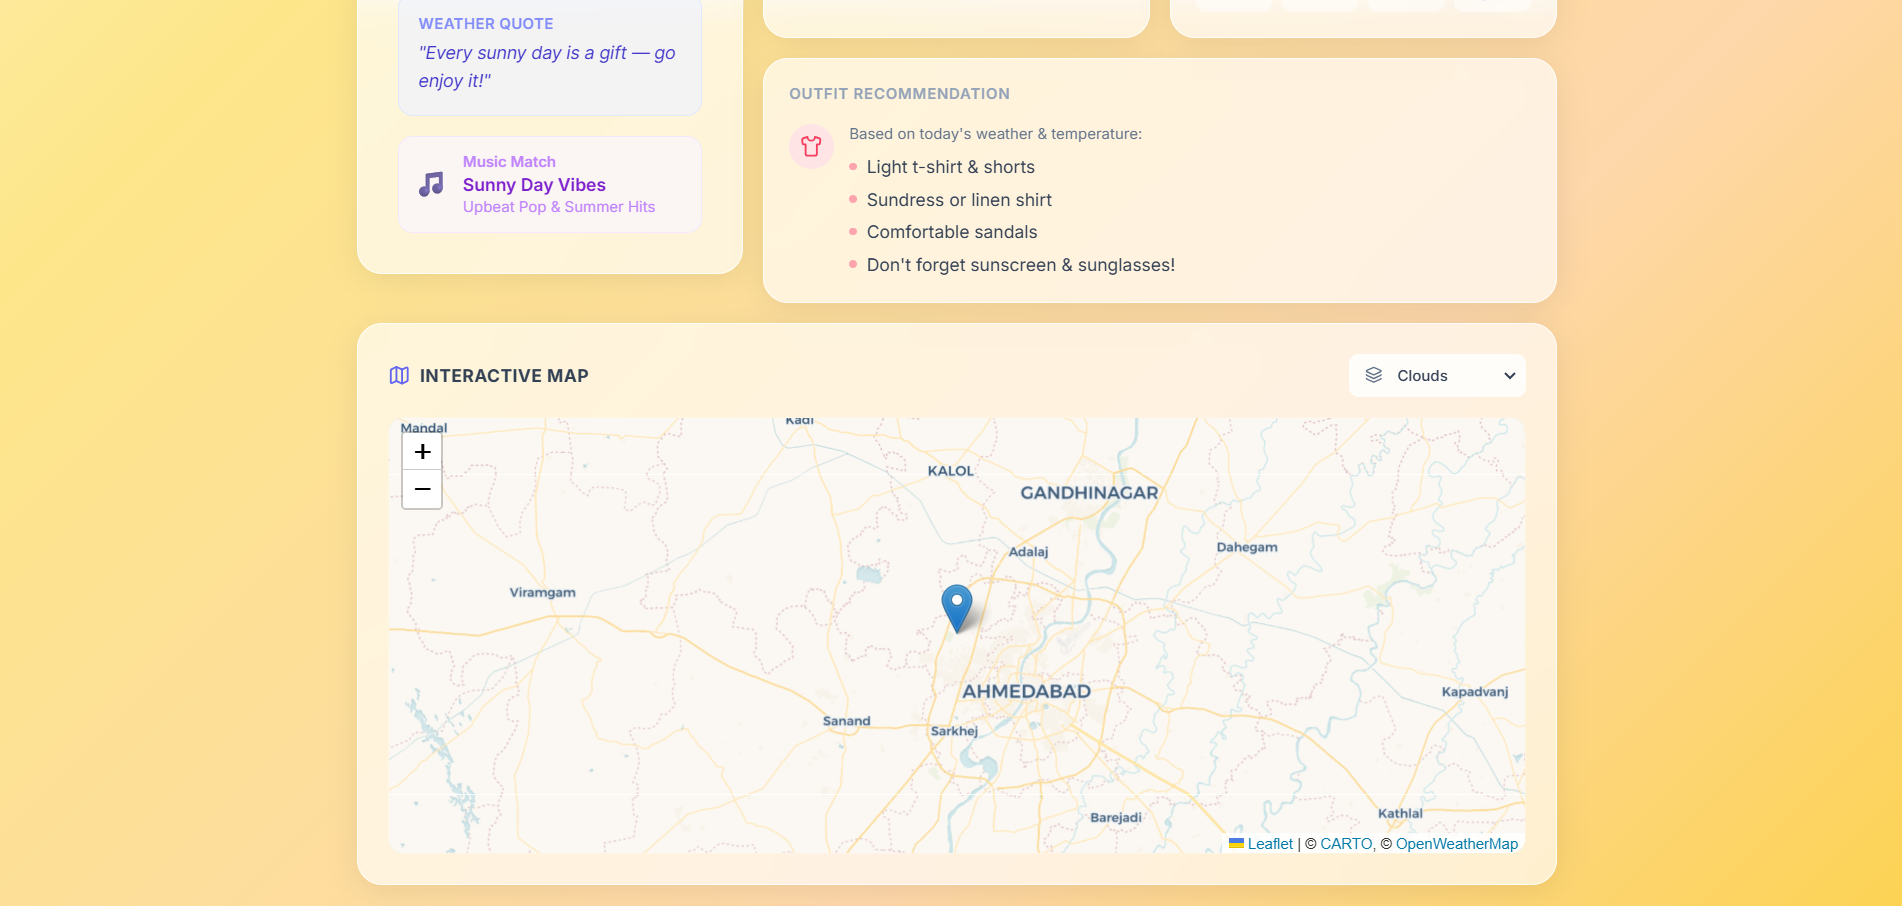
- Air Quality Index (AQI) & Sun Tracker:Live AQI monitoring with pollutant breakdown, plus a visual tracker for Sunrise, Sunset, and daylight progress.
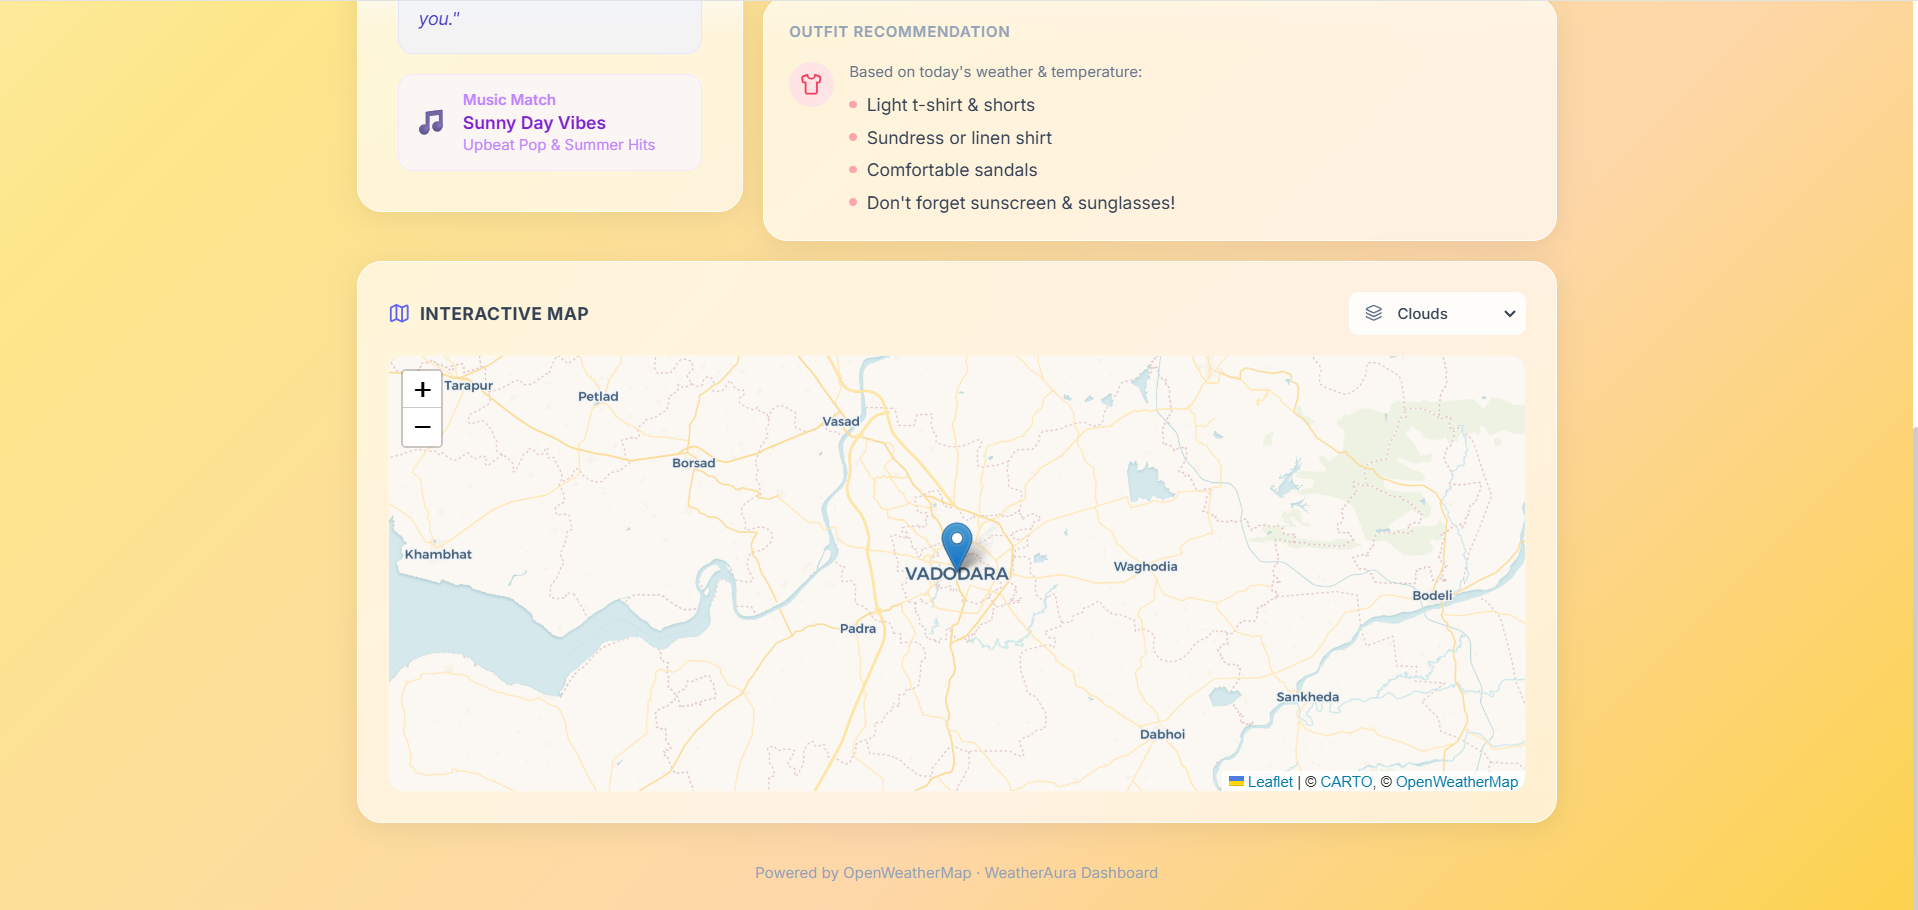
- Interactive Weather Map:A Leaflet-powered radar map with togglable layers for clouds, precipitation, temperature, wind, and pressure.
- Smart Recommendations:Contextual outfit suggestions, music playlist recommendations, and daily quotes tailored to the current weather and temperature.
- Multi-Language Support (i18n):Full UI and dynamic API data translation in English, Hindi, and Gujarati.
- Severe Weather Alerts:Smart local monitoring that flashes a warning banner during heatwaves, severe cold, extreme winds, or thunderstorms.
- Favorite Cities (Database):Users can save and manage their favorite cities using a MongoDB backend for quick, one-click weather checks.
Functionaliy
- When a user opens the dashboard, it automatically detects their location using browser GPS. Users can search for any city globally using a live-autocomplete search bar.
- The frontend communicates with the Node.js backend, which proxies requests to OpenWeatherMap, formats the data, appends AI-like smart recommendations (outfits/music), and sends it back.
- Users can toggle the language from the header, interact with the weather map by zooming and changing layers, and save/delete cities to their favorites list which persists in the MongoDB database.
- The UI instantly reacts to all these interactions without full page reloads.
Technology Used
- Frontend:React.js (Vite), Tailwind CSS (for styling and glassmorphism), React-Leaflet (for maps), Lucide React (for icons), React Context API (for global state management).
- Backend:Node.js, Express.js.
- Database:MongoDB, Mongoose (for storing favorite cities).
- Third-Party APIs:OpenWeatherMap API (Current Weather, Forecast, Geocoding, AQI, and Map Tiles).
Why This Project Is Useful
- This project is incredibly useful because it transforms raw meteorological data into actionable, everyday advice.
- Instead of just telling a user it’s 30°C and raining, it advises them to carry an umbrella and wear quick-dry clothes.
- Furthermore, the inclusion of multi-language support makes the dashboard accessible to a wider, localized audience, while the extreme weather alerts keep users safe.
Deployment and Environment Setup
- Environment Variables Setup:
- backend/.env
- PORT: 3000
- MONGO_URI: mongodb_url_string
- JWT_SECRET: your_jwt_secret_key_here (if needed)
- frontend/.env
- VITE_API_URL: backend_url
- backend/.env
- Deployment Overview:
- Render or Railway for backend hosting
- Vercel or Netlify for frontend hosting
- MongoDB Atlas for the database
- Backend Deployment:
- Push your code to GitHub.
- Go to Render.com or Railway.app.
- Create a new Web Service and connect your GitHub repository.
- Choose “backend/” as the root directory.
- Add the following environment variables on Render:
- PORT=10000
- MONGO_URI=your MongoDB Atlas URI
- JWT_SECRET=your JWT secret
- Start command: npm start (Ensure your backend/package.json includes “start”: “node server.js”)
- After deployment, note your backend URL, e.g. https://your-backend-name.onrender.com
- Frontend Deployment:
- Go to Vercel.com or Netlify.com.
- Create a new project and connect the GitHub repo.
- Select the “frontend/” folder as root.
- In environment variables, set:
- VITE_API_URL=https://your-backend-domain.com/api (or REACT_APP_API_URL if using CRA)
- Deploy.
- MongoDB Atlas Setup:
- Go to https://cloud.mongodb.com
- Create a free cluster.
- Add your current IP address in Network Access.
- Create a database user and password.
- Copy the connection string and replace username, password, and database name in MONGO_URI in backend/.env
Download Source Code
Project Setup Instructions
Note: This project is for educational purposes only. Not for commercial sale.


