Project Overview
An immersive, full-stack interactive educational ecosystem where users can test their technical and creative skills, receive real-time answer evaluations, and visually track their progress over time. The application features a stunning, high-converting home page with dynamic marketing banners, a robust user dashboard with performance progress charts, and a complete administrative console for seamless quiz creation and promotional banner management.
Screenshots
Key Features
- Glassmorphic Responsive Interface: Built with an elegant dark theme using custom HSL gradients and modern typography that adapts seamlessly to desktop and mobile screens.
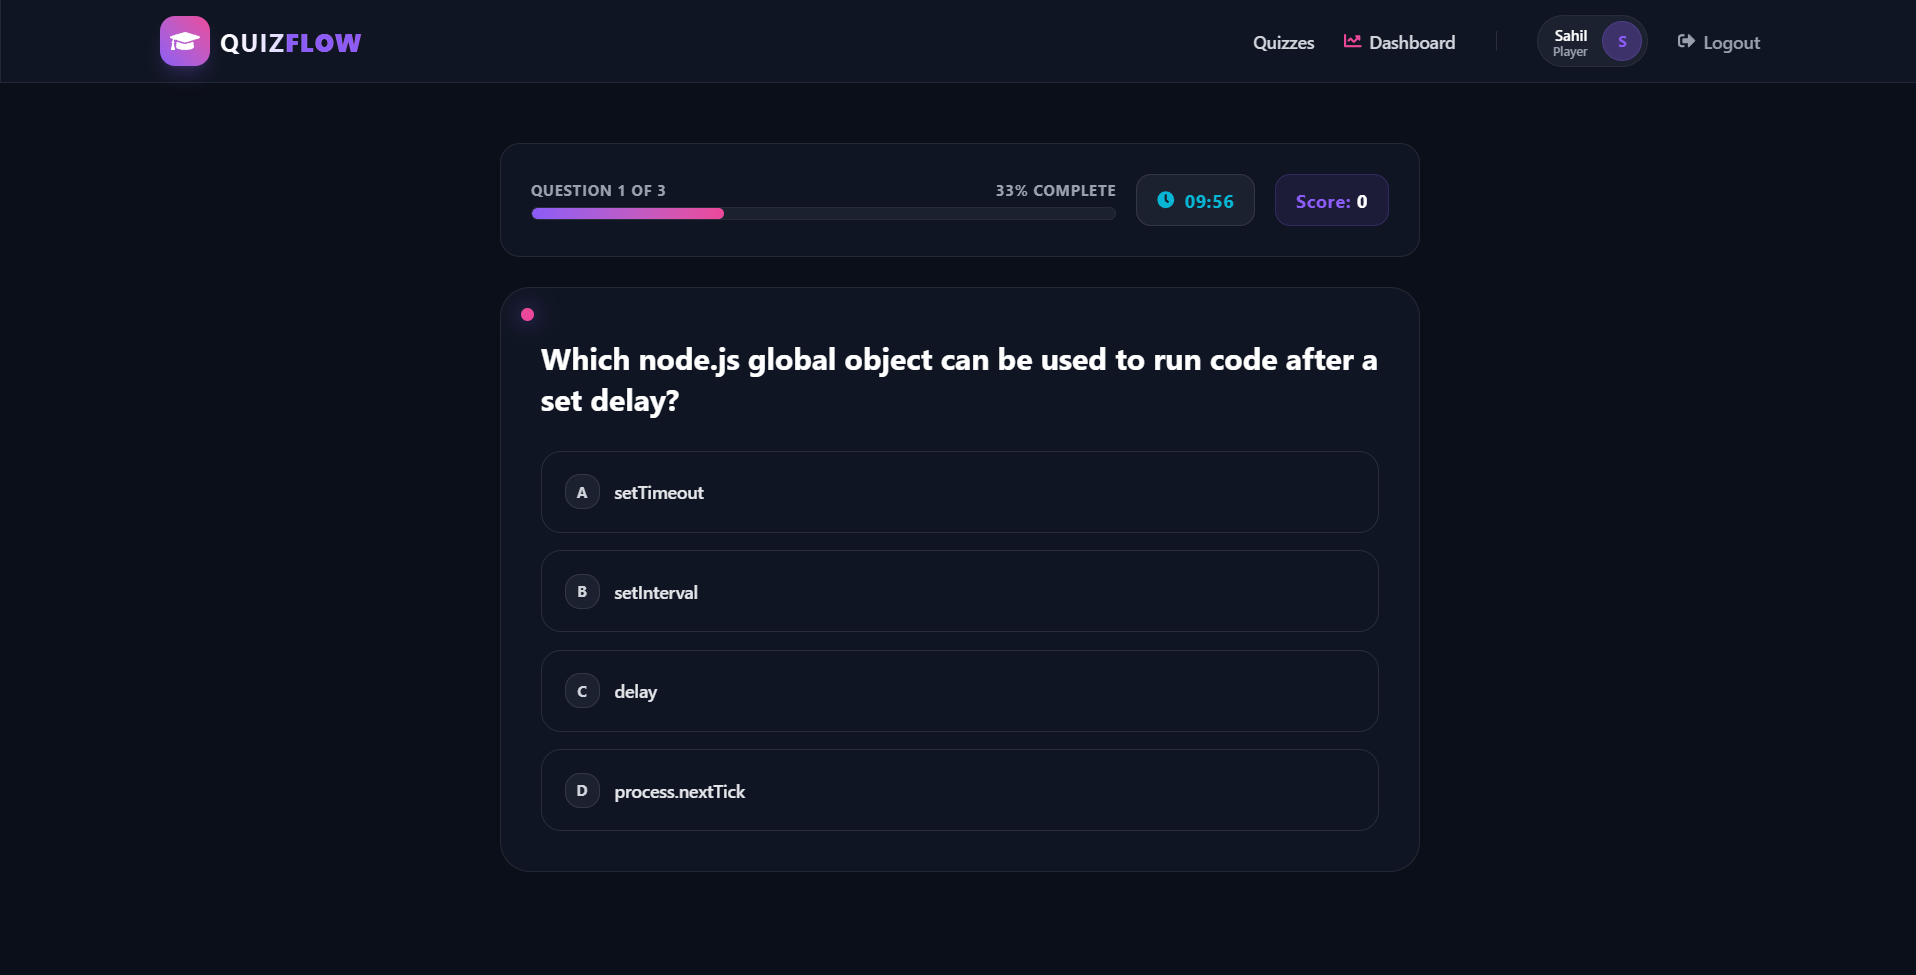
- Interactive Quiz Arena: Houses a beautiful countdown timer, step-by-step navigation, and explanatory support cards.
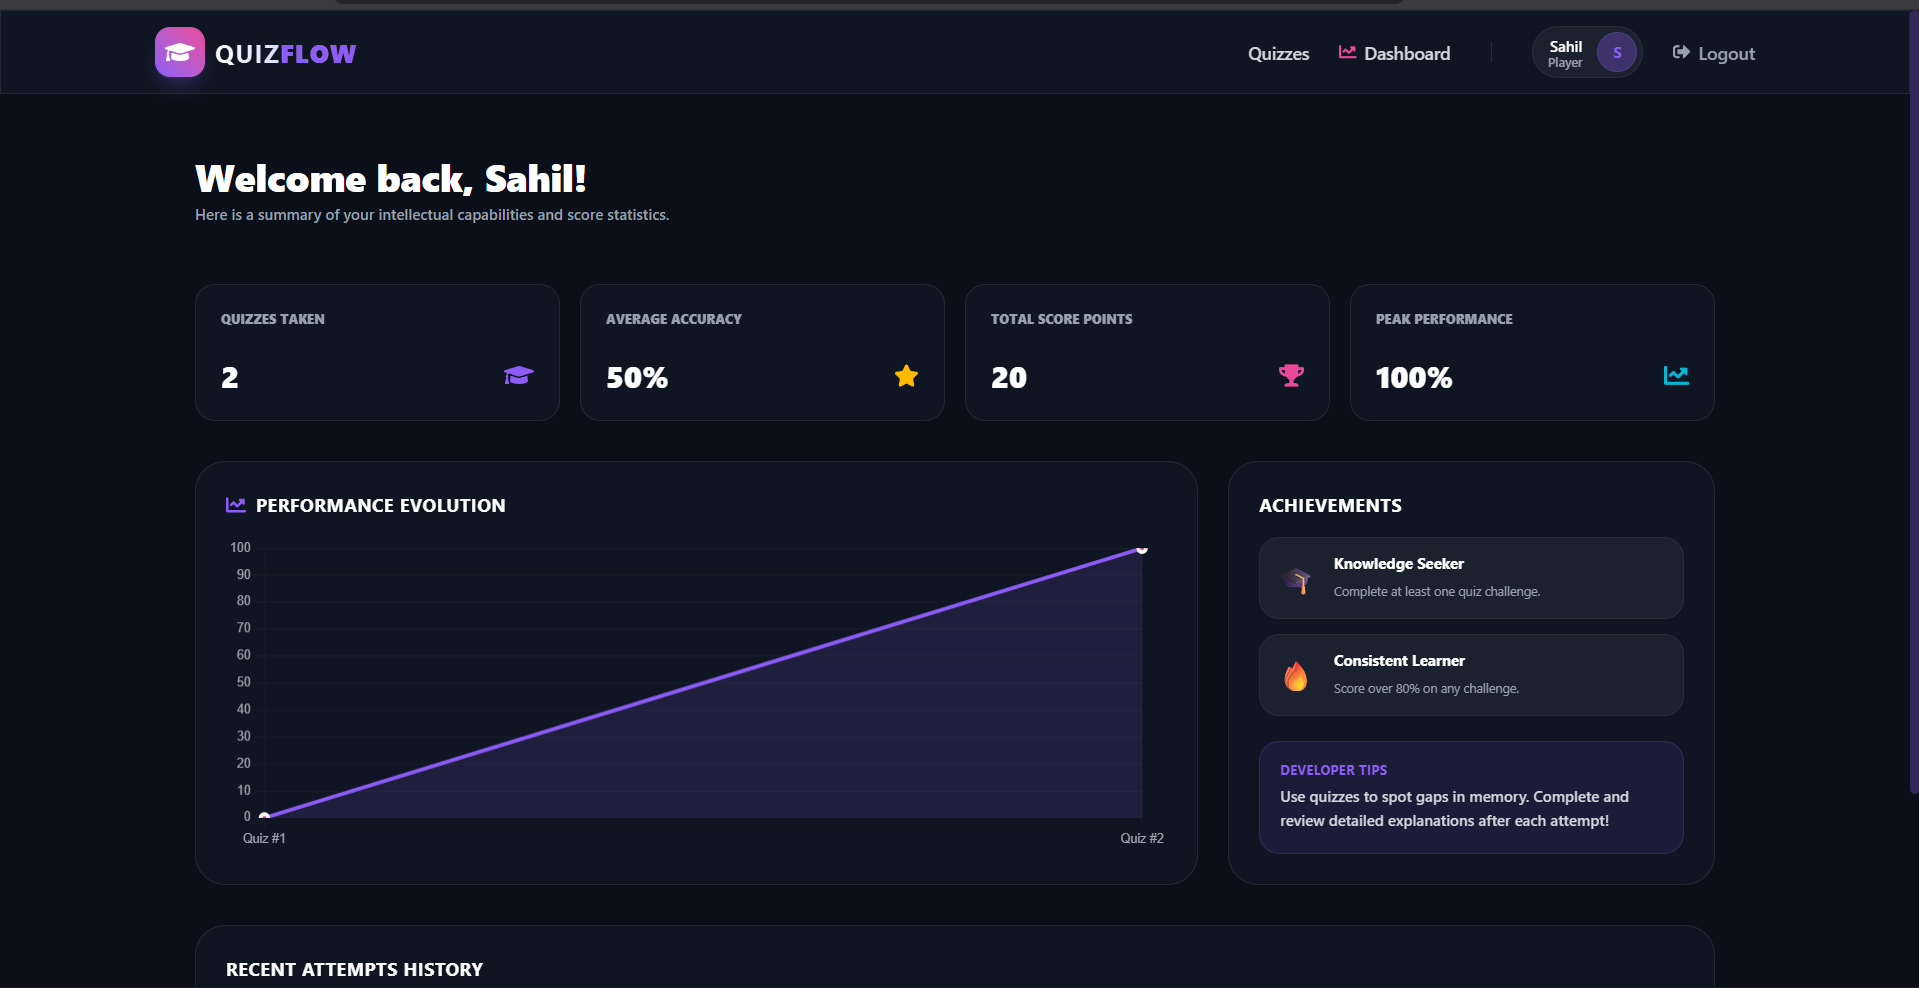
- Visual Analytics Dashboard: Displays interactive progress charts, key performance metrics, and historic attempt logs.
- Dynamic Marketing Campaigns: Highlights active promotional offers on the landing page in modern, card-styled layouts.
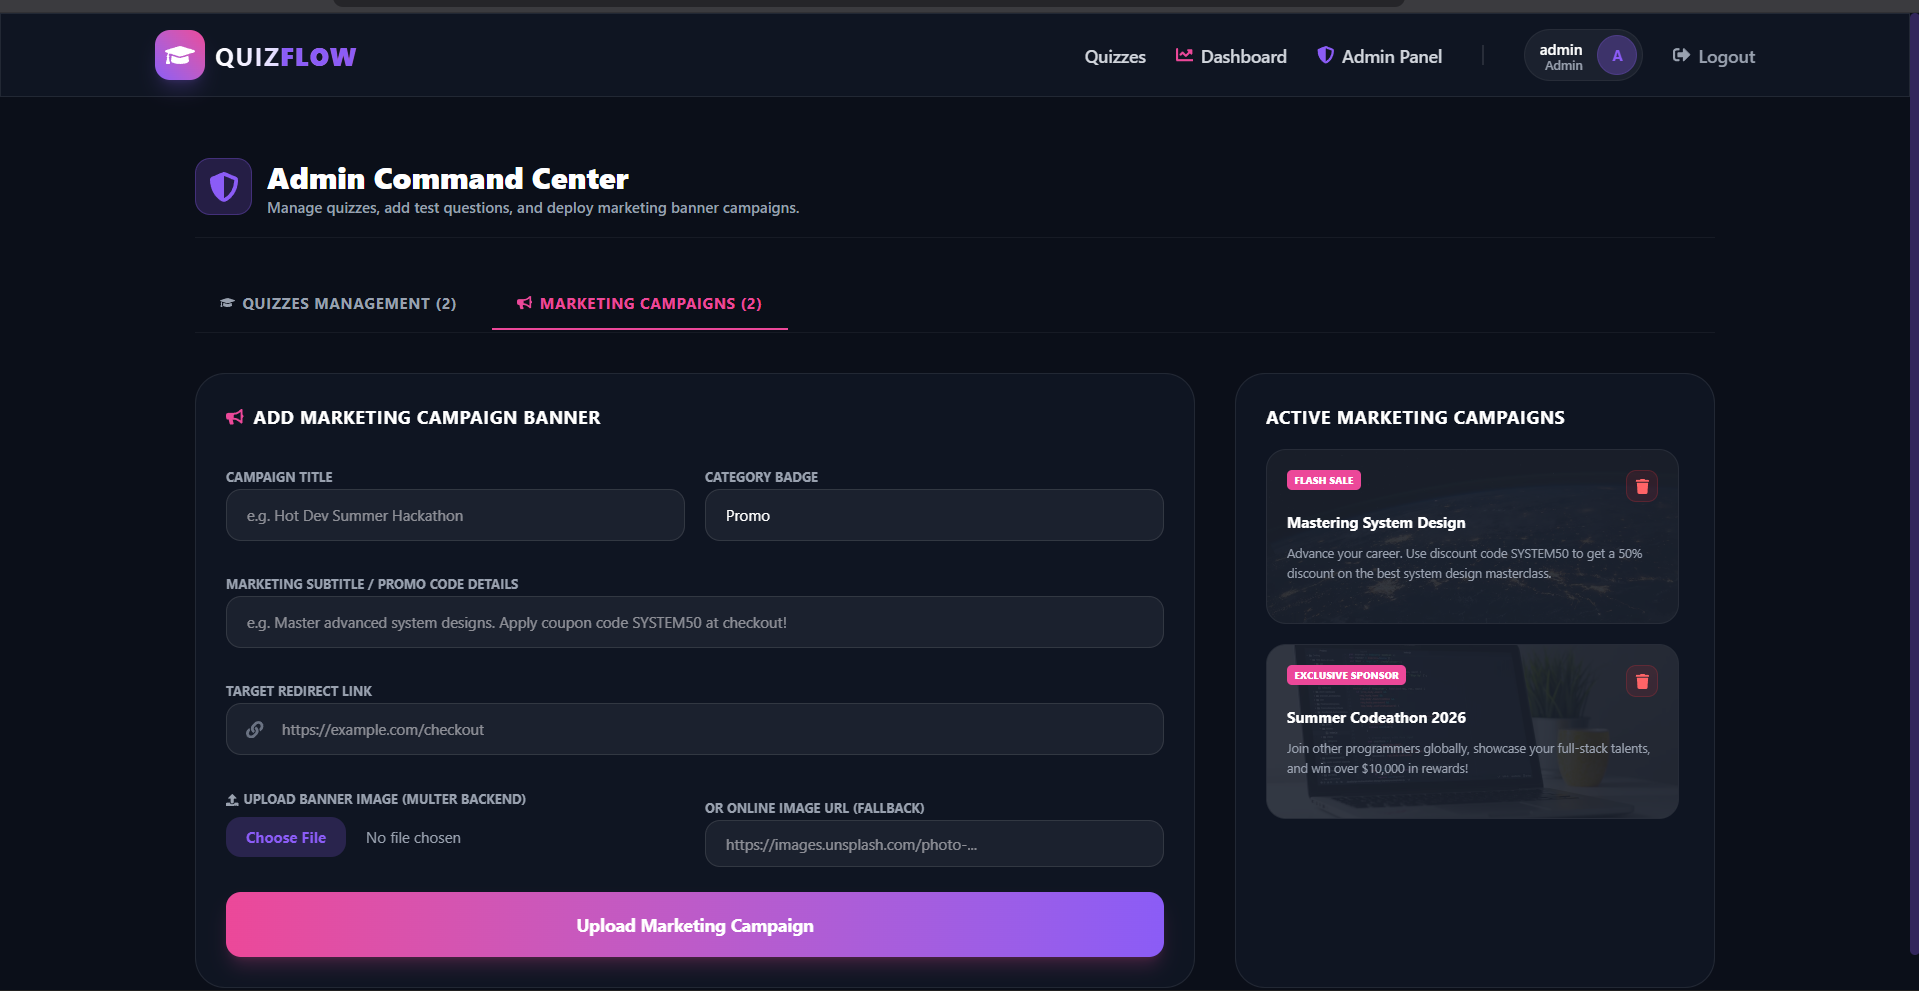
- Multer Image Uploader: Enables direct upload of marketing banner images to the server using standard multipart form processing.
- Secure JWT Authentication: Restricts critical quiz participation, dashboard reviews, and administrative gateways to authorized users.
Functionality
- Without login, guests can browse active challenges and promotional banners but are prompted to sign in when trying to start a quiz.
- On option selection, the interface instantly highlights correct (green) and incorrect (red) answers with an educational explanation popup.
- After quiz completion, scores and duration metrics are processed and sent to the database to update the progress charts.
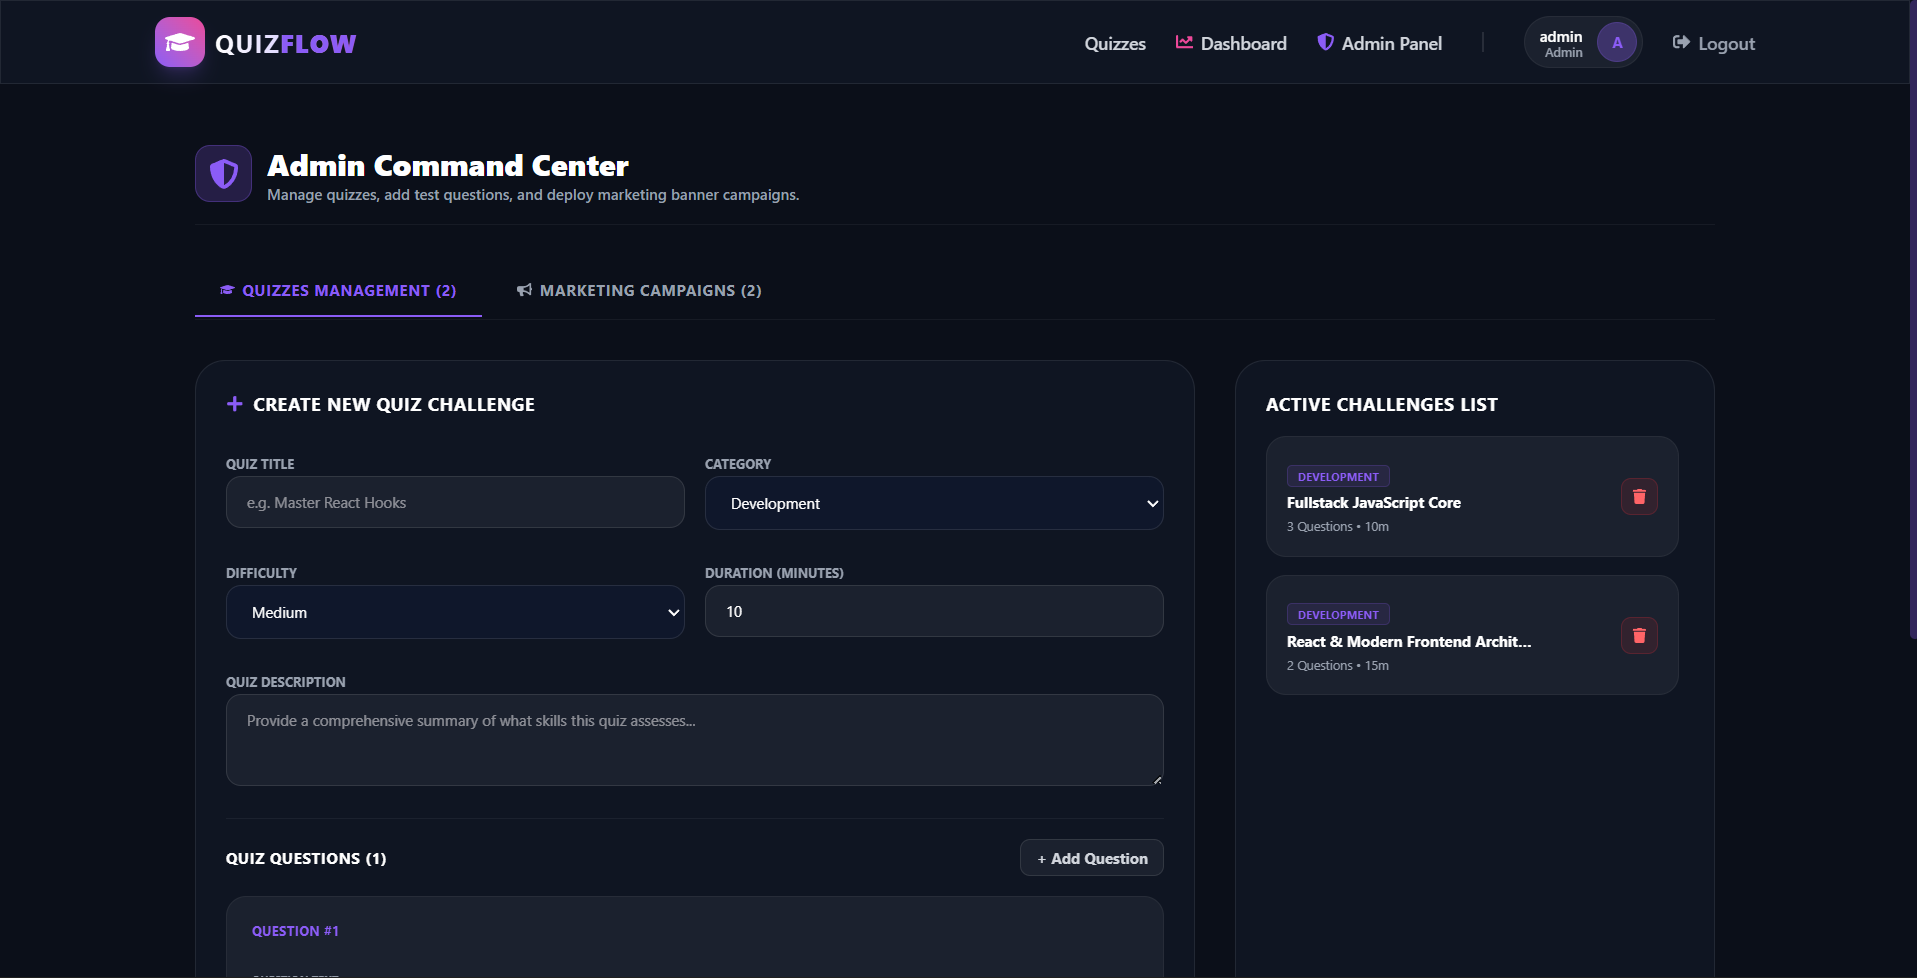
- Under the Admin console, admins can add or delete quizzes and include questions dynamically with options.
- Using the Campaign panel, admins can name, badge, and upload promotional banners with image files.
- Automated database seeders prepopulate the MongoDB database with default premium quizzes and marketing banners on server launch.
Technology Used
- Frontend:
- React 19 & Vite
- Tailwind CSS v4
- React Router DOM
- React Icons
- React Hot Toast
- Chart.js
- React ChartJS 2
- Backend:
- Node.js
- Express
- Mongoose (MongoDB ODM)
- JWT (jsonwebtoken)
- bcryptjs
- Multer
- Database:
- MongoDB (Local or Atlas clusters)
Why This Project Is Useful
- Reinforces Technical Skillsets: Helps developers evaluate their knowledge in key web topics through instant validation.
- Tracks Career Growth: Provides tangible analytics and historical performance graphs to help identify educational gaps.
- Simplifies Content Management: Allows course creators to instantly publish new challenges without writing database code.
- Drives Marketing Engagement: Showcases promotional bootcamps or discount vouchers right on the user landing page.
- Delivers Immersive User Experience: WOWs players with rich visual animations that make studying highly interactive.
- Resilient Fallback Design: Keeps client interfaces functional by automatically switching to mock storage if the backend goes offline.
Deployment and Environment Setup
- Environment Variables Setup:
- backend/.env
- PORT: 3000
- MONGO_URI: mongodb_url_string
- JWT_SECRET: your_jwt_secret_key_here (if needed)
- frontend/.env
- VITE_API_URL: backend_url
- backend/.env
- Deployment Overview:
- Render or Railway for backend hosting
- Vercel or Netlify for frontend hosting
- MongoDB Atlas for the database
- Backend Deployment:
- Push your code to GitHub.
- Go to Render.com or Railway.app.
- Create a new Web Service and connect your GitHub repository.
- Choose “backend/” as the root directory.
- Add the following environment variables on Render:
- PORT=10000
- MONGO_URI=your MongoDB Atlas URI
- JWT_SECRET=your JWT secret
- Start command: npm start (Ensure your backend/package.json includes “start”: “node server.js”)
- After deployment, note your backend URL, e.g. https://your-backend-name.onrender.com
- Frontend Deployment:
- Go to Vercel.com or Netlify.com.
- Create a new project and connect the GitHub repo.
- Select the “frontend/” folder as root.
- In environment variables, set:
- VITE_API_URL=https://your-backend-domain.com/api (or REACT_APP_API_URL if using CRA)
- Deploy.
- MongoDB Atlas Setup:
- Go to https://cloud.mongodb.com
- Create a free cluster.
- Add your current IP address in Network Access.
- Create a database user and password.
- Copy the connection string and replace username, password, and database name in MONGO_URI in backend/.env
Download Source Code
Project Setup Instructions
Note: This project is for educational purposes only. Not for commercial sale.