Project Overview
A secure, modern, and responsive web application demonstrating Google OAuth 2.0 authentication using the MERN stack (MongoDB, Express, React, Node.js). This project features a polished, premium UI built with Tailwind CSS.
This project serves as a robust foundation for applications requiring secure third-party authentication. It separates concerns between a React frontend and a Node.js/Express backend, communicating via RESTful APIs. It implements a full OAuth 2.0 flow, session management with JWT (JSON Web Tokens), and protected route handling.
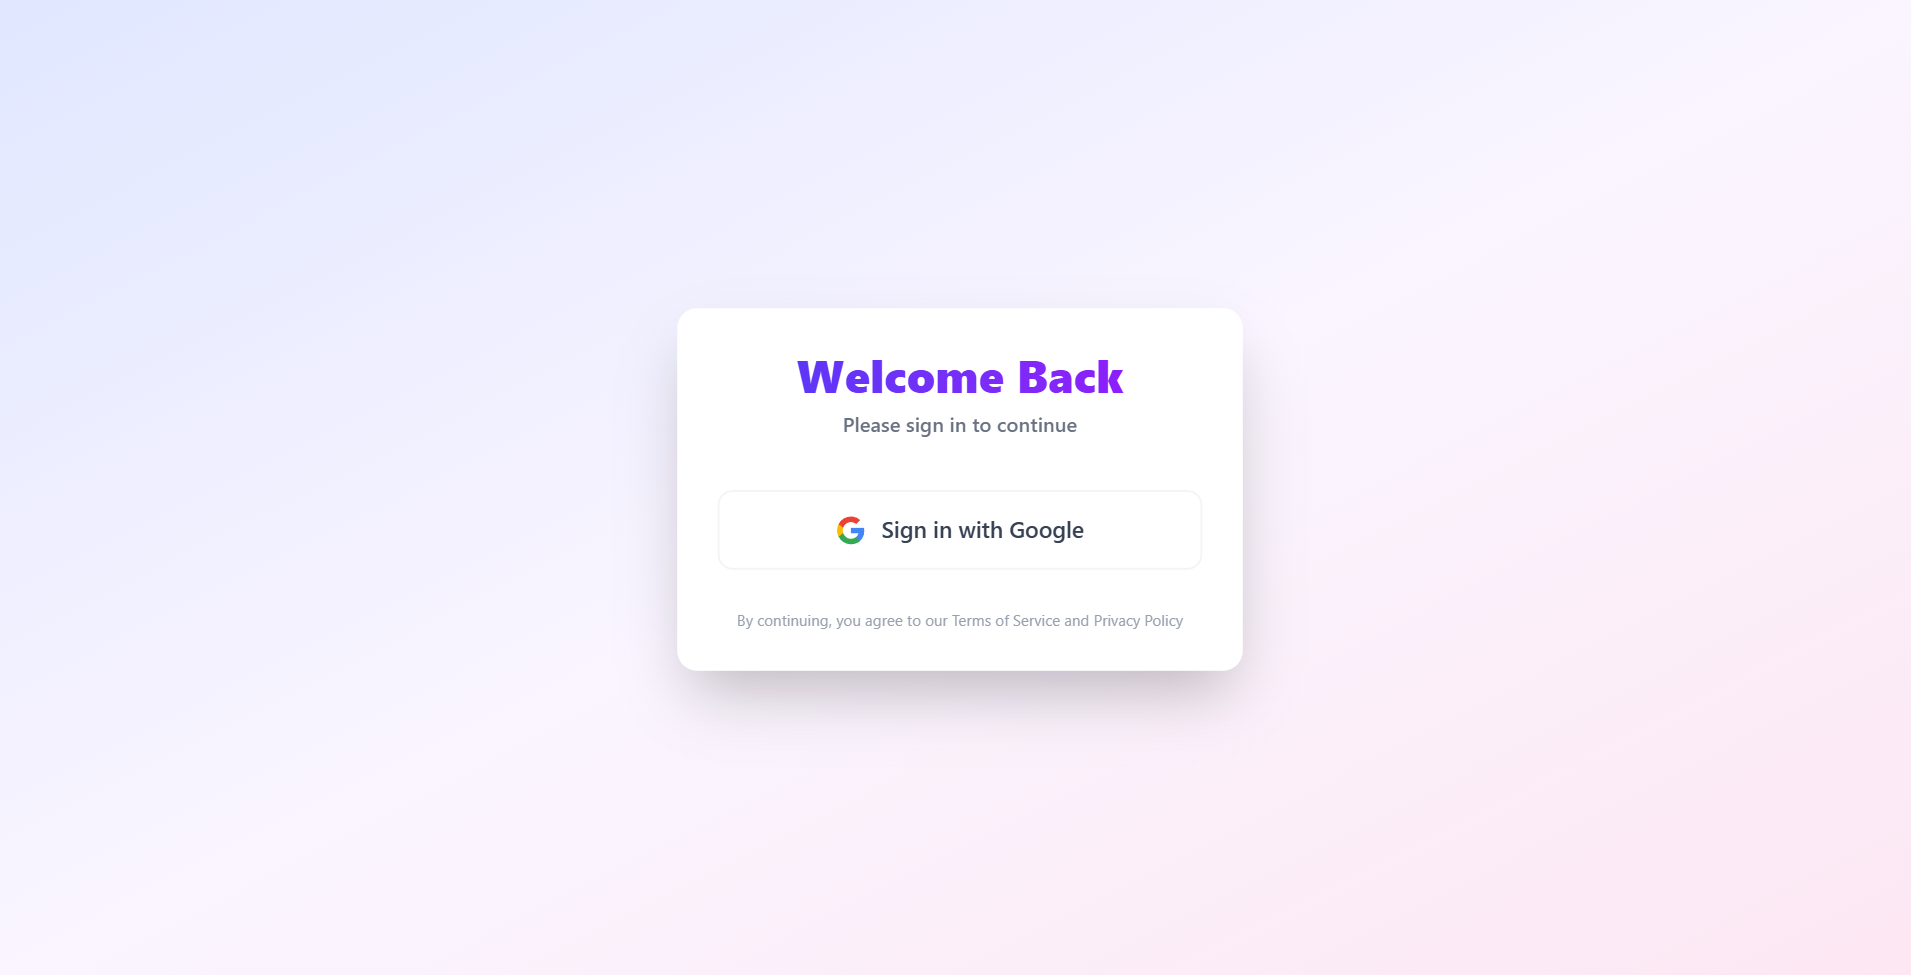
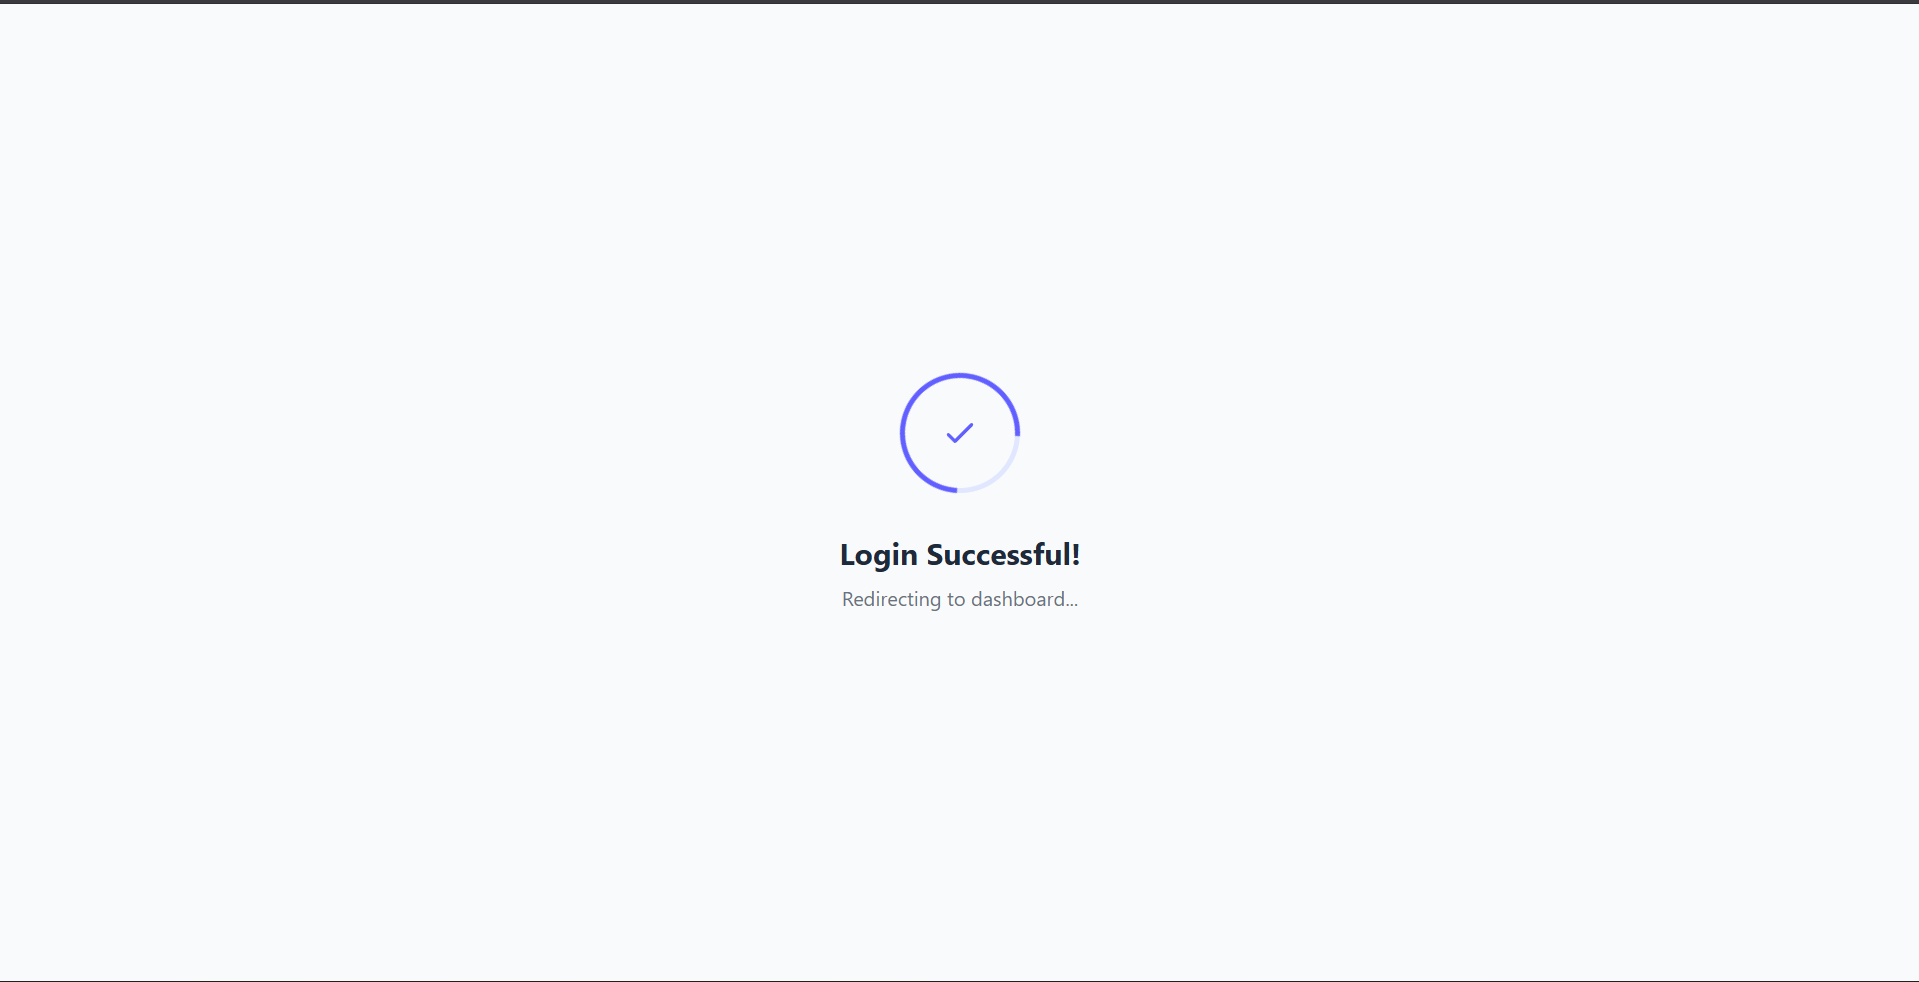
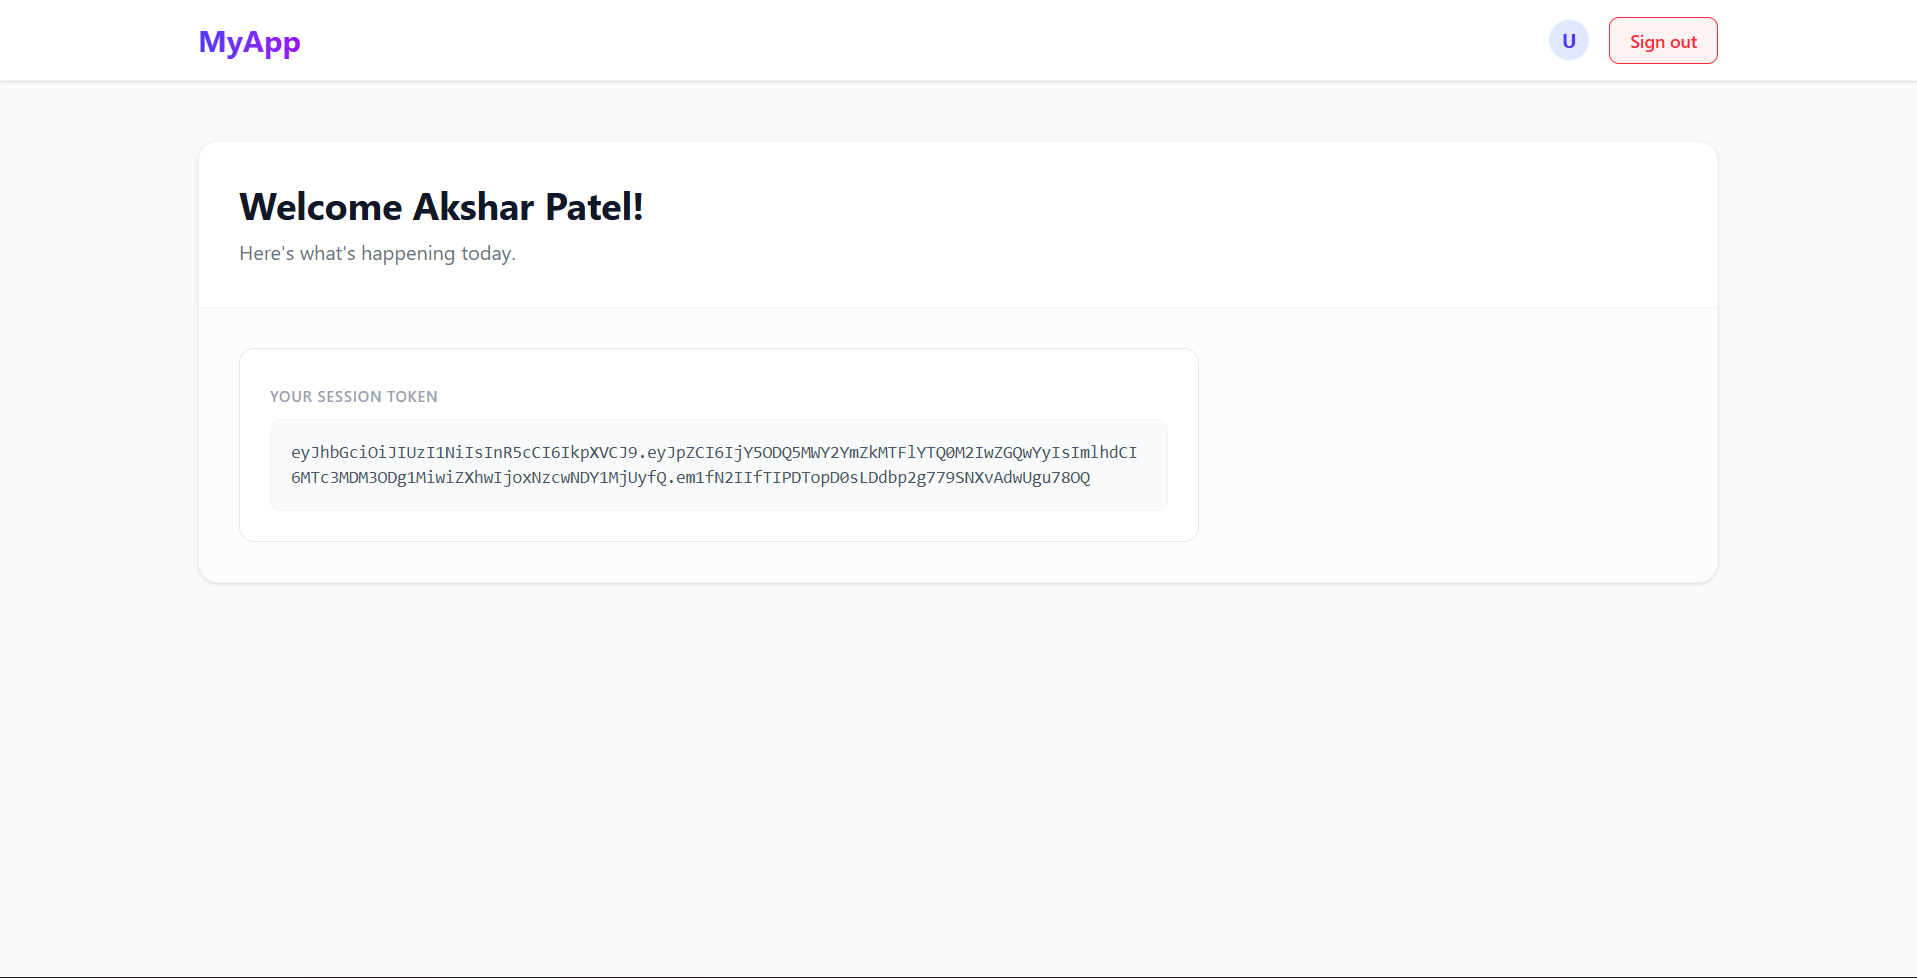
Screenshots
Key Features
- Secure Google Login: Seamless integration with Google OAuth 2.0 for safe and fast user authentication.
- JWT Authentication: Secure session management using JSON Web Tokens passed via URL parameters and stored in LocalStorage.
- Modern UI/UX: A redesign using Tailwind CSS featuring glassmorphism, gradients, and smooth animations.
- Responsive Design: Fully responsive layouts for Login, Loading, and Dashboard pages.
- Protected Routes: Client-side routing guards that prevent unauthorized access to the Dashboard.
- Loading States: Polished feedback loops for user actions (e.g., login redirection).
Functionality
- User Initiation: User clicks “Sign in with Google” on the client.
- Redirection: The app redirects the user to Google’s Consent Screen.
- Authentication: User logs in with their Google credentials.
- Callback: Google redirects to the Backend Callback URL with an authorization code.
- Token Generation: Backend exchanges the code for user profile data, generates a JWT, and signs it.
- Client Handoff: Backend redirects to the Client Success Page (`/login/success`) with the JWT in the URL query parameters.
- Storage: Client extracts the token and stores it in `localStorage`.
- Access: User is automatically redirected to the protected `/dashboard` route.
Technology Used
- Frontend:
- React: Component-based UI library.
- Vite: Next-generation frontend tooling for fast builds.
- Tailwind CSS: Utility-first CSS framework for modern styling.
- React Router DOM: Client-side routing and navigation.
- Backend:
- Node.js & Express: Scalable server-side runtime and framework.
- Passport.js: Authentication middleware for Node.js (specifically `passport-google-oauth20`).
- JSON Web Token (JWT): Securely transmitting information between parties as a JSON object.
Why This Project Is Useful
- Security Best Practices: Demonstrates how to handle OAuth tokens securely without exposing client secrets.
- Scalable Architecture: The separation of frontend and backend allows for independent scaling and development.
- UI/UX Reference: Provides a template for creating high-quality, professional-looking authentication pages.
- Quick Start: Acts as a perfect boilerplate for anyone looking to add “Login with Google” to their React apps.
Deployment and Environment Setup
- Environment Variables Setup:
- backend/.env
- PORT: 5000
- MONGO_URI: mongodb_url_string
- JWT_SECRET: your_jwt_secret_key_here (if needed)
- frontend/.env
- VITE_API_URL: backend_url
- backend/.env
- Deployment Overview:
- Render or Railway for backend hosting
- Vercel or Netlify for frontend hosting
- MongoDB Atlas for the database
- Backend Deployment:
- Push your code to GitHub.
- Go to Render.com or Railway.app.
- Create a new Web Service and connect your GitHub repository.
- Choose “backend/” as the root directory.
- Add the following environment variables on Render:
- PORT=10000
- MONGO_URI=your MongoDB Atlas URI
- JWT_SECRET=your JWT secret
- Start command: npm start (Ensure your backend/package.json includes “start”: “node server.js”)
- After deployment, note your backend URL, e.g. https://your-backend-name.onrender.com
- Frontend Deployment:
- Go to Vercel.com or Netlify.com.
- Create a new project and connect the GitHub repo.
- Select the “frontend/” folder as root.
- In environment variables, set:
- VITE_API_URL=https://your-backend-domain.com/api (or REACT_APP_API_URL if using CRA)
- Deploy.
- MongoDB Atlas Setup:
- Go to https://cloud.mongodb.com
- Create a free cluster.
- Add your current IP address in Network Access.
- Create a database user and password.
- Copy the connection string and replace username, password, and database name in MONGO_URI in backend/.env
Download Source Code
Project Setup Instructions
Note: This project is for educational purposes only. Not for commercial sale.