Project Overview
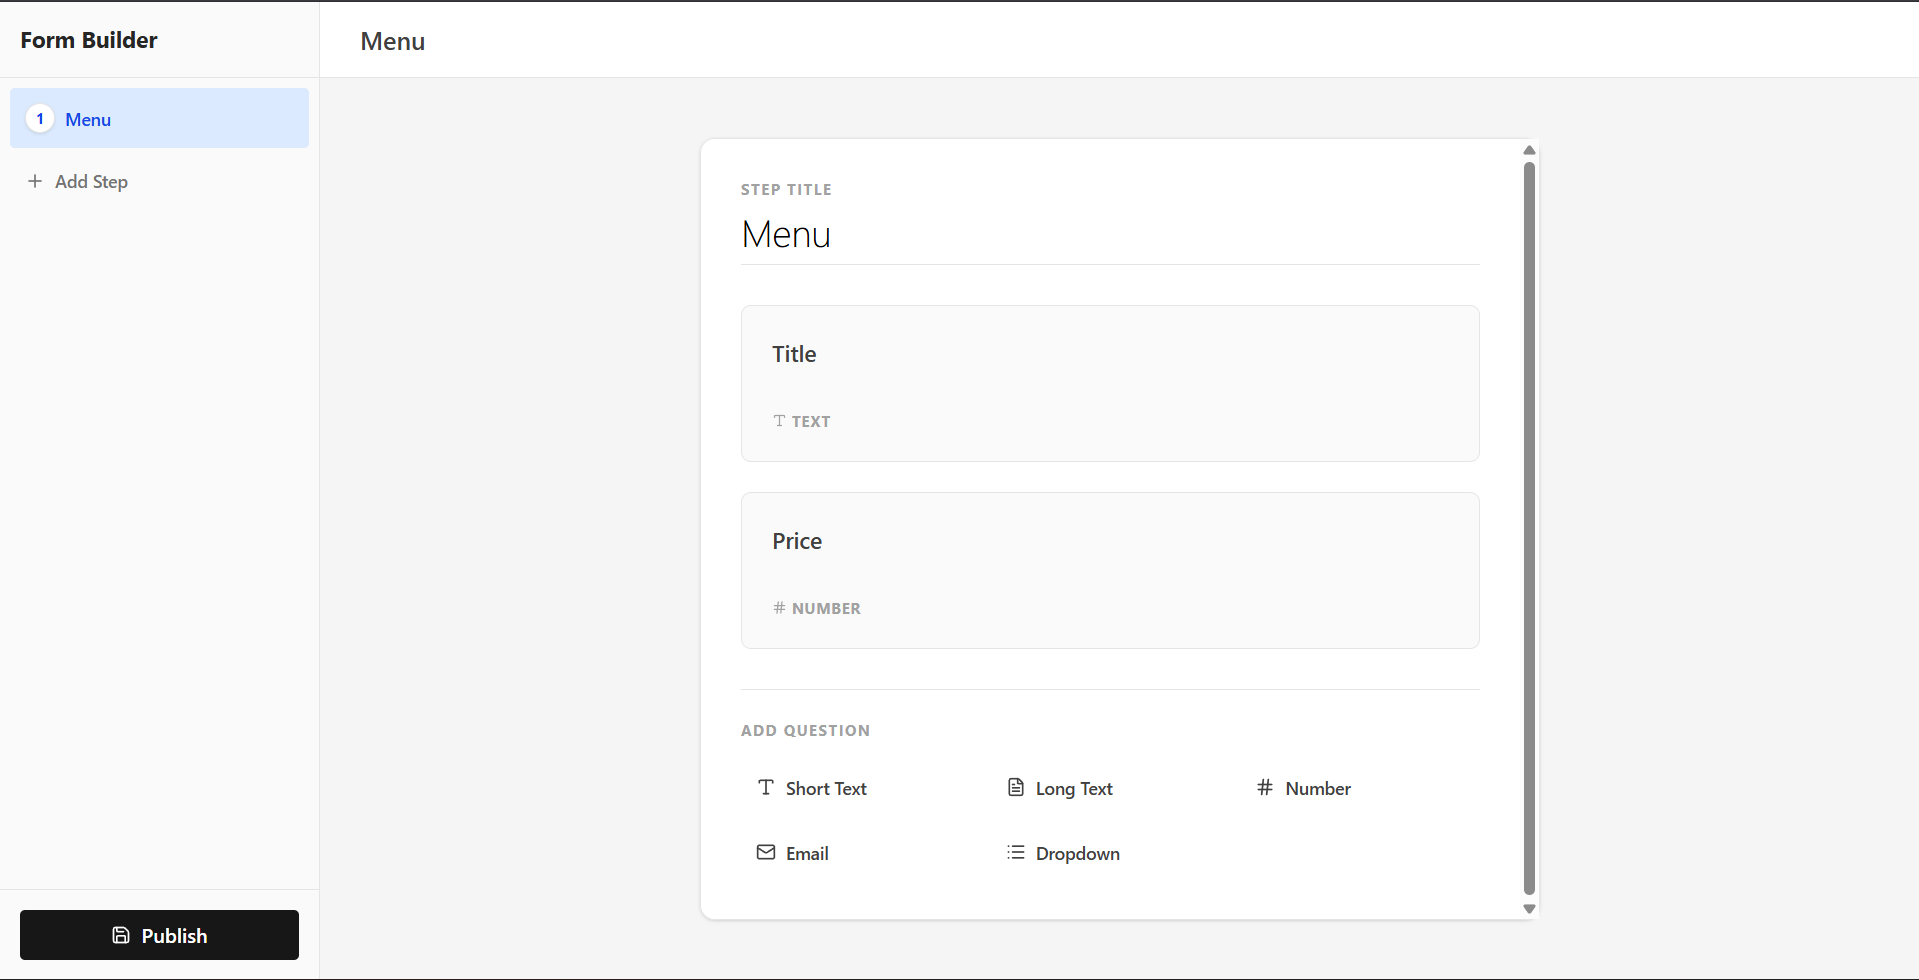
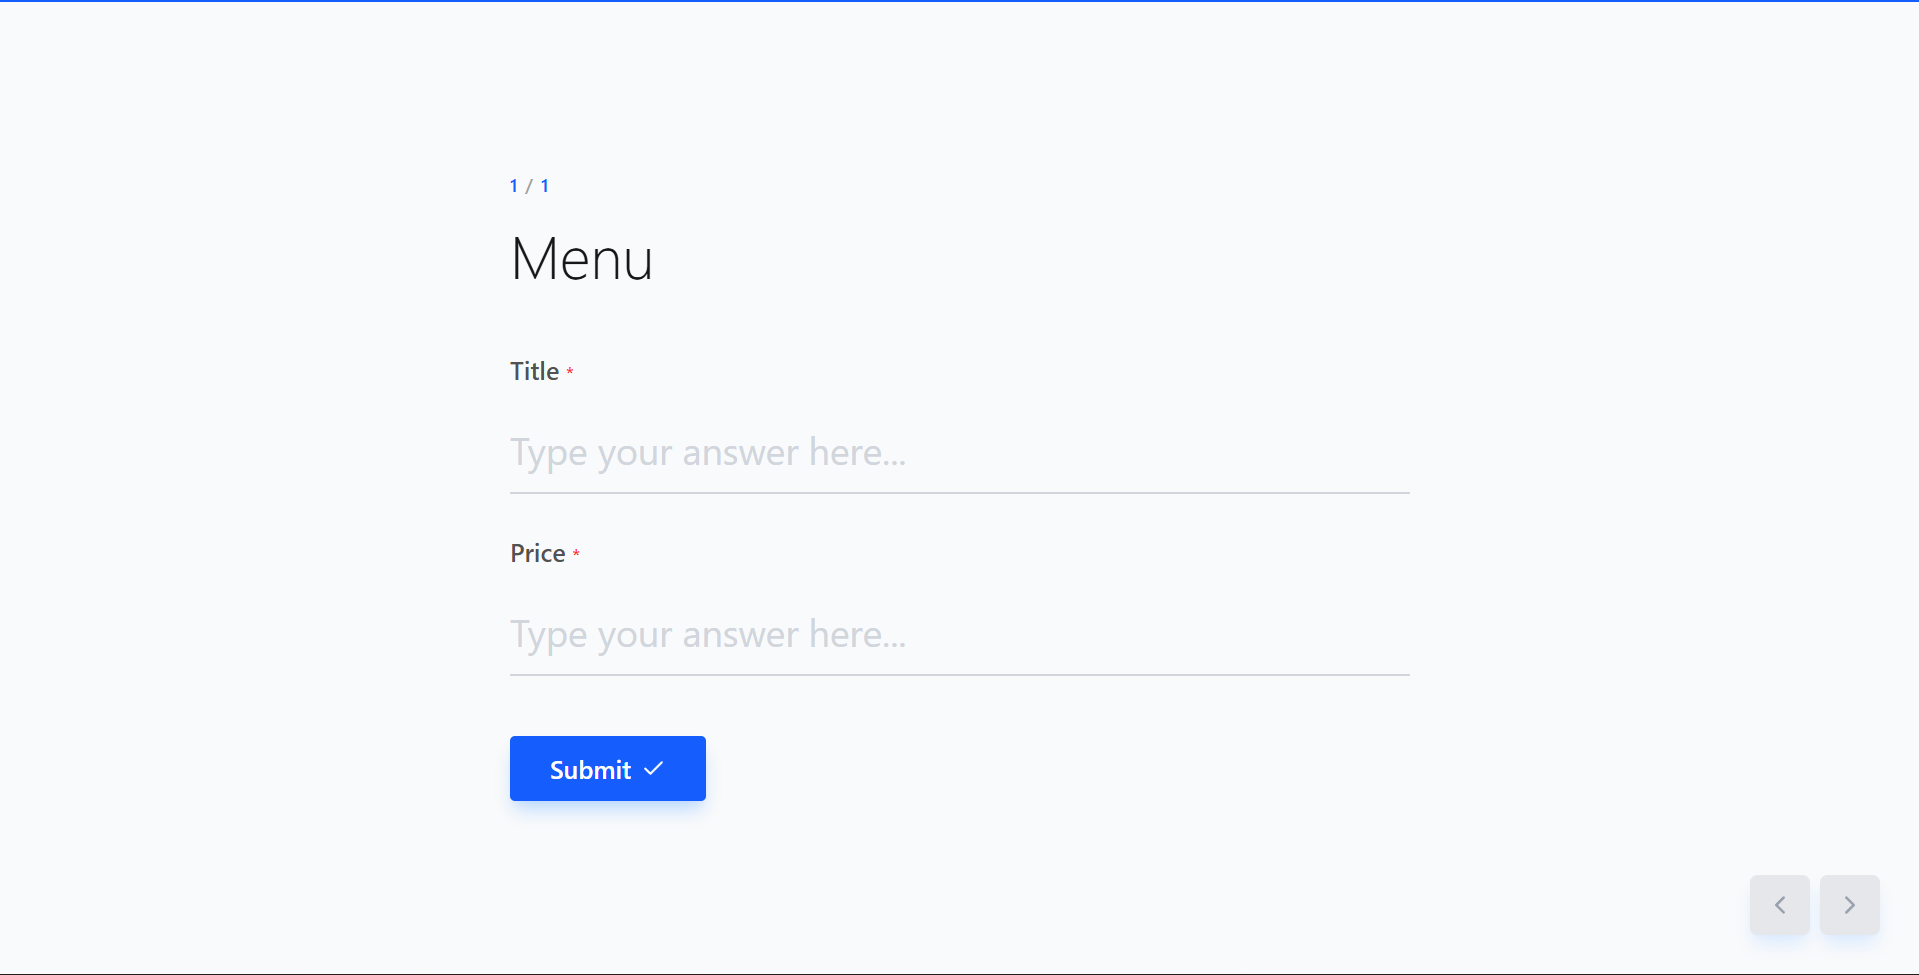
The Form Builder is designed to modernize data collection. It replaces boring, static forms with engaging, conversational interfaces. Users can effortlessly build complex forms using a drag-and-drop style builder, share them via a unique link, and analyze responses in a dedicated dashboard.
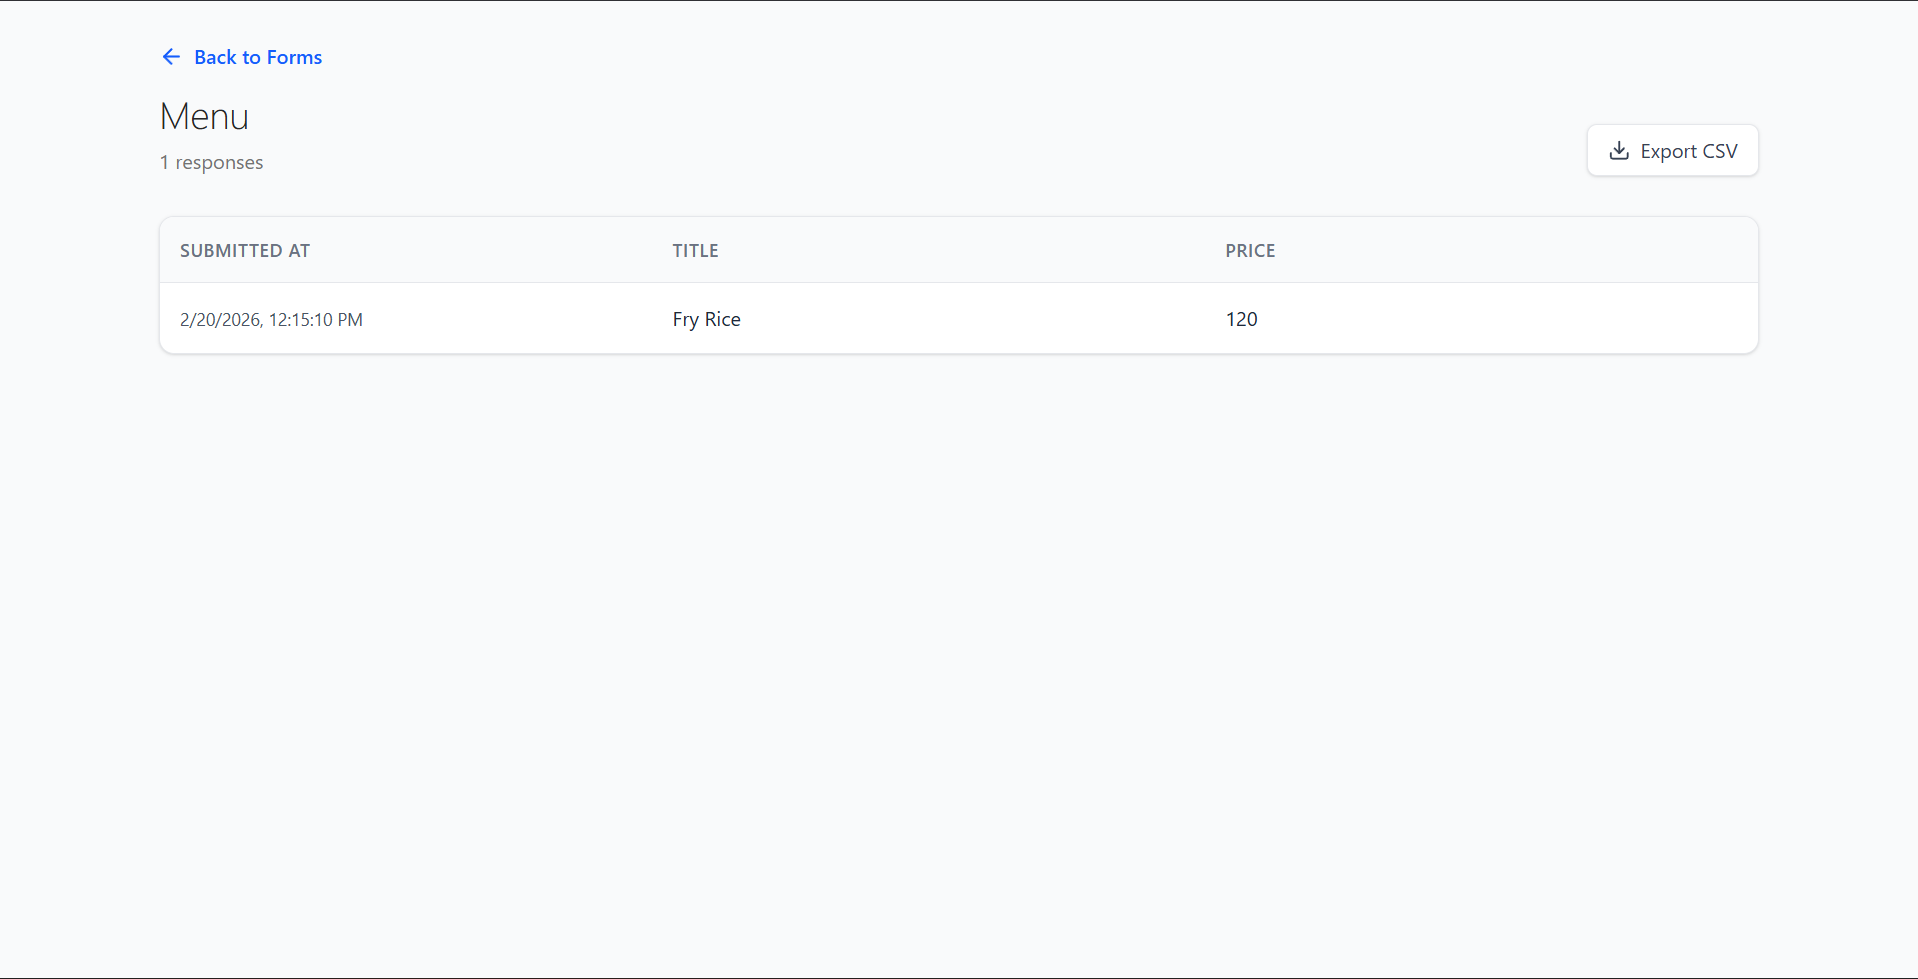
Screenshots
Key Features
- Interactive Form Builder: Create multi-step forms with ease. Add text inputs, dropdowns, and text areas.
- Conversational UI: Smooth, animated transitions between questions (powered by Framer Motion) keep users engaged.
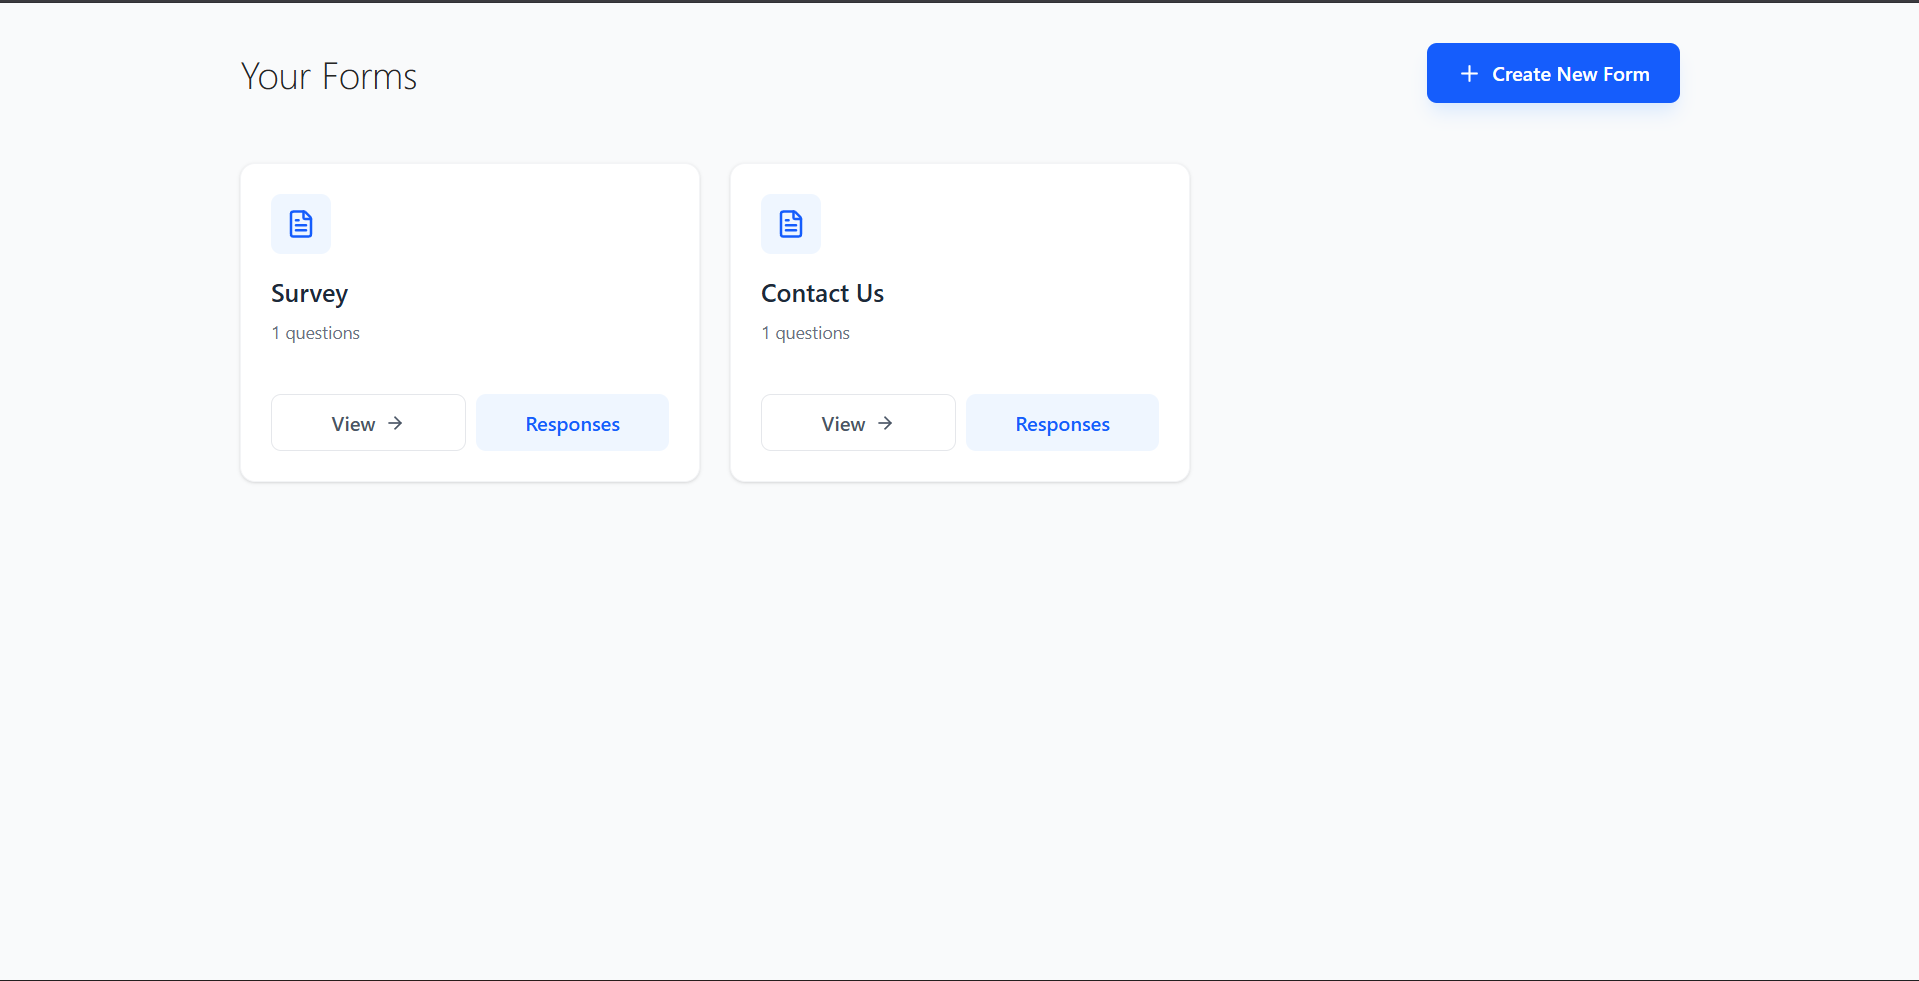
- Dashboard: A central hub to manage all your forms and create new ones.
- Response Management: View all submissions for a specific form in a clean table layout.
- Data Export: improved analysis by exporting responses to CSV with a single click.
- Responsive Design: Fully optimized for desktop, tablet, and mobile devices.
Functionaliy
- Create Forms: Define steps, add fields, and set validation rules (e.g., required fields).
- Share: Generate a public link (`/form/:id`) for users to fill out the form.
- Collect Data: Real-time validation ensures data integrity before submission.
- Analyze:
- Form List: improved visibility of all your active forms.
- Response Viewer: Drill down into specific forms to see who responded and what they said.
Technology Used
- Frontend:
- React.js (Vite): For a fast, reactive user interface.
- Tailwind CSS: For modern, utility-first styling.
- Framer Motion: For smooth, complex animations.
- Lucide React: For beautiful, consistent iconography.
- React Router: For seamless client-side navigation.
- Backend:
- Node.js & Express.js: Robust API handling.
- MongoDB & Mongoose: Flexible schema-less database for storing complex form structures and responses.
Why This Project Is Useful
- Engagement: traditional forms often suffer from high drop-off rates. This interactive design keeps users focused on one question at a time, increasing completion rates.
- Efficiency: Eliminates the need for expensive SaaS subscriptions (like Typeform or JotForm) for basic needs.
- Flexibility: Being open-source and custom-built, it allows for infinite customization in styling and logic that off-the-shelf tools can’t match.
- Data Ownership: You own your data. No third-party data silos.
Deployment and Environment Setup
- Environment Variables Setup:
- backend/.env
- PORT: 3000
- MONGO_URI: mongodb_url_string
- JWT_SECRET: your_jwt_secret_key_here (if needed)
- frontend/.env
- VITE_API_URL: backend_url
- backend/.env
- Deployment Overview:
- Render or Railway for backend hosting
- Vercel or Netlify for frontend hosting
- MongoDB Atlas for the database
- Backend Deployment:
- Push your code to GitHub.
- Go to Render.com or Railway.app.
- Create a new Web Service and connect your GitHub repository.
- Choose “backend/” as the root directory.
- Add the following environment variables on Render:
- PORT=10000
- MONGO_URI=your MongoDB Atlas URI
- JWT_SECRET=your JWT secret
- Start command: npm start (Ensure your backend/package.json includes “start”: “node server.js”)
- After deployment, note your backend URL, e.g. https://your-backend-name.onrender.com
- Frontend Deployment:
- Go to Vercel.com or Netlify.com.
- Create a new project and connect the GitHub repo.
- Select the “frontend/” folder as root.
- In environment variables, set:
- VITE_API_URL=https://your-backend-domain.com/api (or REACT_APP_API_URL if using CRA)
- Deploy.
- MongoDB Atlas Setup:
- Go to https://cloud.mongodb.com
- Create a free cluster.
- Add your current IP address in Network Access.
- Create a database user and password.
- Copy the connection string and replace username, password, and database name in MONGO_URI in backend/.env
Download Source Code
Project Setup Instructions
Note: This project is for educational purposes only. Not for commercial sale.