Project Overview
MediCare is a full-stack hospital management system built using the MERN Stack. The application helps hospitals manage doctors, patients, appointments, rooms, billing, pharmacy, and laboratory services through a centralized platform. It provides secure authentication, role-based access, and real-time updates to improve operational efficiency and patient care.
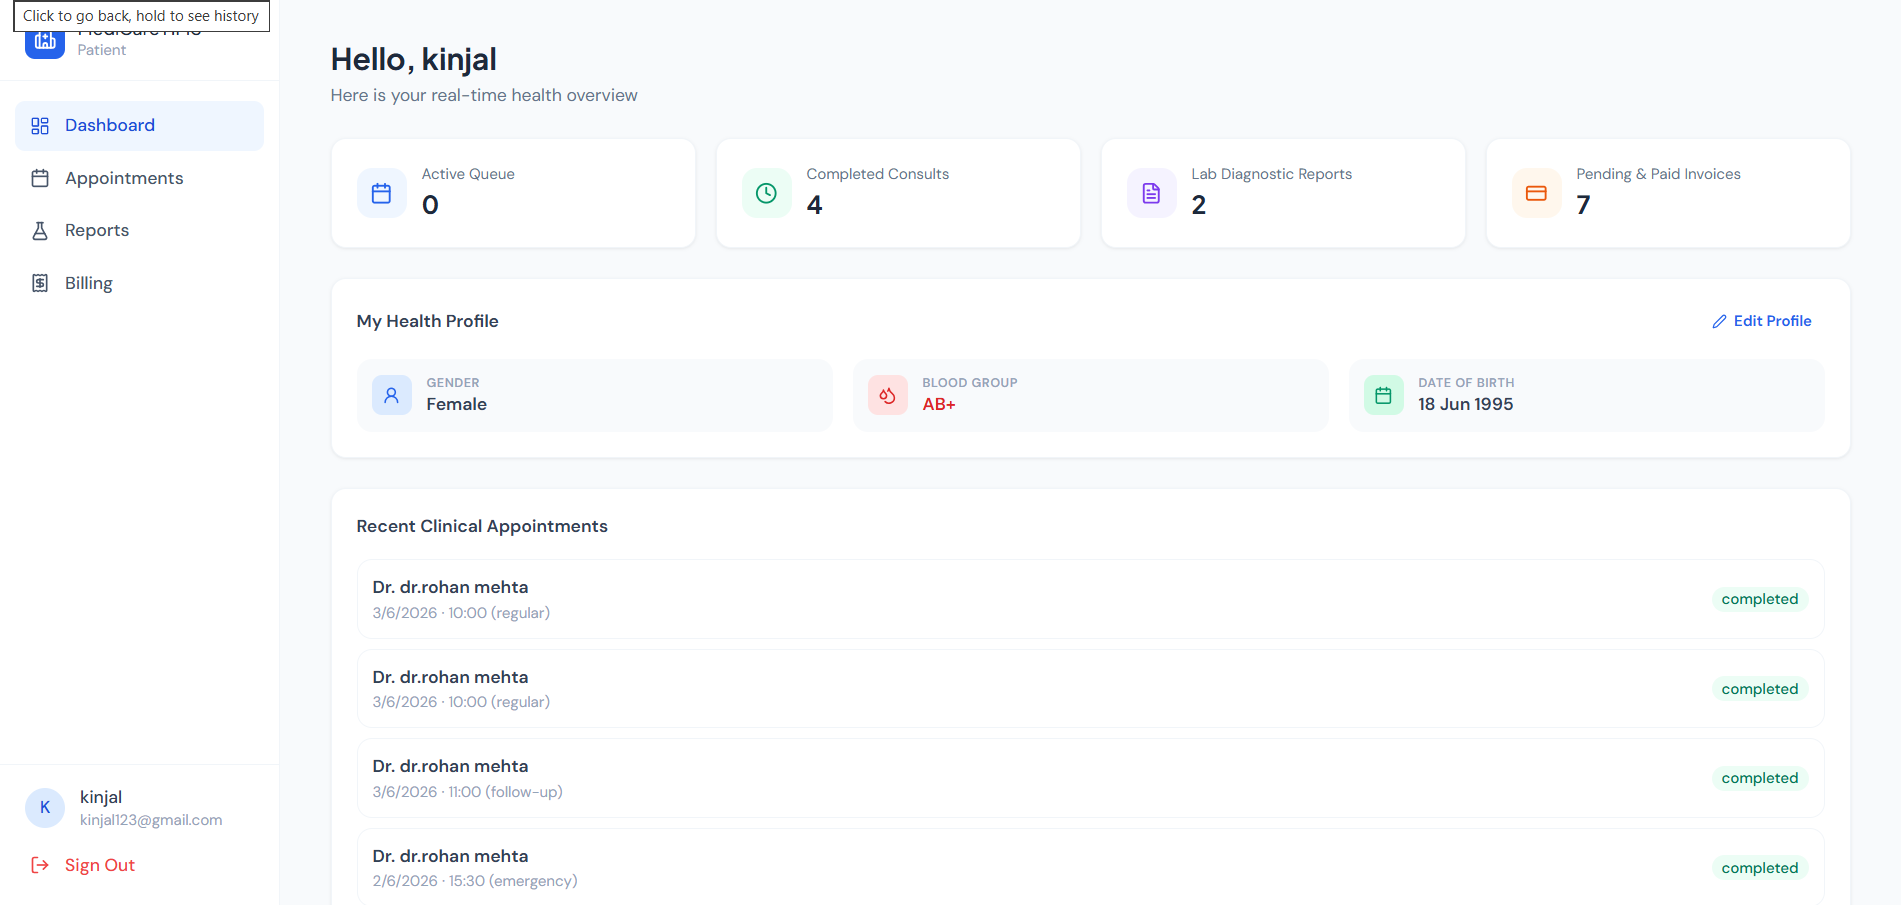
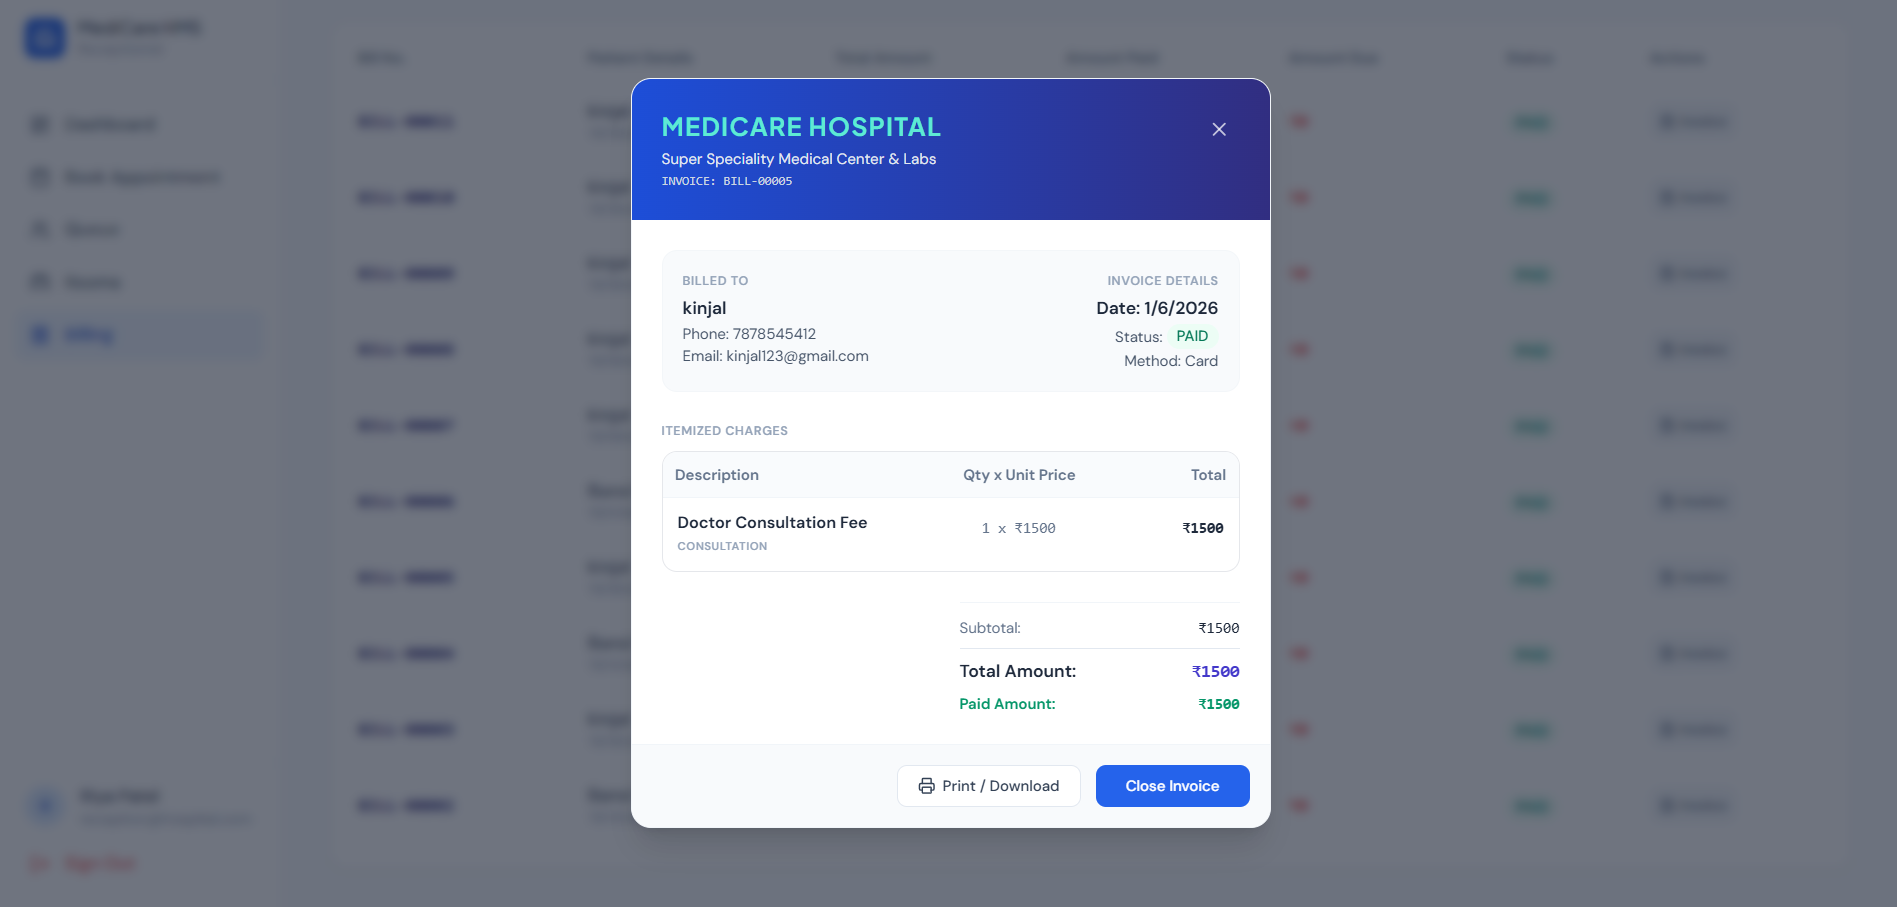
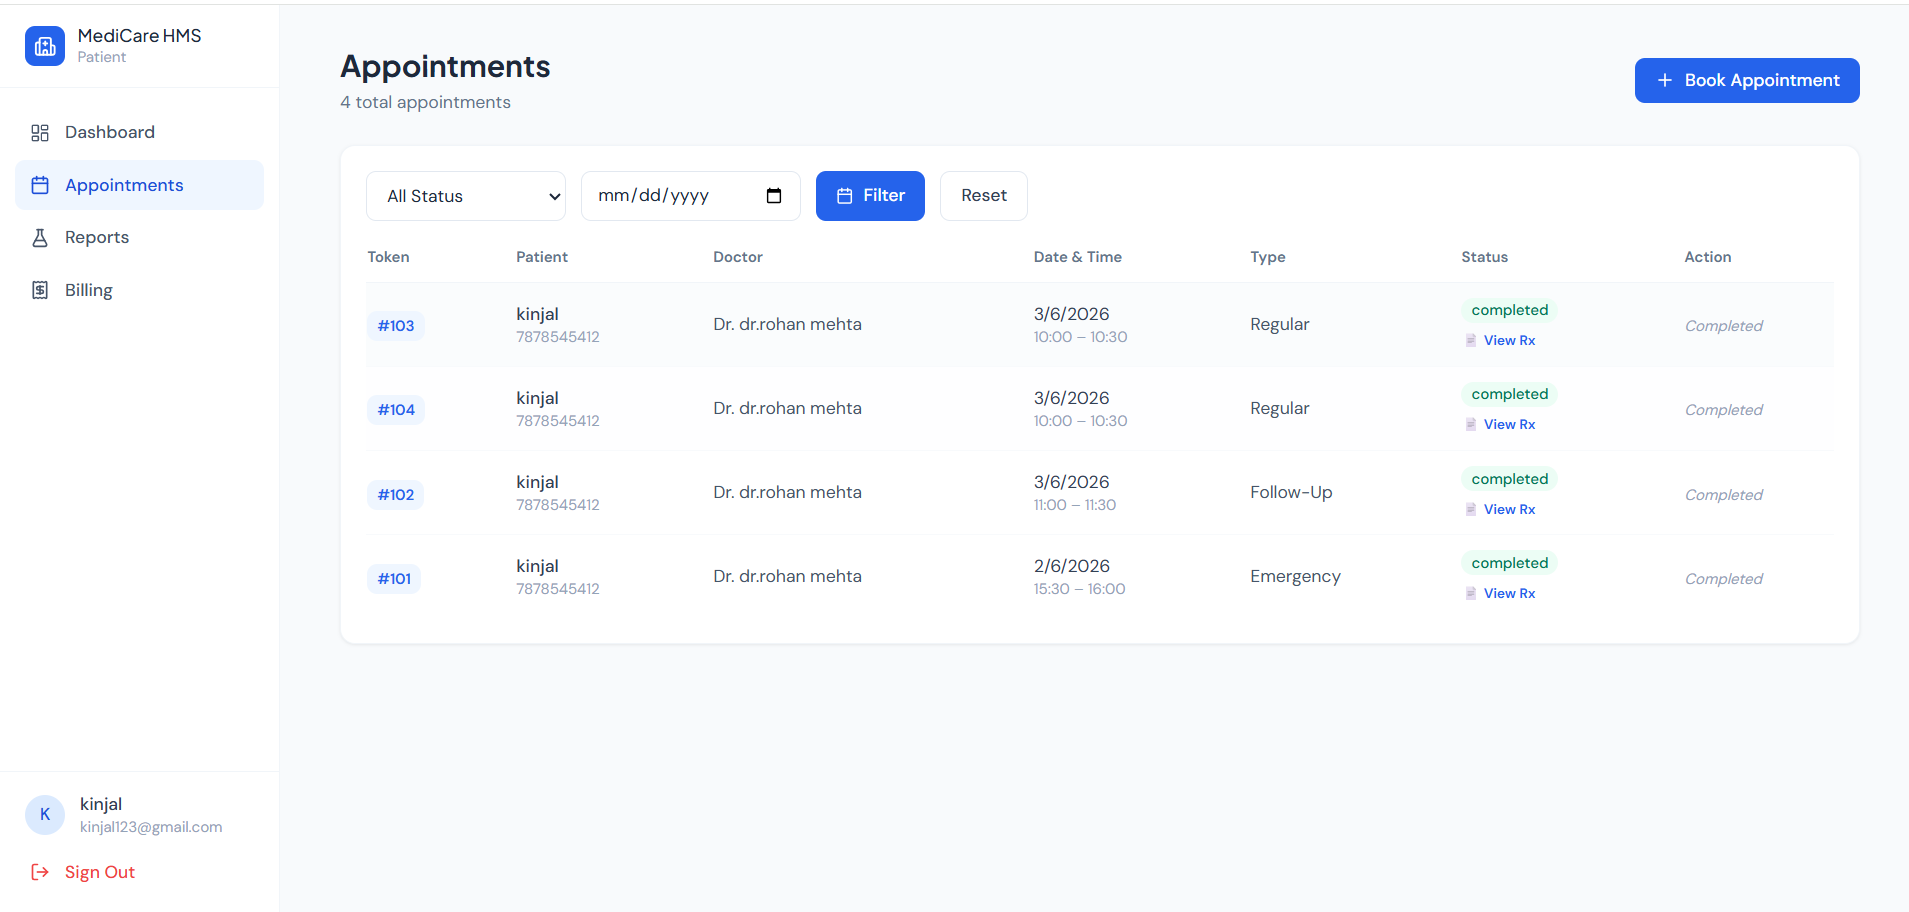
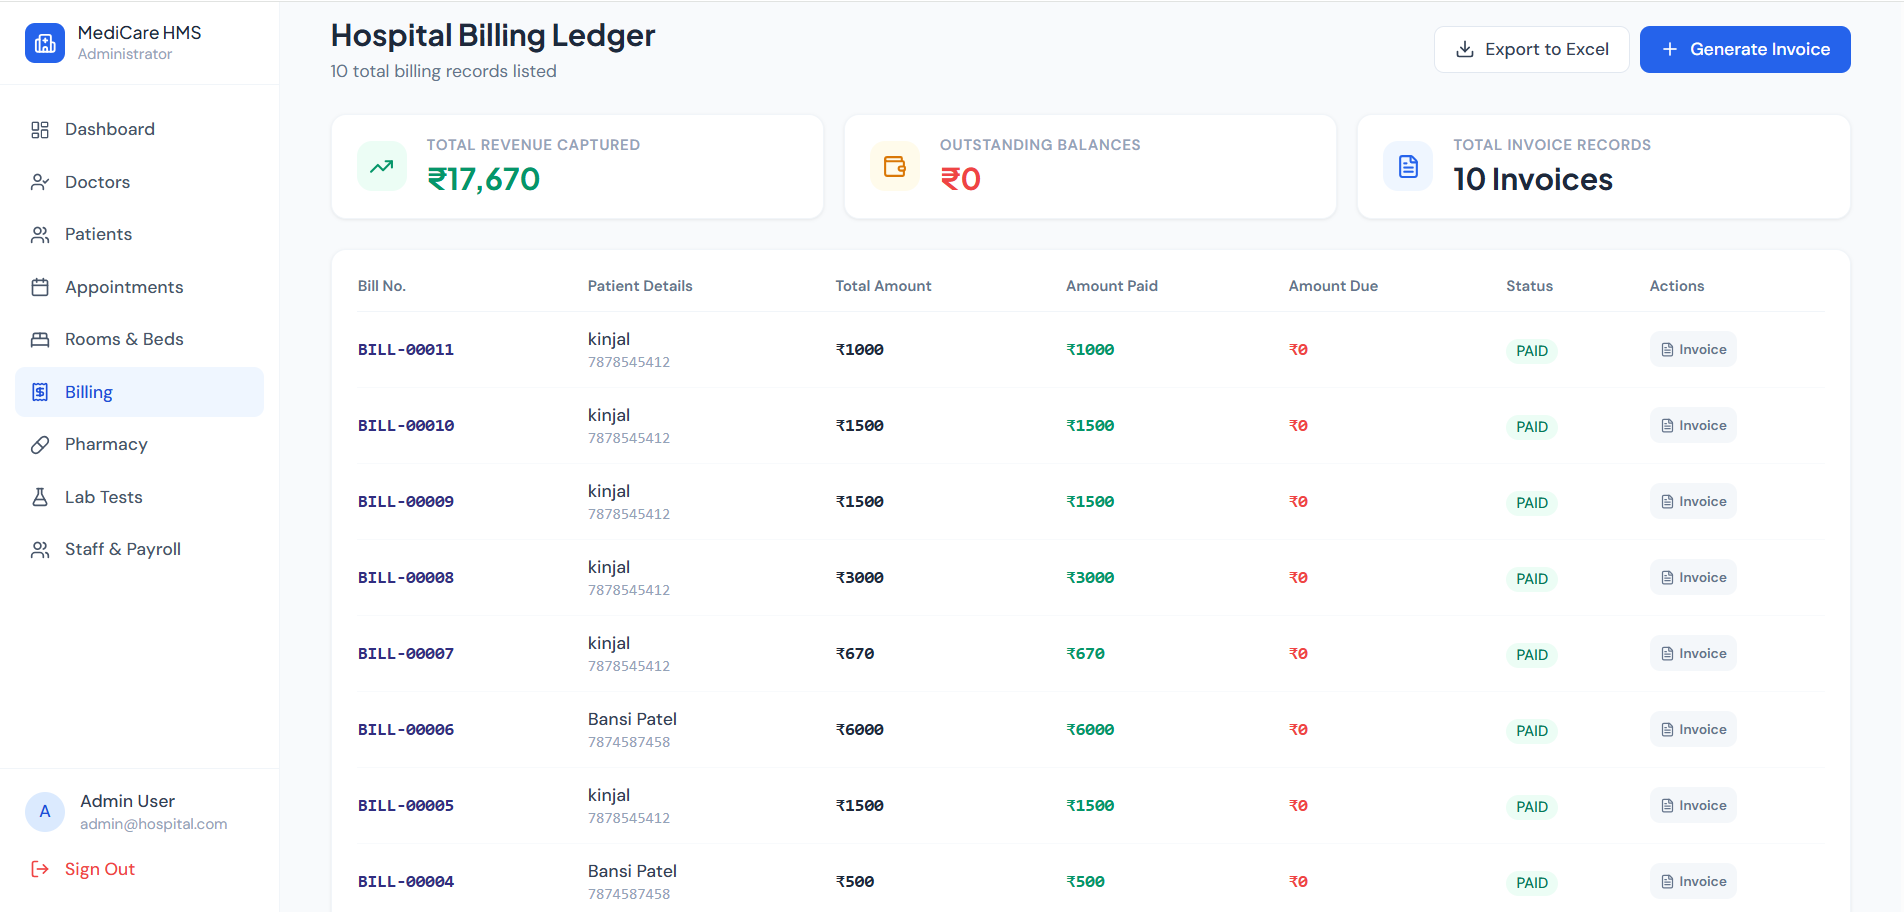
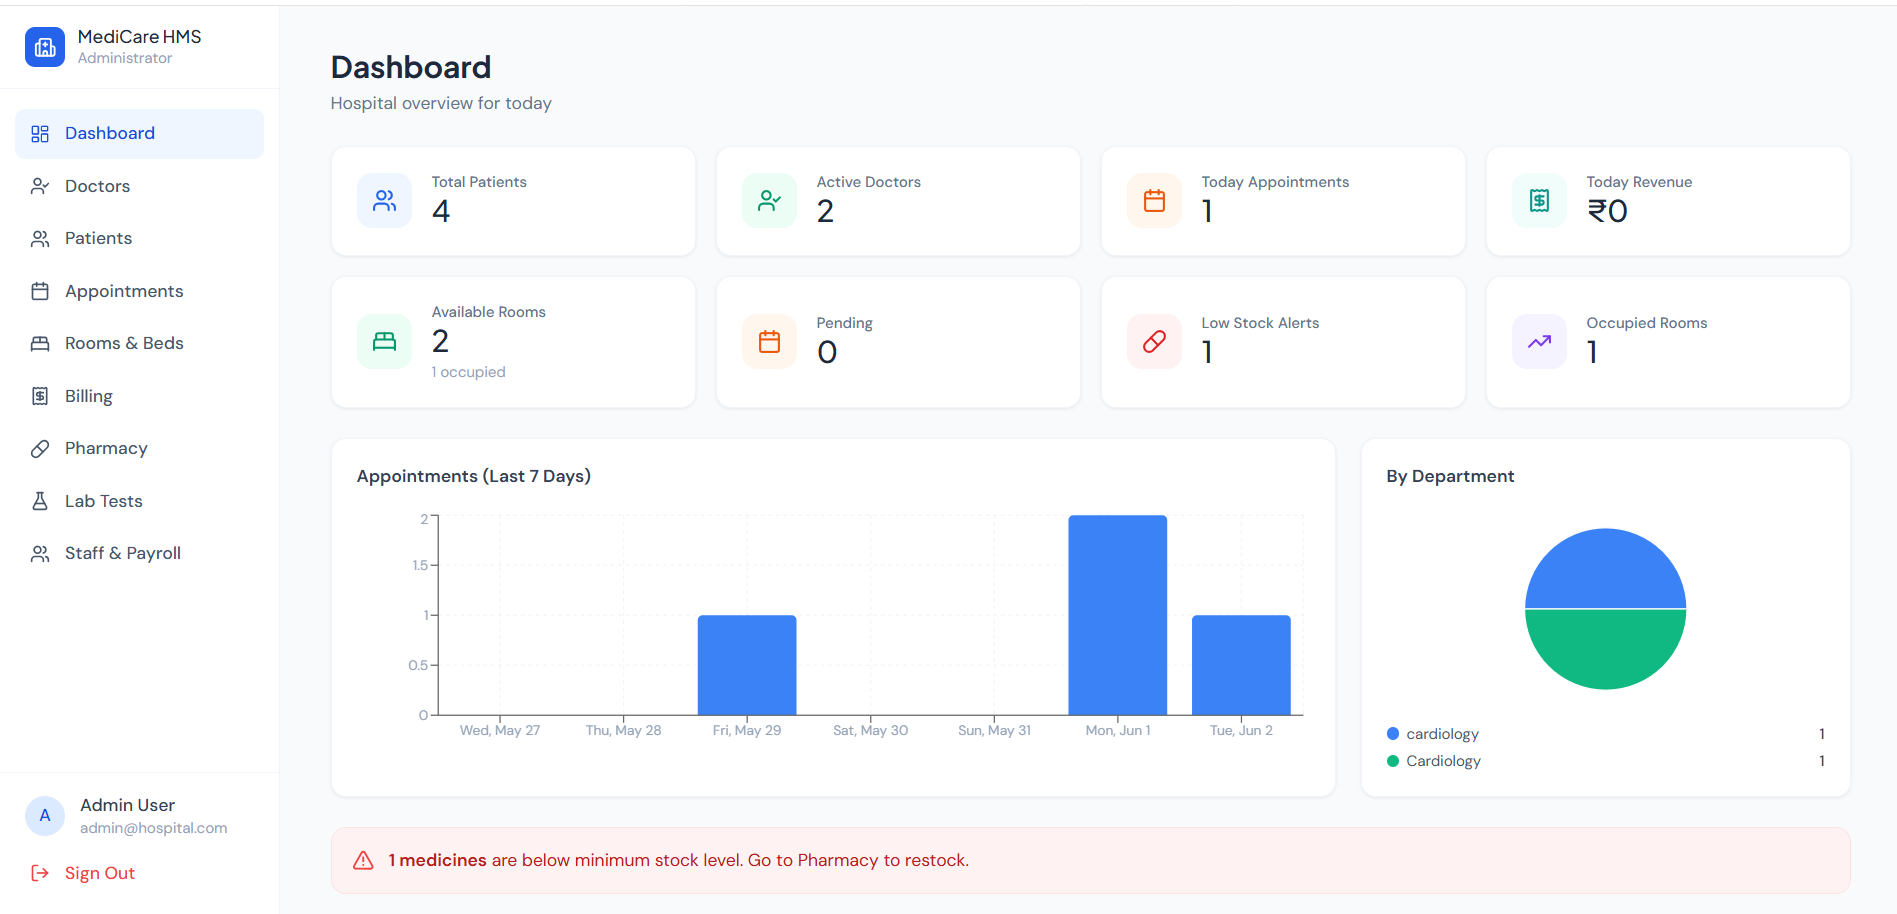
Screenshots
Key Features
- Role-Based Access Control (Admin, Doctor, Receptionist, Patient)
- Appointment Scheduling & Management
- Real-Time Notifications using Socket.IO
- Patient & Doctor Management
- Room Allocation System
- Billing & Payment Management
- Pharmacy & Laboratory Modules
- Analytics Dashboard with Reports
- Secure JWT Authentication
Functionaliy
- Patients can register, log in, and book appointments.
- Doctors can manage appointments and patient records.
- Receptionists can schedule appointments, manage queues, and generate bills.
- Admins can manage doctors, patients, rooms, pharmacy, and laboratory services.
- Real-time notifications keep all users updated about appointments and status changes.
- Analytics dashboards provide insights into hospital operations and performance.
Technology Used
- Frontend
- React
- Vite
- Tailwind CSS
- Zustand
- React Router
- Axios
- Recharts
- Backend
- Node.js
- Express.js
- Database
- MongoDB
- Mongoose
- Authentication
- JWT
- bcrypt
Why This Project Is Useful
- Reduces manual hospital paperwork
- Improves appointment and patient management
- Enhances communication between staff and doctors
- Provides centralized healthcare administration
- Demonstrates enterprise-level MERN stack development
Deployment and Environment Setup
- Environment Variables Setup:
- backend/.env
- PORT: 3000
- MONGO_URI: mongodb_url_string
- JWT_SECRET: your_jwt_secret_key_here (if needed)
- frontend/.env
- VITE_API_URL: backend_url
- backend/.env
- Deployment Overview:
- Render or Railway for backend hosting
- Vercel or Netlify for frontend hosting
- MongoDB Atlas for the database
- Backend Deployment:
- Push your code to GitHub.
- Go to Render.com or Railway.app.
- Create a new Web Service and connect your GitHub repository.
- Choose “backend/” as the root directory.
- Add the following environment variables on Render:
- PORT=10000
- MONGO_URI=your MongoDB Atlas URI
- JWT_SECRET=your JWT secret
- Start command: npm start (Ensure your backend/package.json includes “start”: “node server.js”)
- After deployment, note your backend URL, e.g. https://your-backend-name.onrender.com
- Frontend Deployment:
- Go to Vercel.com or Netlify.com.
- Create a new project and connect the GitHub repo.
- Select the “frontend/” folder as root.
- In environment variables, set:
- VITE_API_URL=https://your-backend-domain.com/api (or REACT_APP_API_URL if using CRA)
- Deploy.
- MongoDB Atlas Setup:
- Go to https://cloud.mongodb.com
- Create a free cluster.
- Add your current IP address in Network Access.
- Create a database user and password.
- Copy the connection string and replace username, password, and database name in MONGO_URI in backend/.env
Download Source Code
Project Setup Instructions
Note: This project is for educational purposes only. Not for commercial sale.


