Project Overview
CrowdFlow is a premium, full-stack crowdfunding platform designed to empower creators, innovators, and social activists to bring their ideas to life. It provides a secure, transparent, and visually stunning environment where users can start campaigns, and the community can discover and fund extraordinary projects.
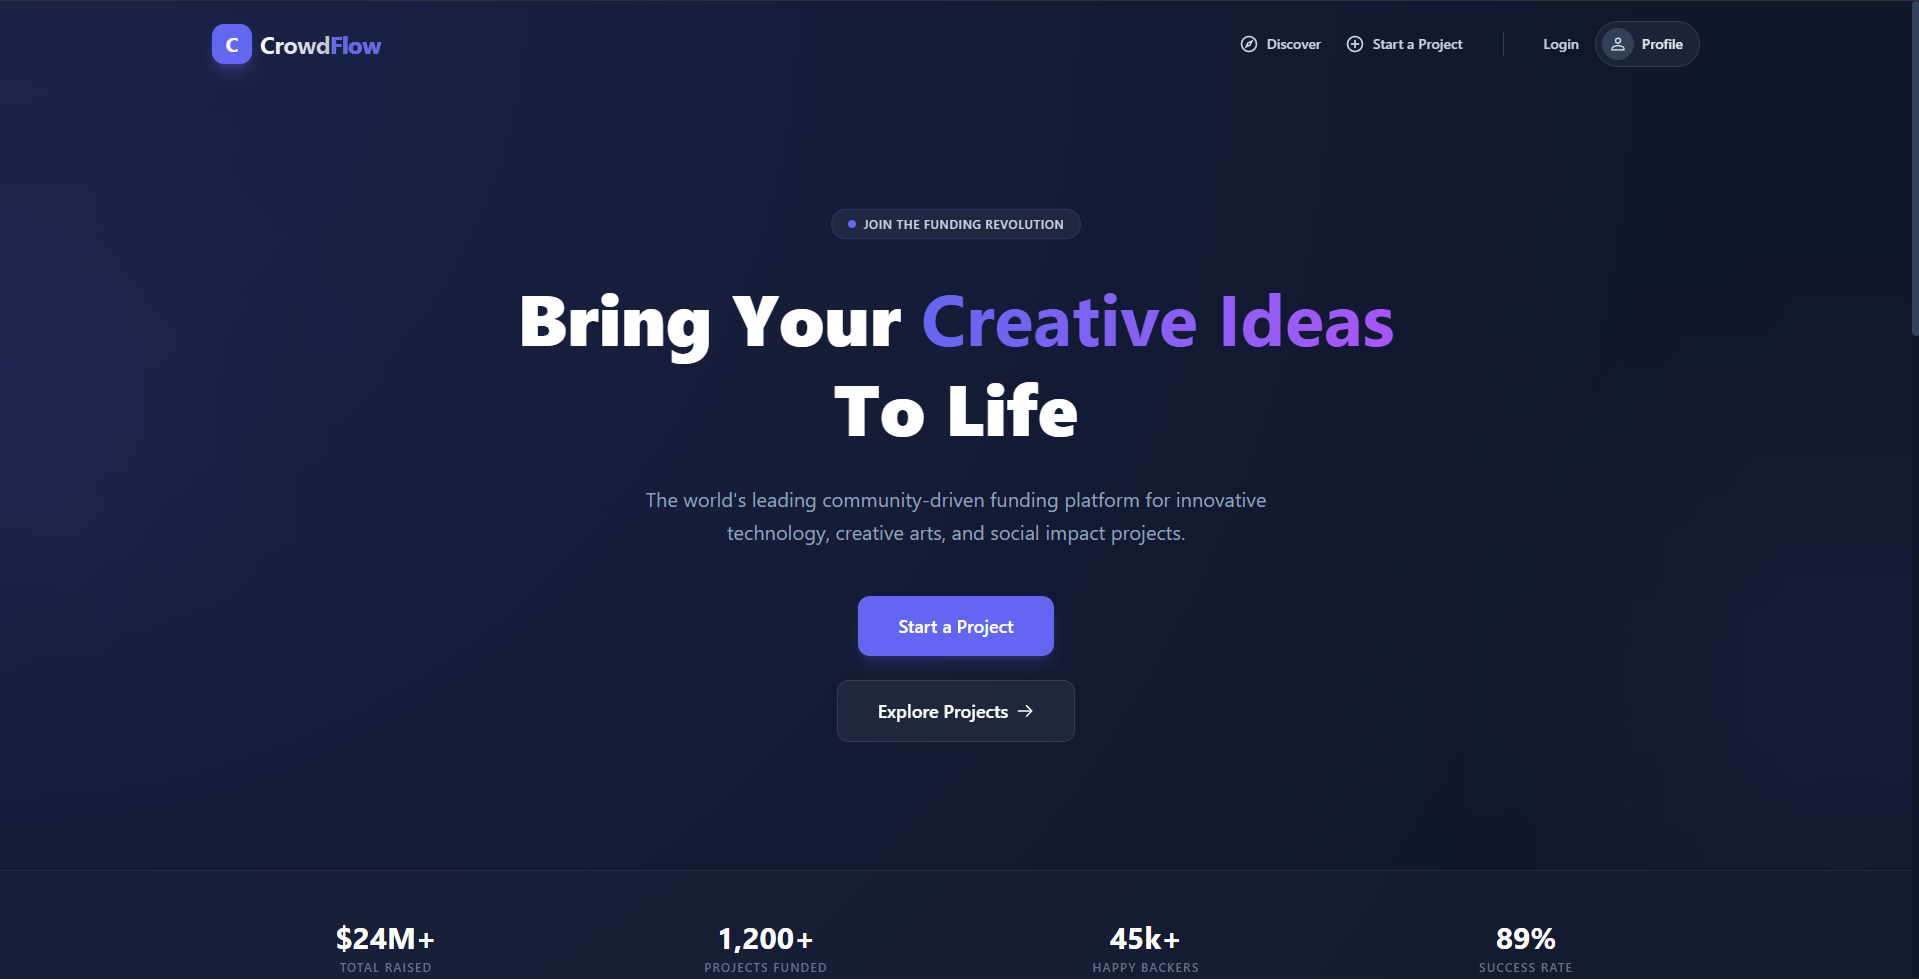
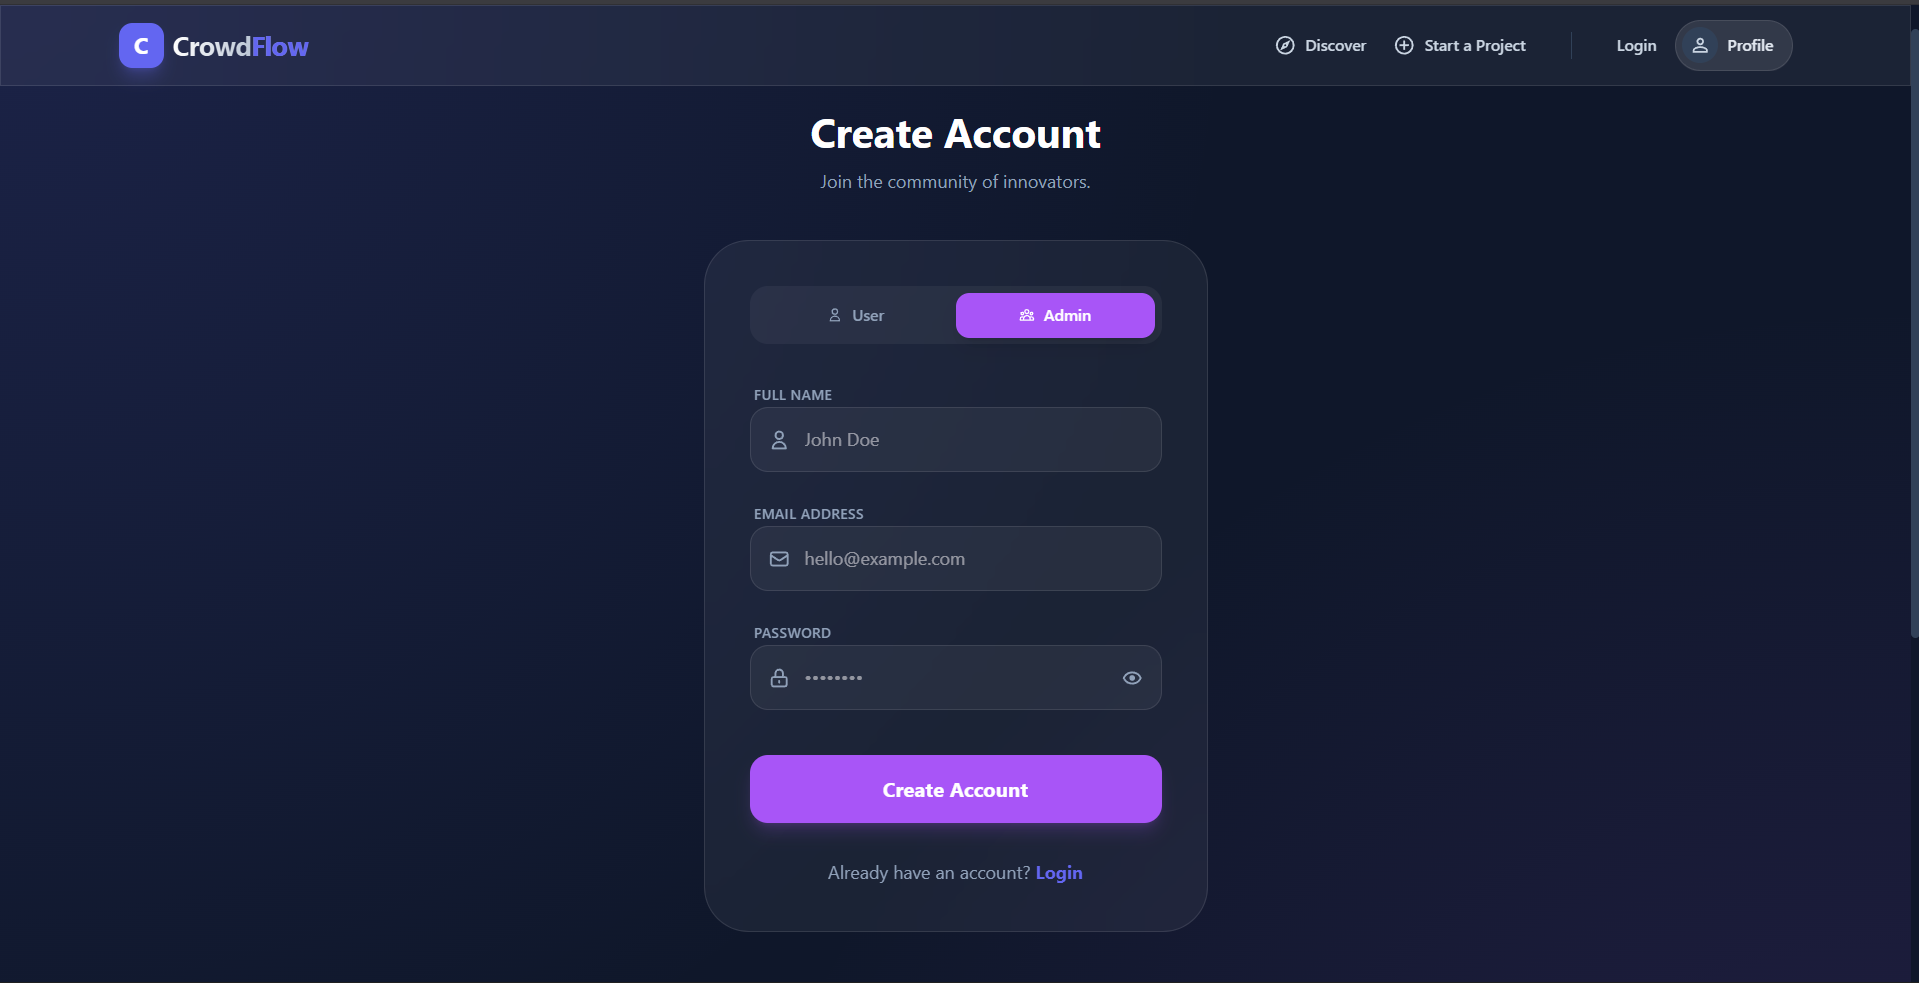
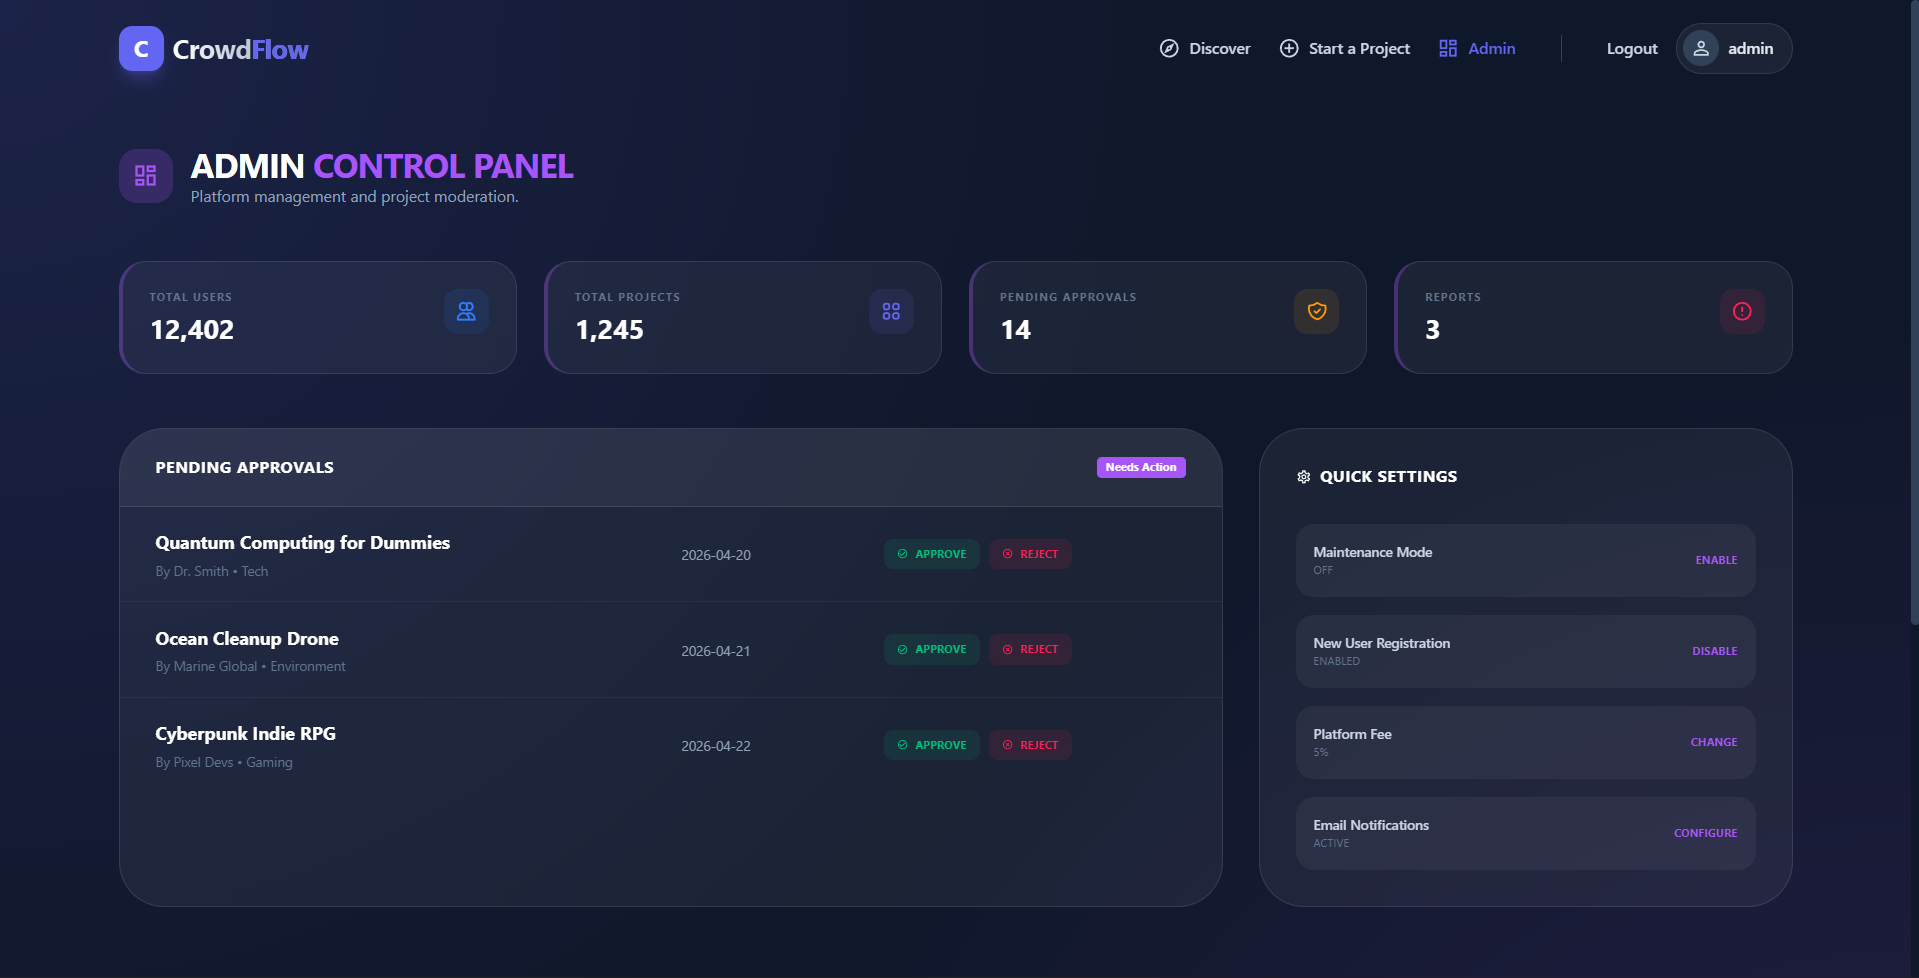
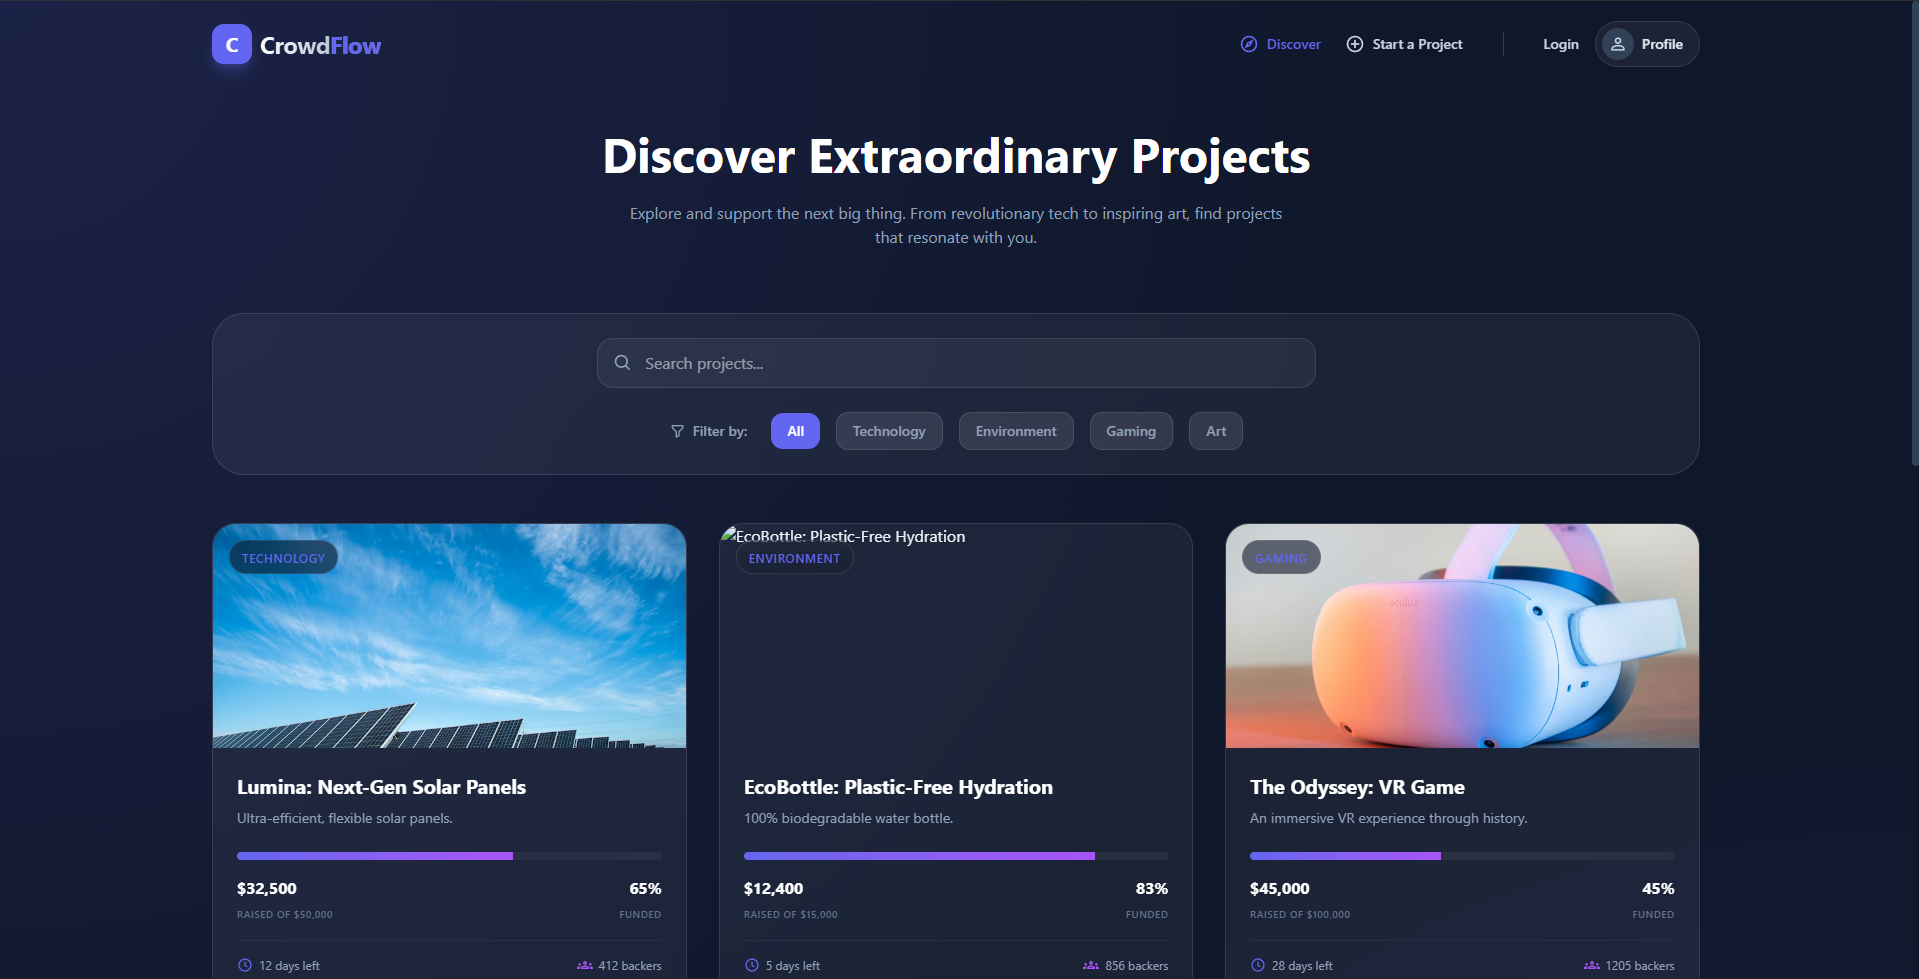
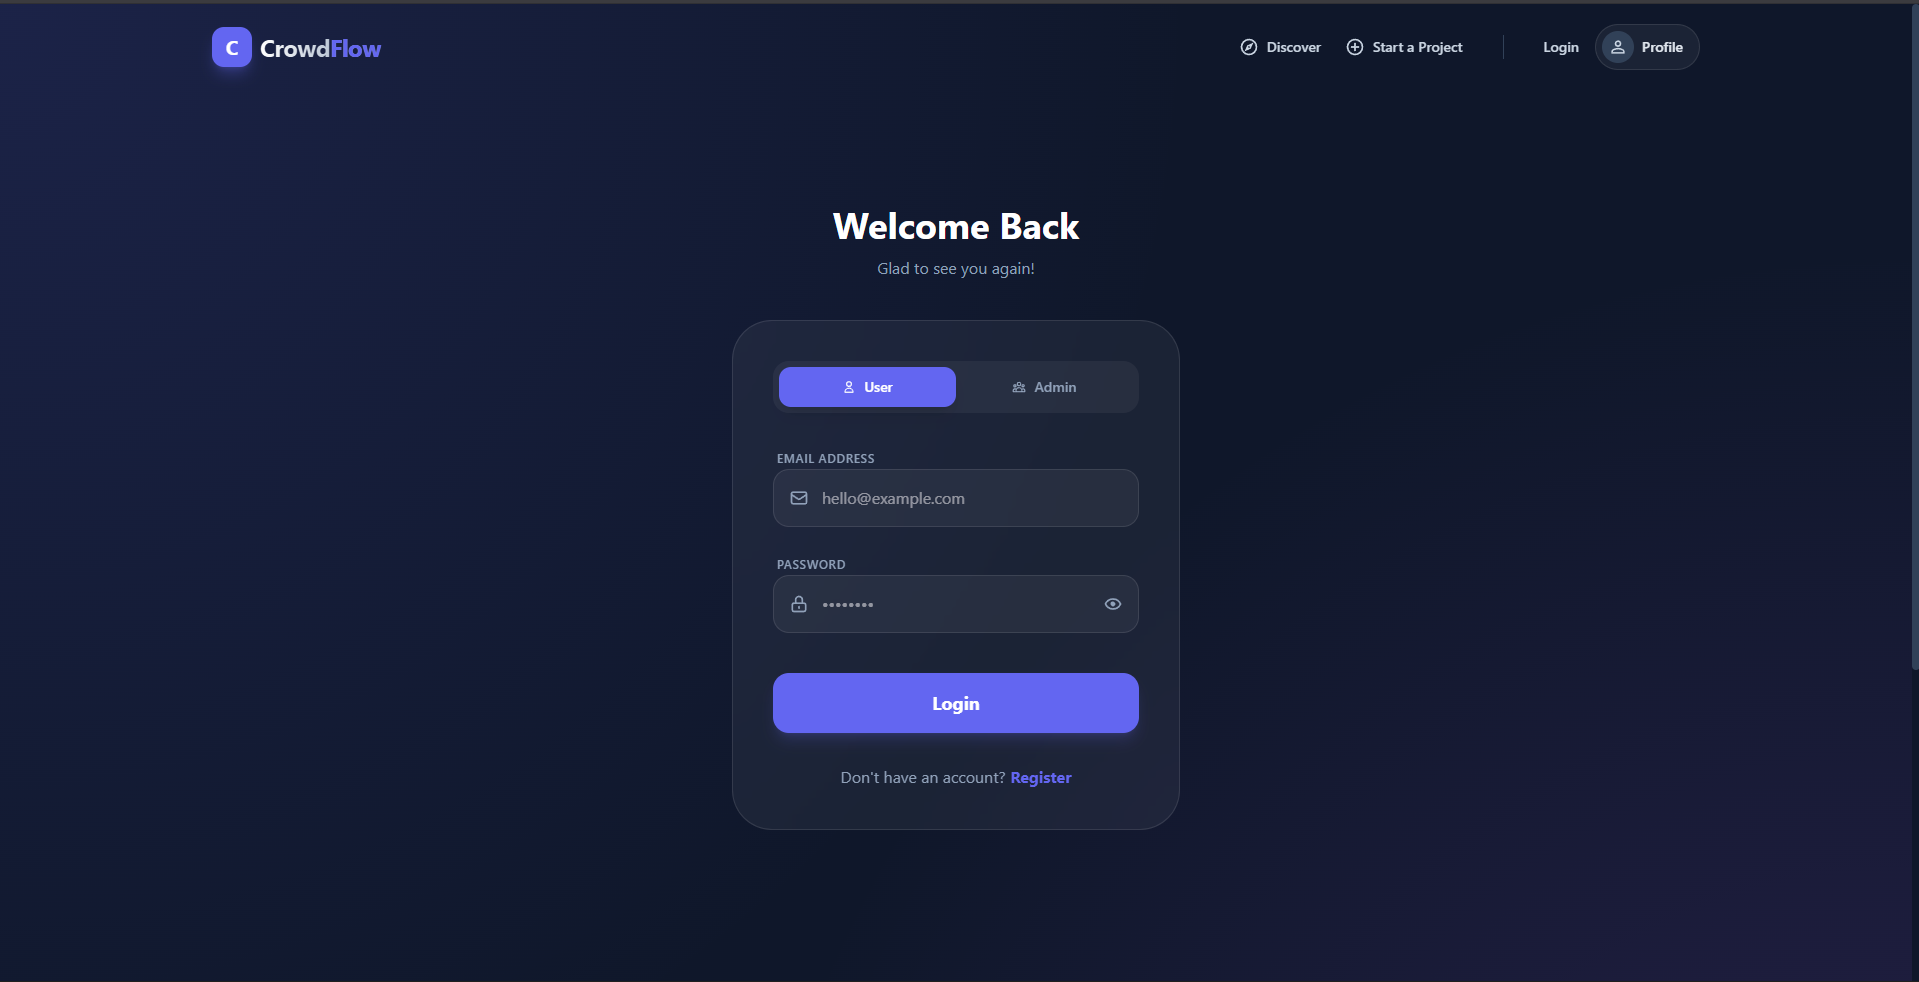
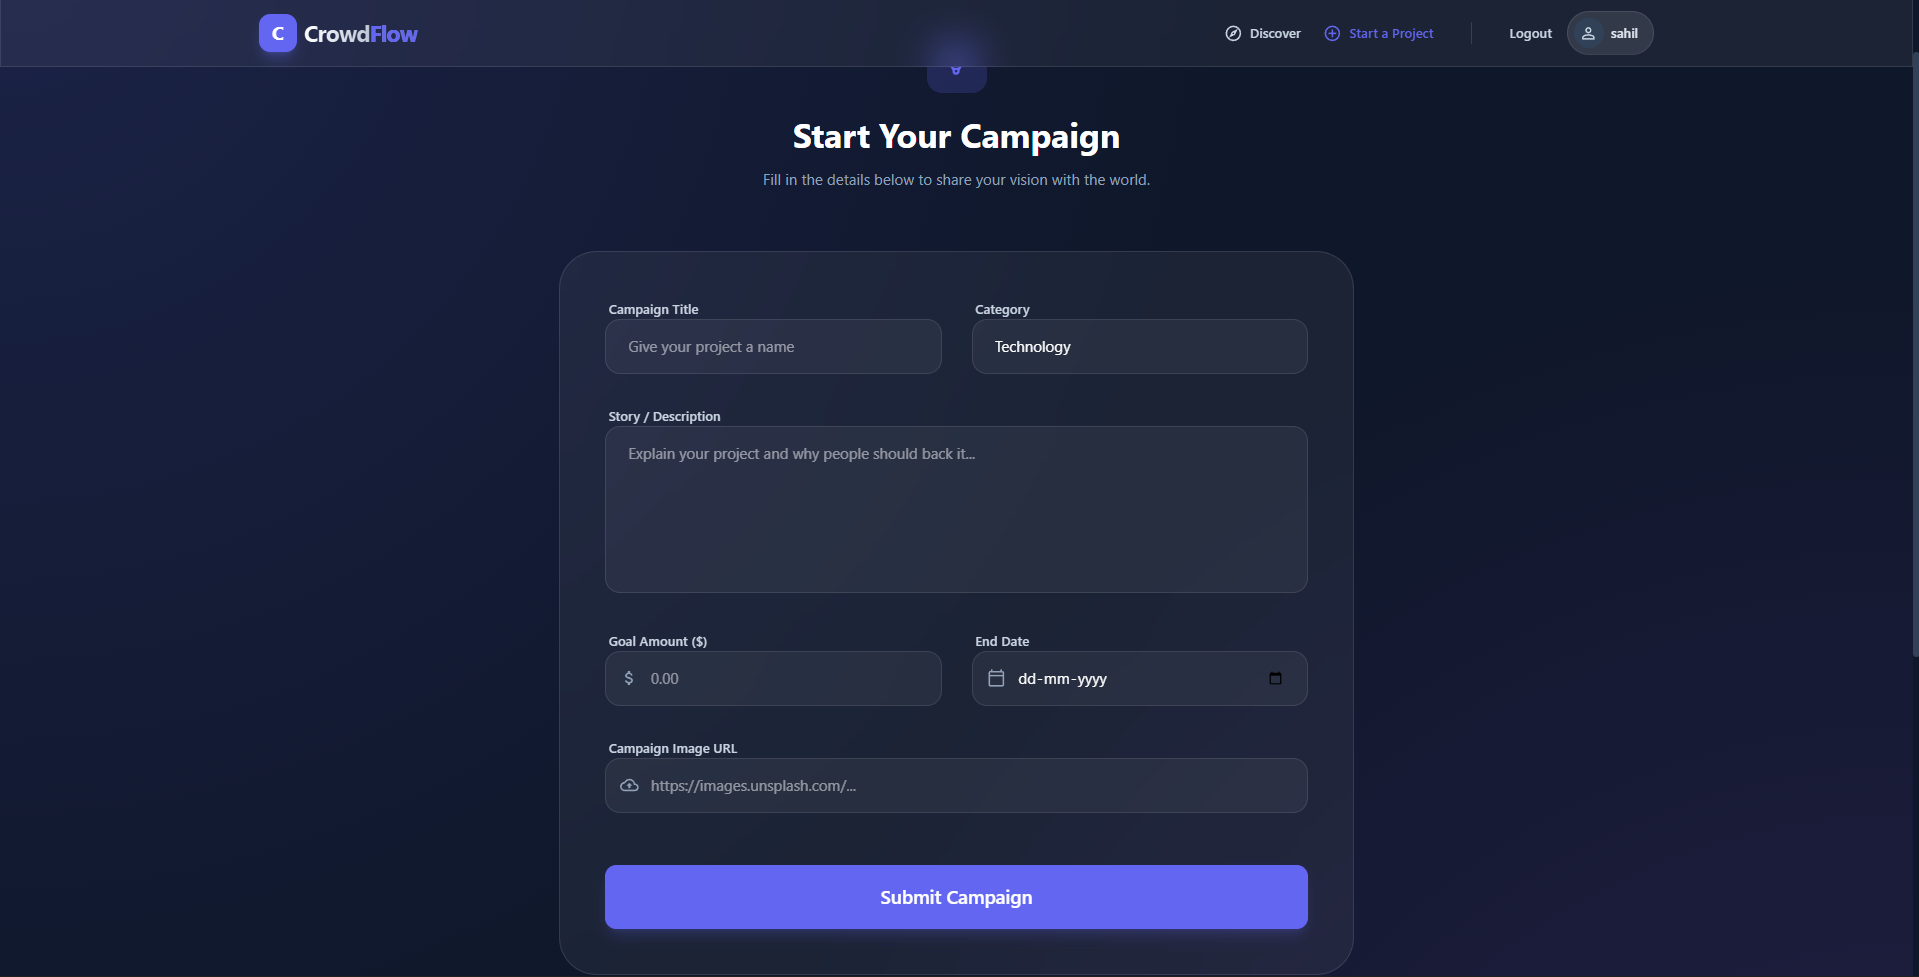
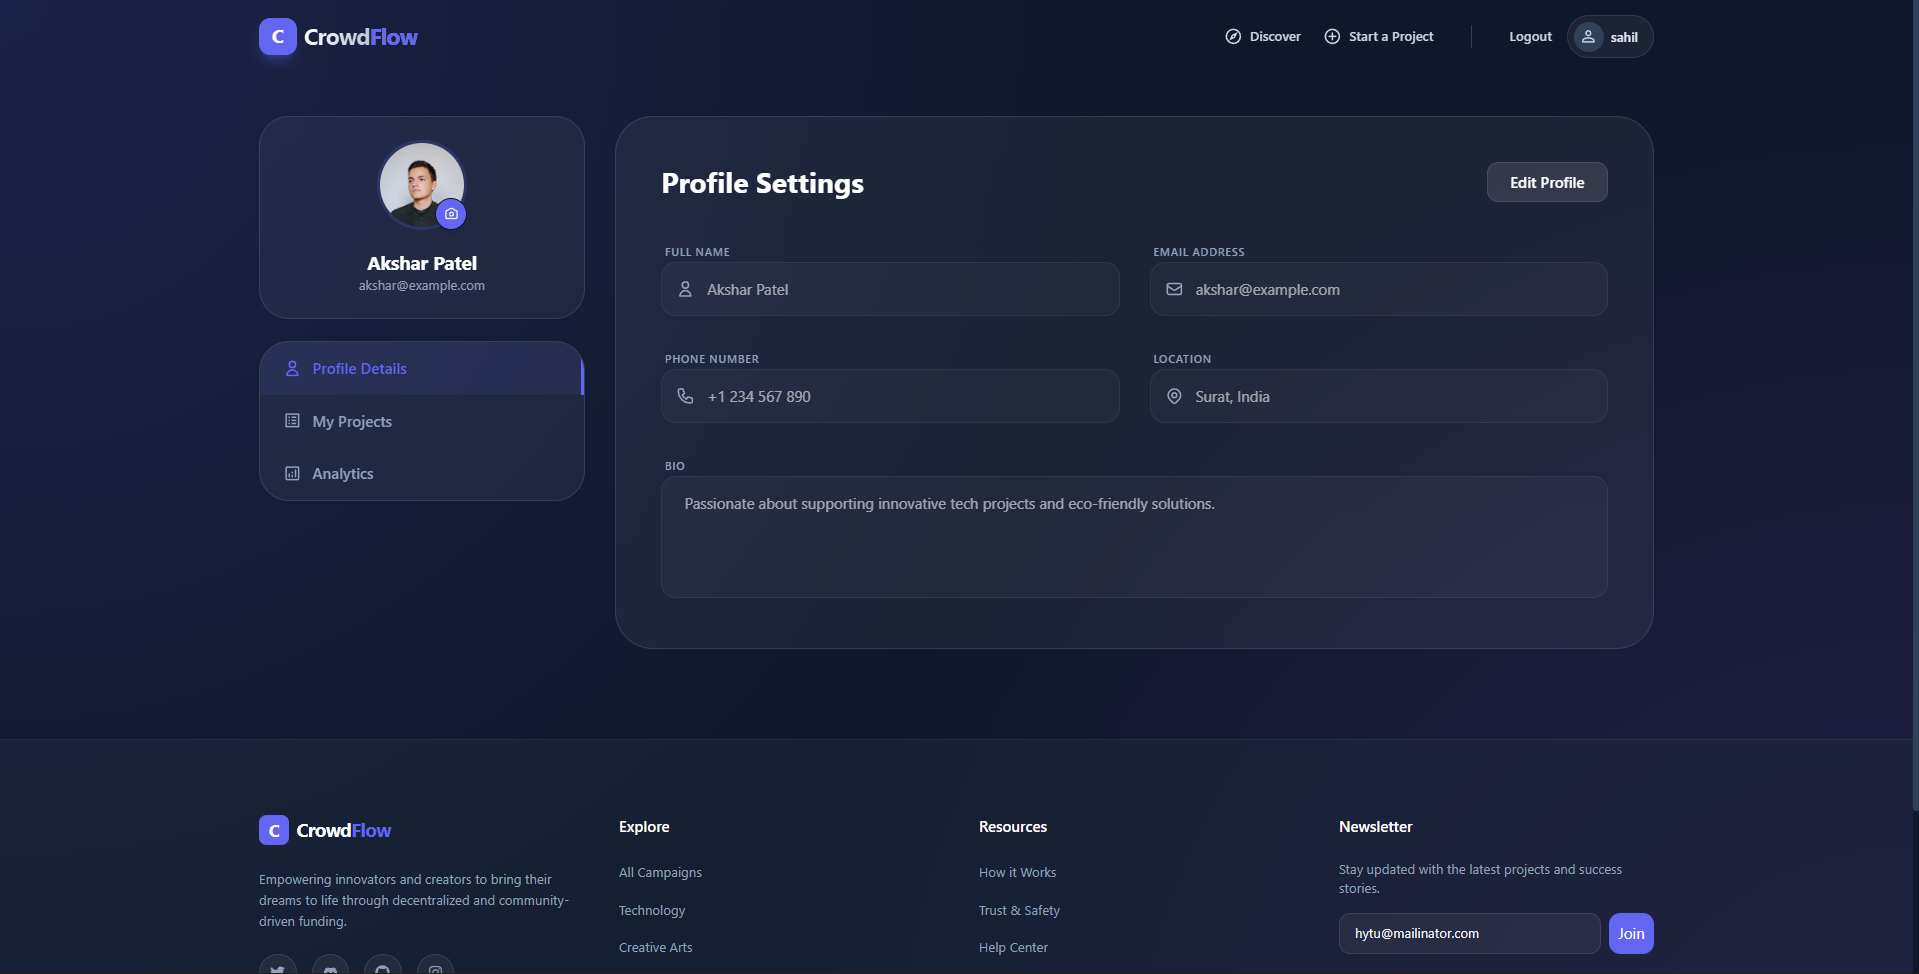
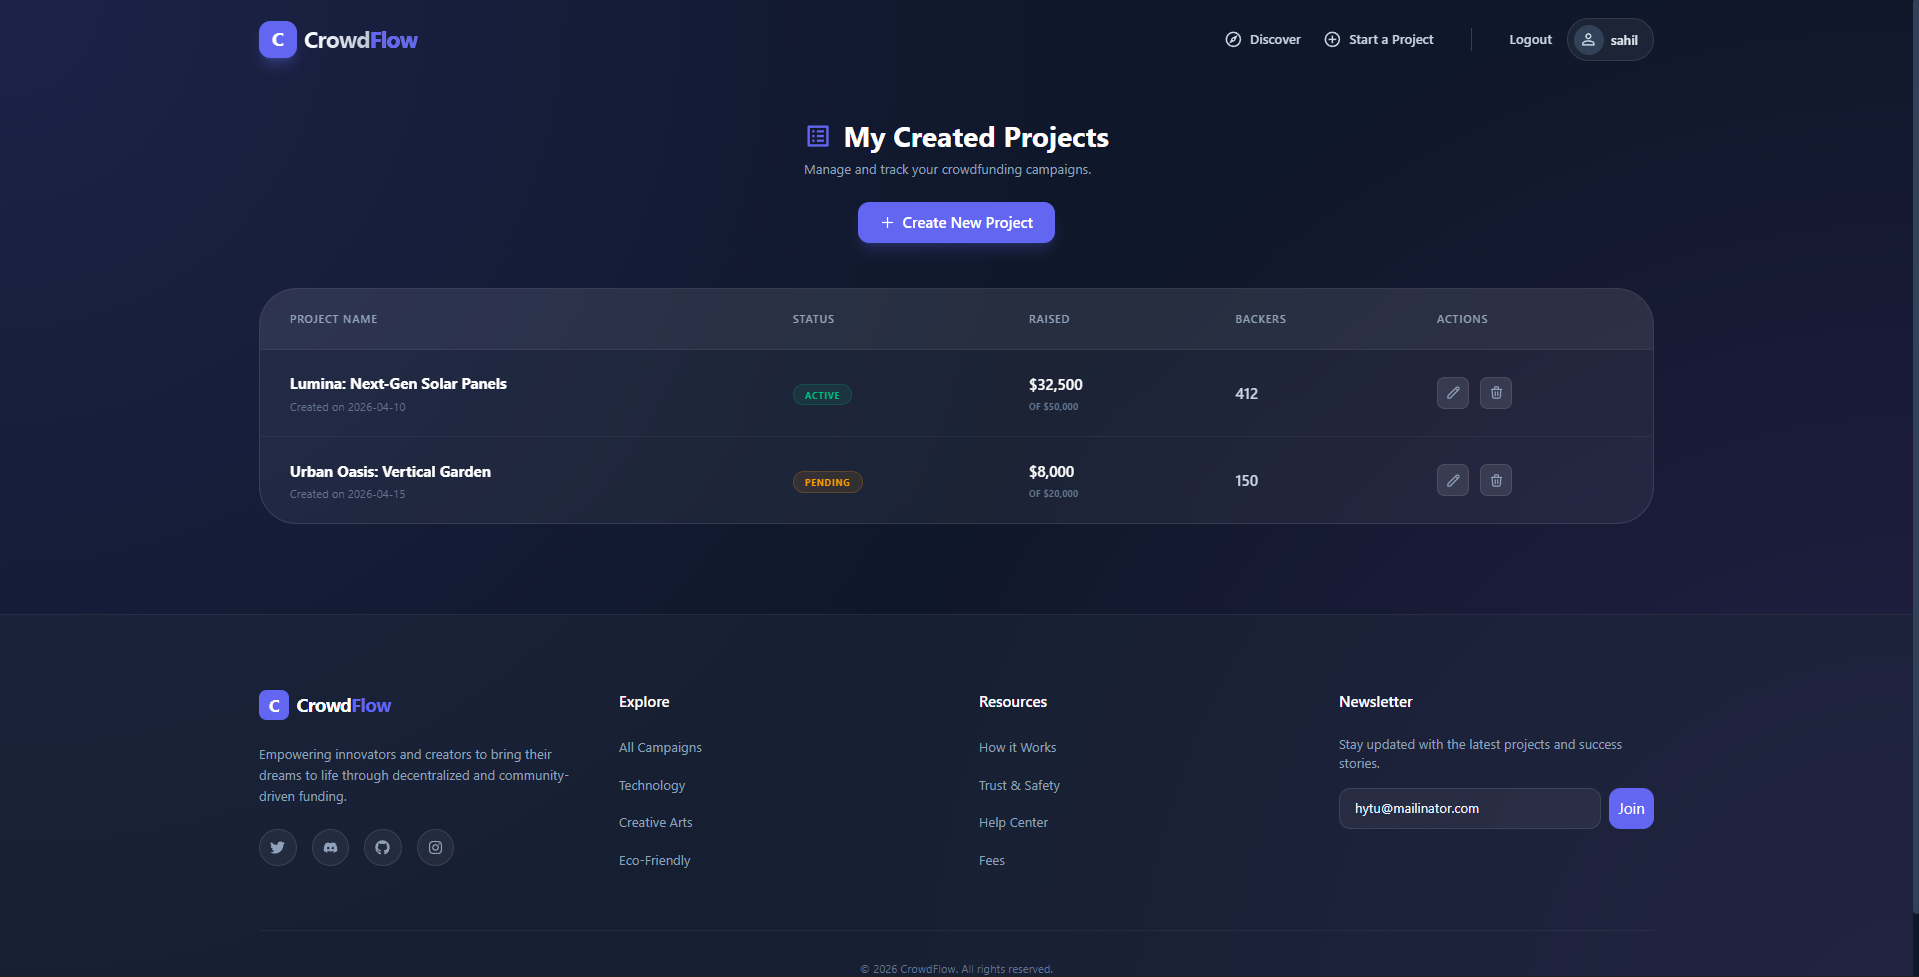
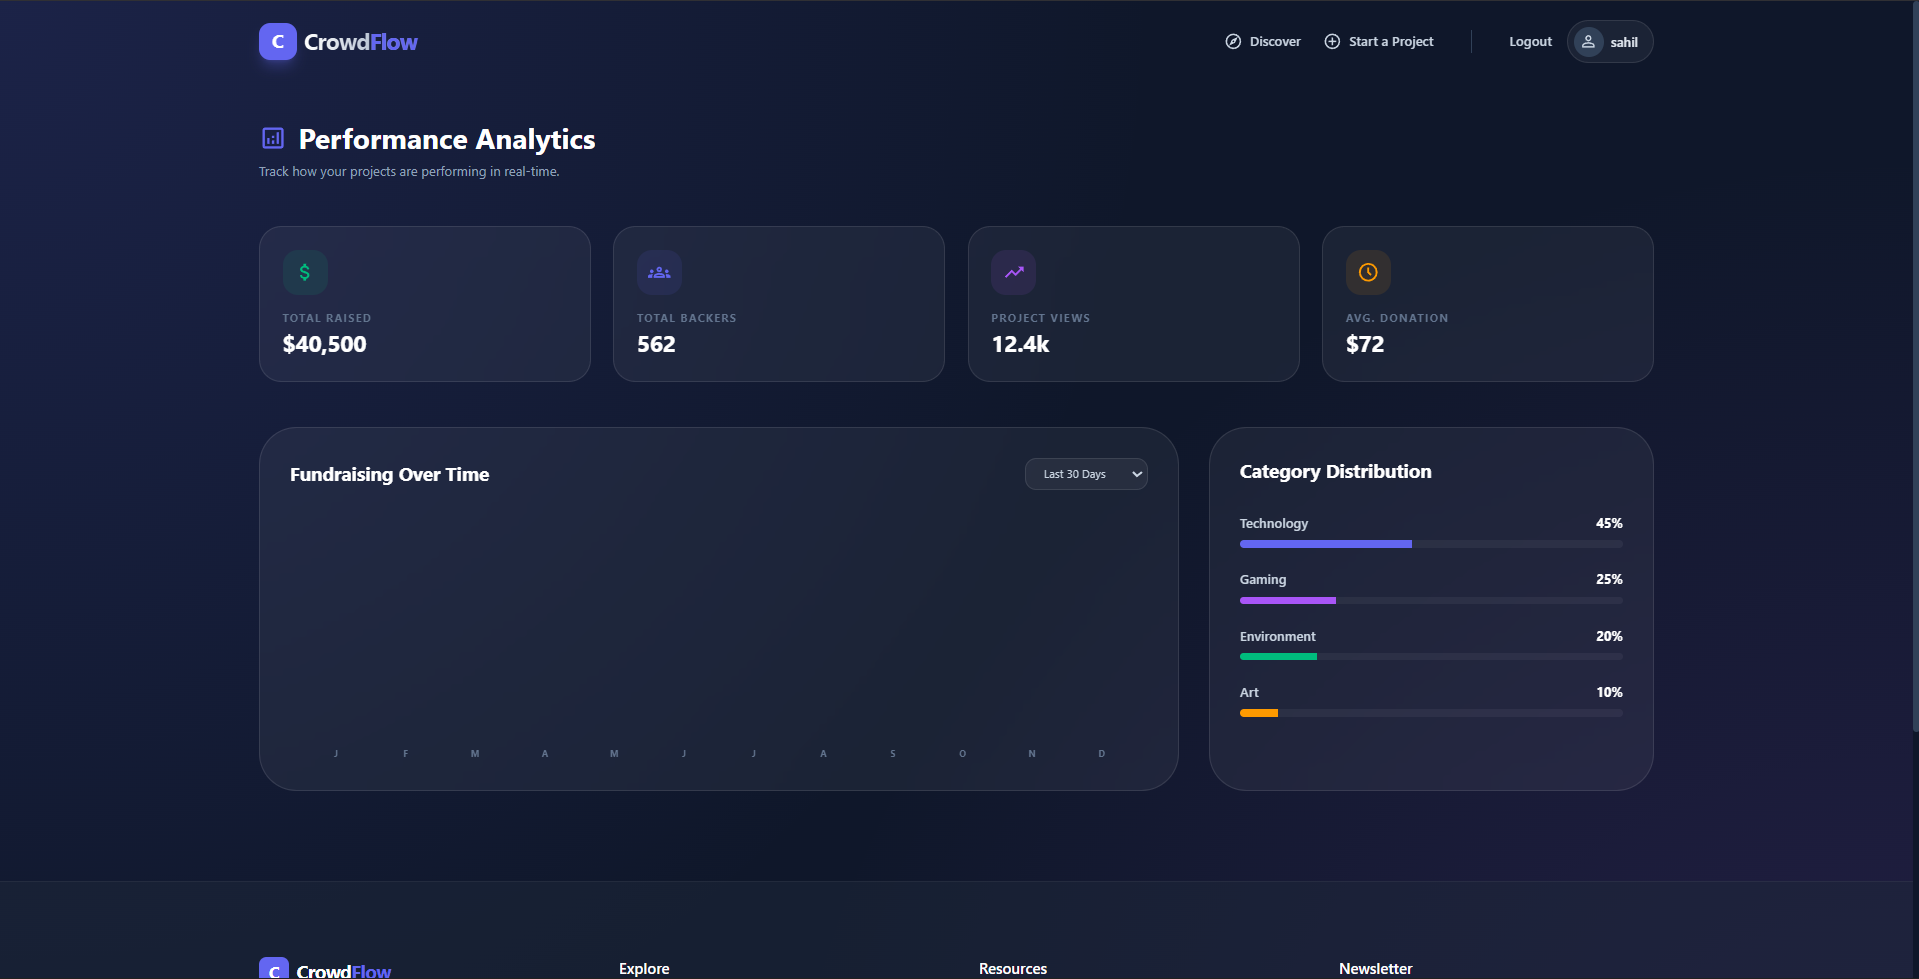
Screenshots
Key Features
- Premium Design System: A high-end, responsive UI featuring glassmorphism, smooth animations, and a sleek dark-themed aesthetic.
- Role-Based Access Control: Secure separation between Users (Creators/Backers) and a Single-Admin management system.
- Dynamic Campaign Discovery: Real-time project listing with advanced searching and category-based filtering (Tech, Creative, Social, etc.).
- Interactive Dashboard: Personal “My Projects” area for creators to track progress, manage their campaigns, and delete outdated projects.
- User Profile Management: Personalized settings allowing users to update their identity and bio directly via the platform.
- Protected Ecosystem: Advanced JWT authentication ensuring only authorized users can create or manage campaigns.
Functionality
- Authentication Flow: Secure Register/Login system with a unique “Single Admin” rule to ensure platform integrity.
- Campaign Lifecycle: Users can create detailed projects with goal amounts, descriptions, and visual assets.
- Progress Tracking: Automatic calculation of funding percentages and real-time visualization of money raised.
- Category Ecosystem: Organizes projects into distinct hubs, making it easier for backers to find topics they care about.
- API-Driven Architecture: Fully decoupled frontend and backend, communicating via a high-performance RESTful API.
Technology Used
- Frontend: React 18, Vite, Tailwind CSS, React Icons, Axios, React Hot Toast
- Backend: Node.js, Express.js
- Database: MongoDB, Mongoose ODM
- Security: JSON Web Tokens (JWT), BcryptJS (Password Hashing)
- Dev Tools: Nodemon, Dotenv, CORS, Cookie-Parser
Why This Project Is Useful
- Bridging the Funding Gap: It provides a professional platform for small-scale creators who might not have access to traditional venture capital.
- Community Empowerment: Backers gain a sense of ownership and contribution by directly supporting innovation and social causes.
- Low Barrier to Entry: With an intuitive “Start a Project” flow, anyone with a great idea can begin fundraising in minutes.
- Trust and Security: By using industry-standard encryption and role-based protection, it ensures that user data and project management remain secure.
- Scalability: The modular architecture allows for future expansion into payment gateway integration (like Stripe), real-time commenting, and backer reward tiers.
Deployment and Environment Setup
- Environment Variables Setup:
- backend/.env
- PORT: 5000
- MONGO_URI: mongodb_url_string
- JWT_SECRET: your_jwt_secret_key_here (if needed)
- frontend/.env
- VITE_API_URL: backend_url
- backend/.env
- Deployment Overview:
- Render or Railway for backend hosting
- Vercel or Netlify for frontend hosting
- MongoDB Atlas for the database
- Backend Deployment:
- Push your code to GitHub.
- Go to Render.com or Railway.app.
- Create a new Web Service and connect your GitHub repository.
- Choose “backend/” as the root directory.
- Add the following environment variables on Render:
- PORT=10000
- MONGO_URI=your MongoDB Atlas URI
- JWT_SECRET=your JWT secret
- Start command: npm start (Ensure your backend/package.json includes “start”: “node server.js”)
- After deployment, note your backend URL, e.g. https://your-backend-name.onrender.com
- Frontend Deployment:
- Go to Vercel.com or Netlify.com.
- Create a new project and connect the GitHub repo.
- Select the “frontend/” folder as root.
- In environment variables, set:
- VITE_API_URL=https://your-backend-domain.com/api (or REACT_APP_API_URL if using CRA)
- Deploy.
- MongoDB Atlas Setup:
- Go to https://cloud.mongodb.com
- Create a free cluster.
- Add your current IP address in Network Access.
- Create a database user and password.
- Copy the connection string and replace username, password, and database name in MONGO_URI in backend/.env
Download Source Code
Project Setup Instructions
Note: This project is for educational purposes only. Not for commercial sale.


