Project Overview
The Remote Team Productivity Tracker is a professional management tool that bridges the gap between team leaders and remote contributors. Built with a focus on User Experience (UX) and Role-Based Security, the platform allows organizations to maintain high productivity levels by providing transparent task tracking, real-time status updates, and a searchable team directory.
Screenshots
Key Features
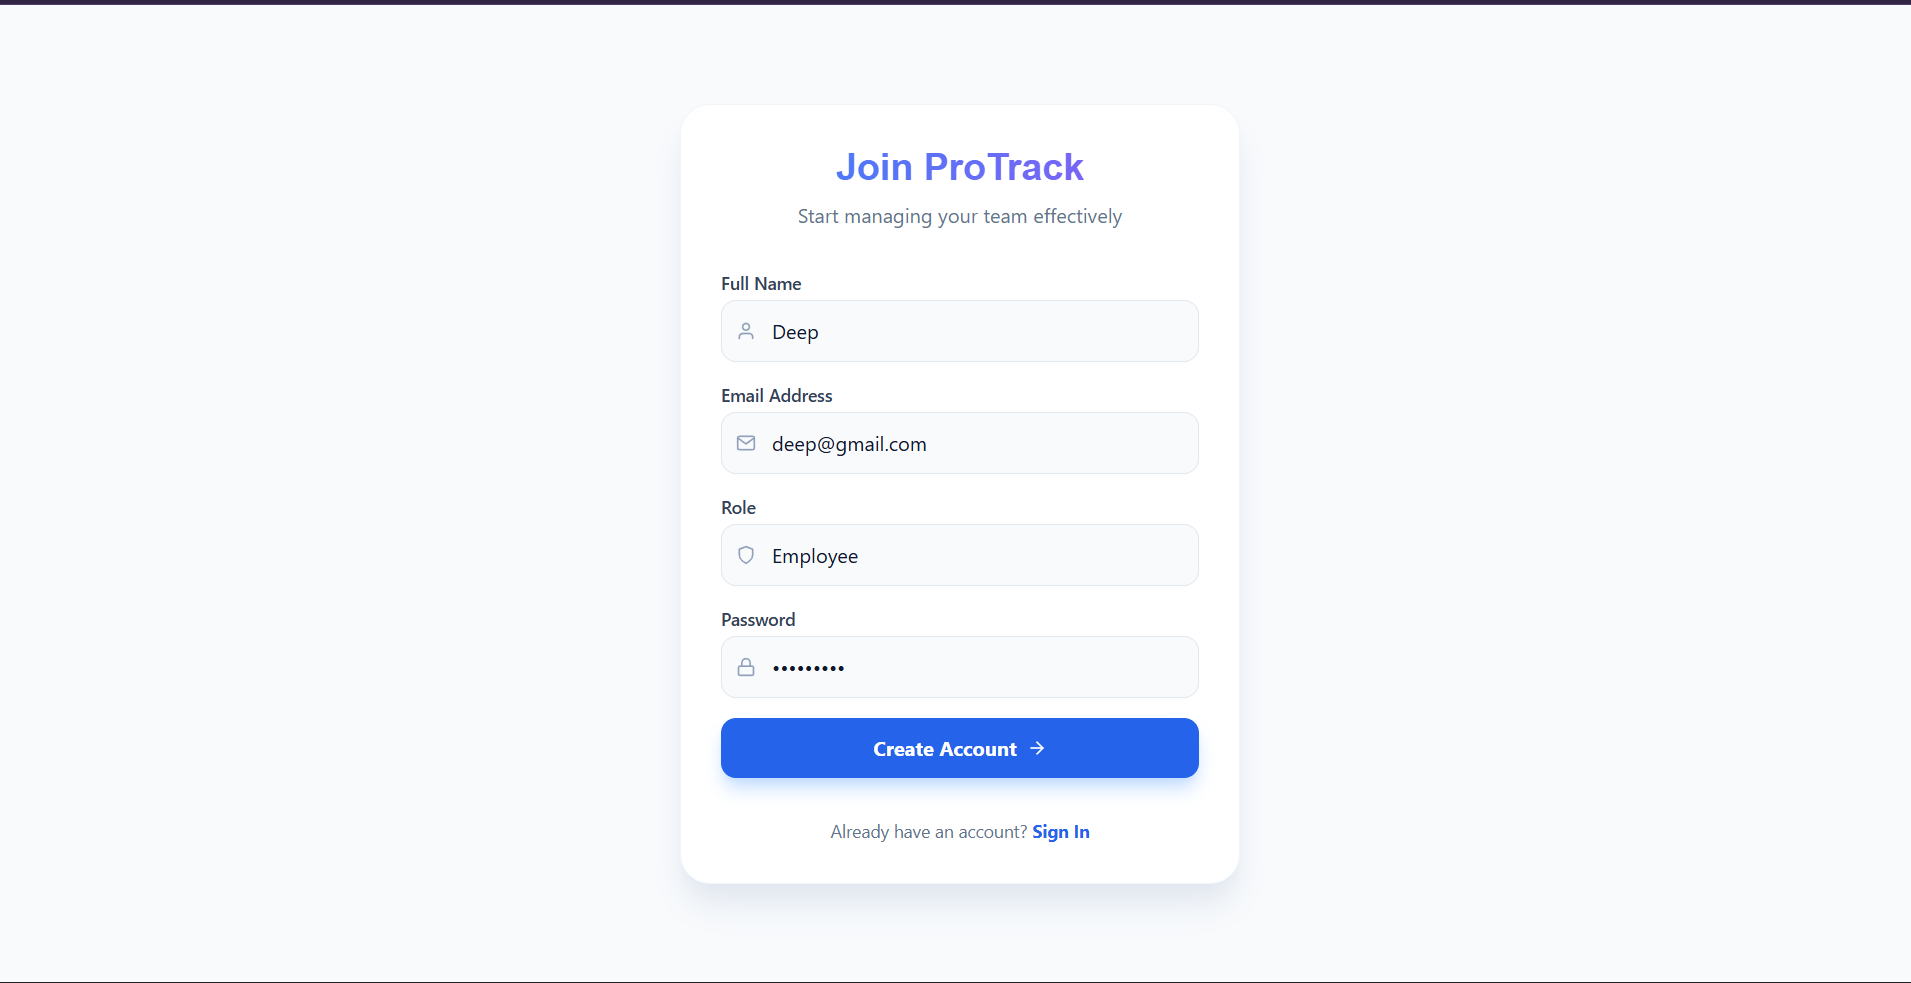
- Role-Based Access Control (RBAC): Distinct permissions and views for Managers and Employees.
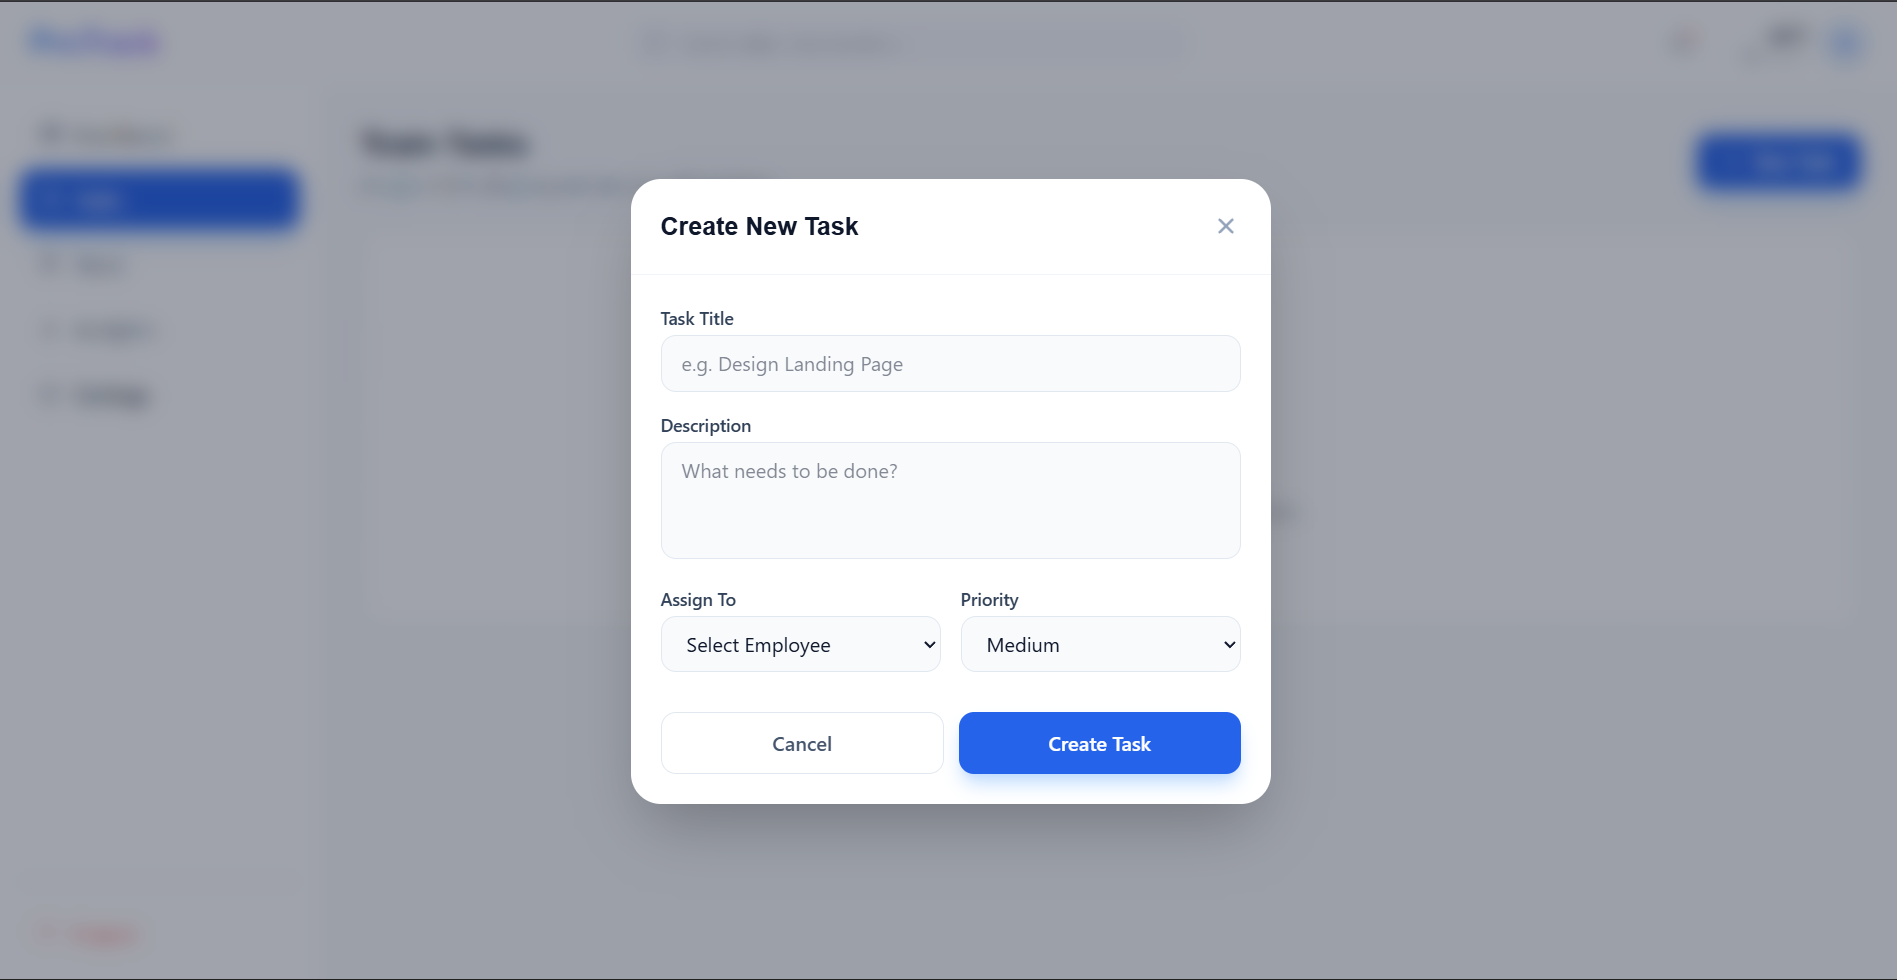
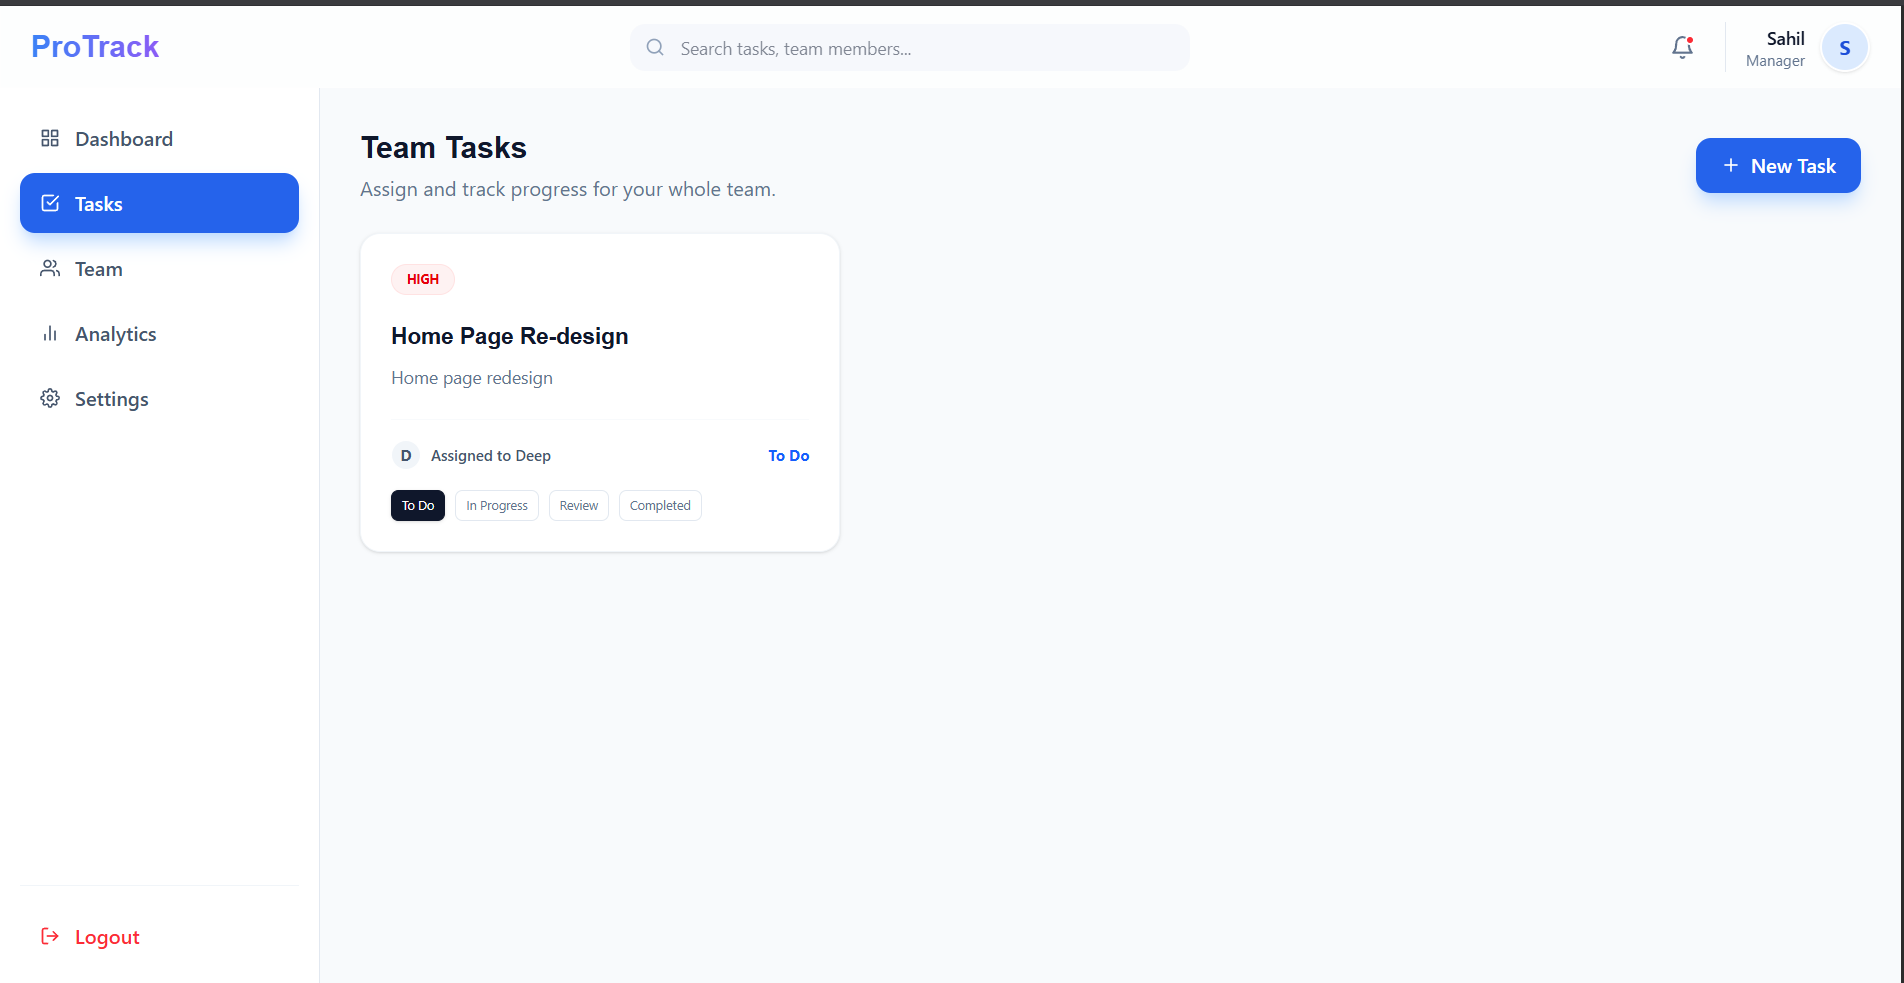
- Centralized Task Management: A unified board for creating, assigning, updating, and deleting tasks.
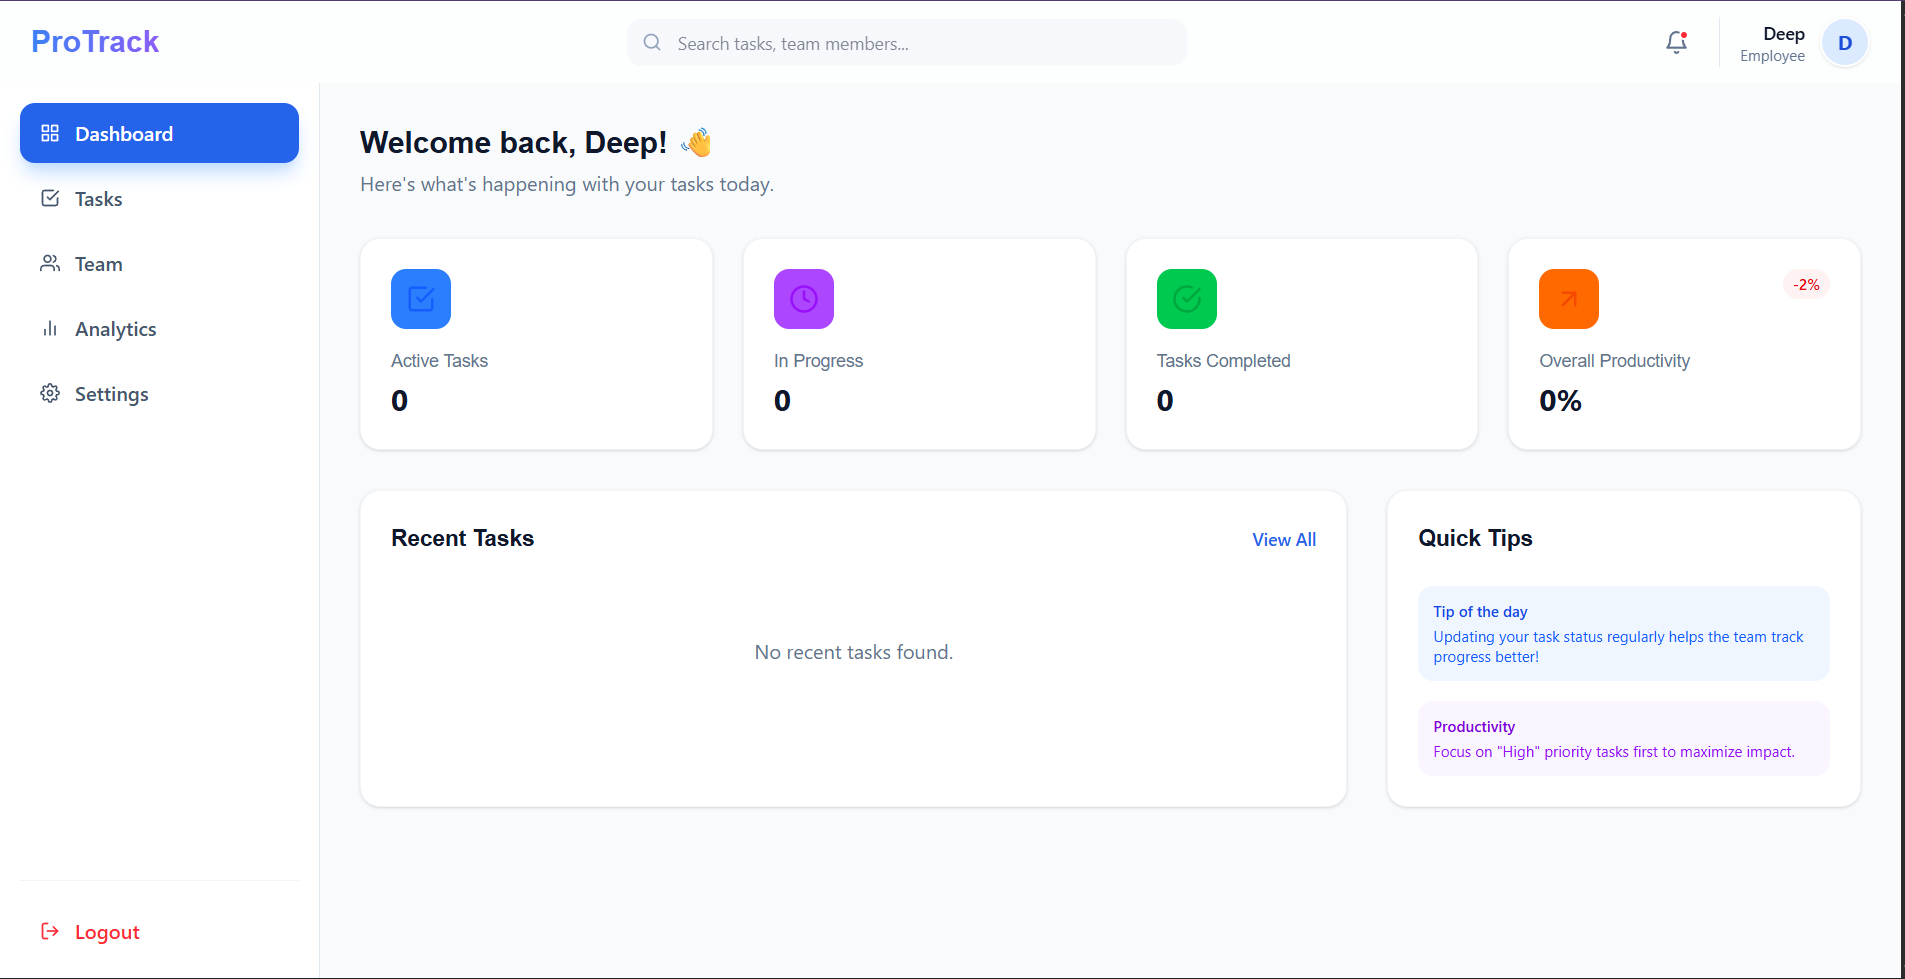
- Real-time Productivity Dashboard: Live statistics showing active tasks, completion rates, and team-wide productivity percentages.
- Premium Design System: A modern UI featuring Glassmorphism, smooth animations, and a responsive layout for all screen sizes.
- Interactive Notifications: Instant feedback on every action (success/error) using
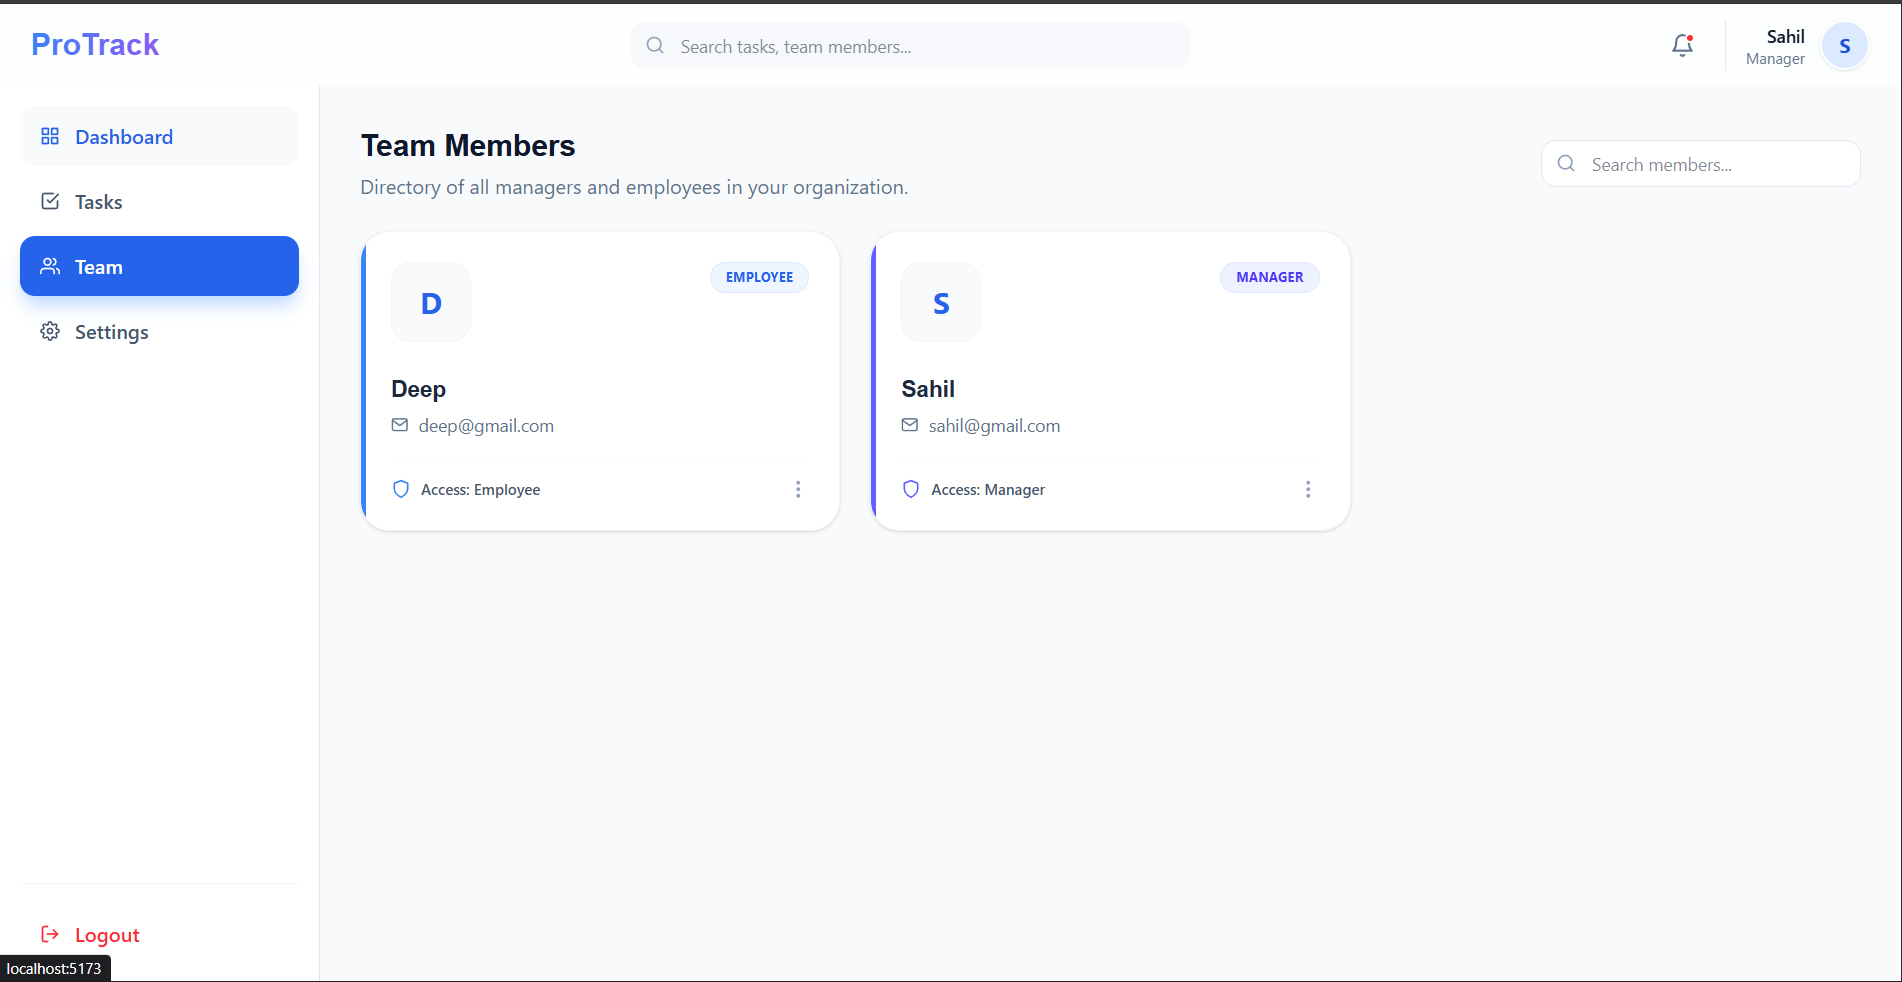
react-hot-toast. - Searchable Team Directory: A full list of organization members with quick search functionality.
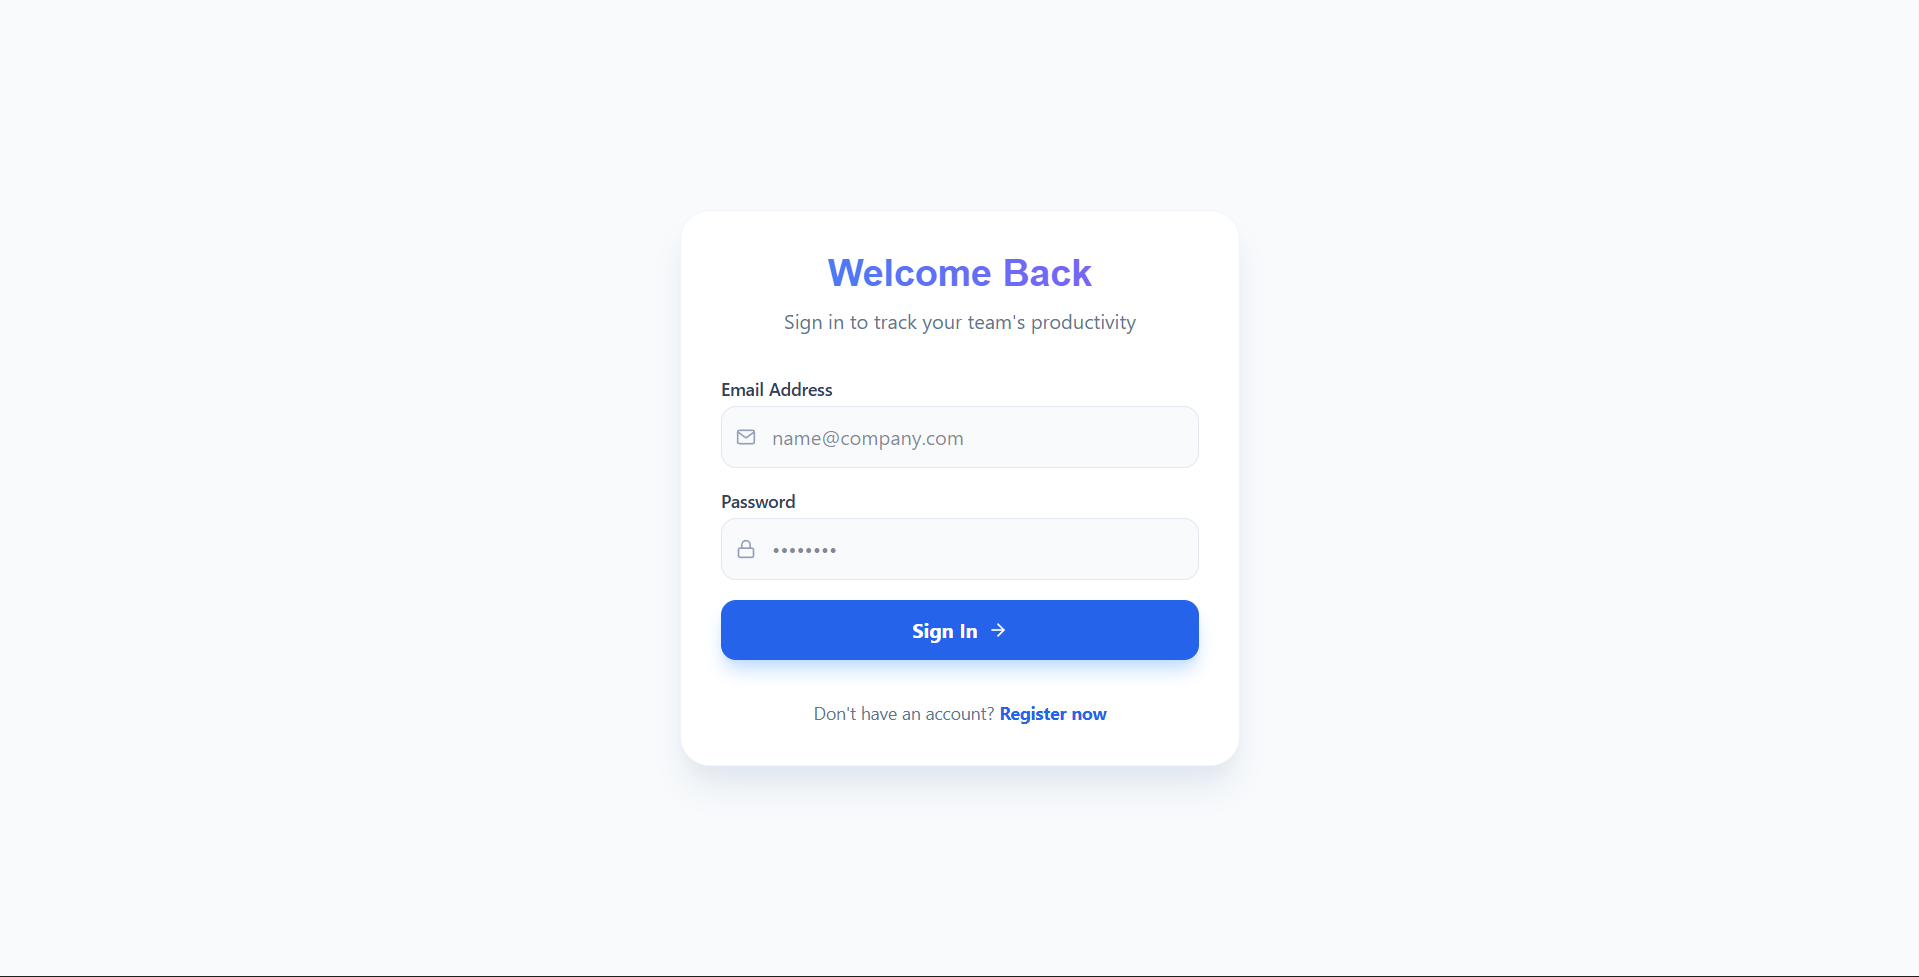
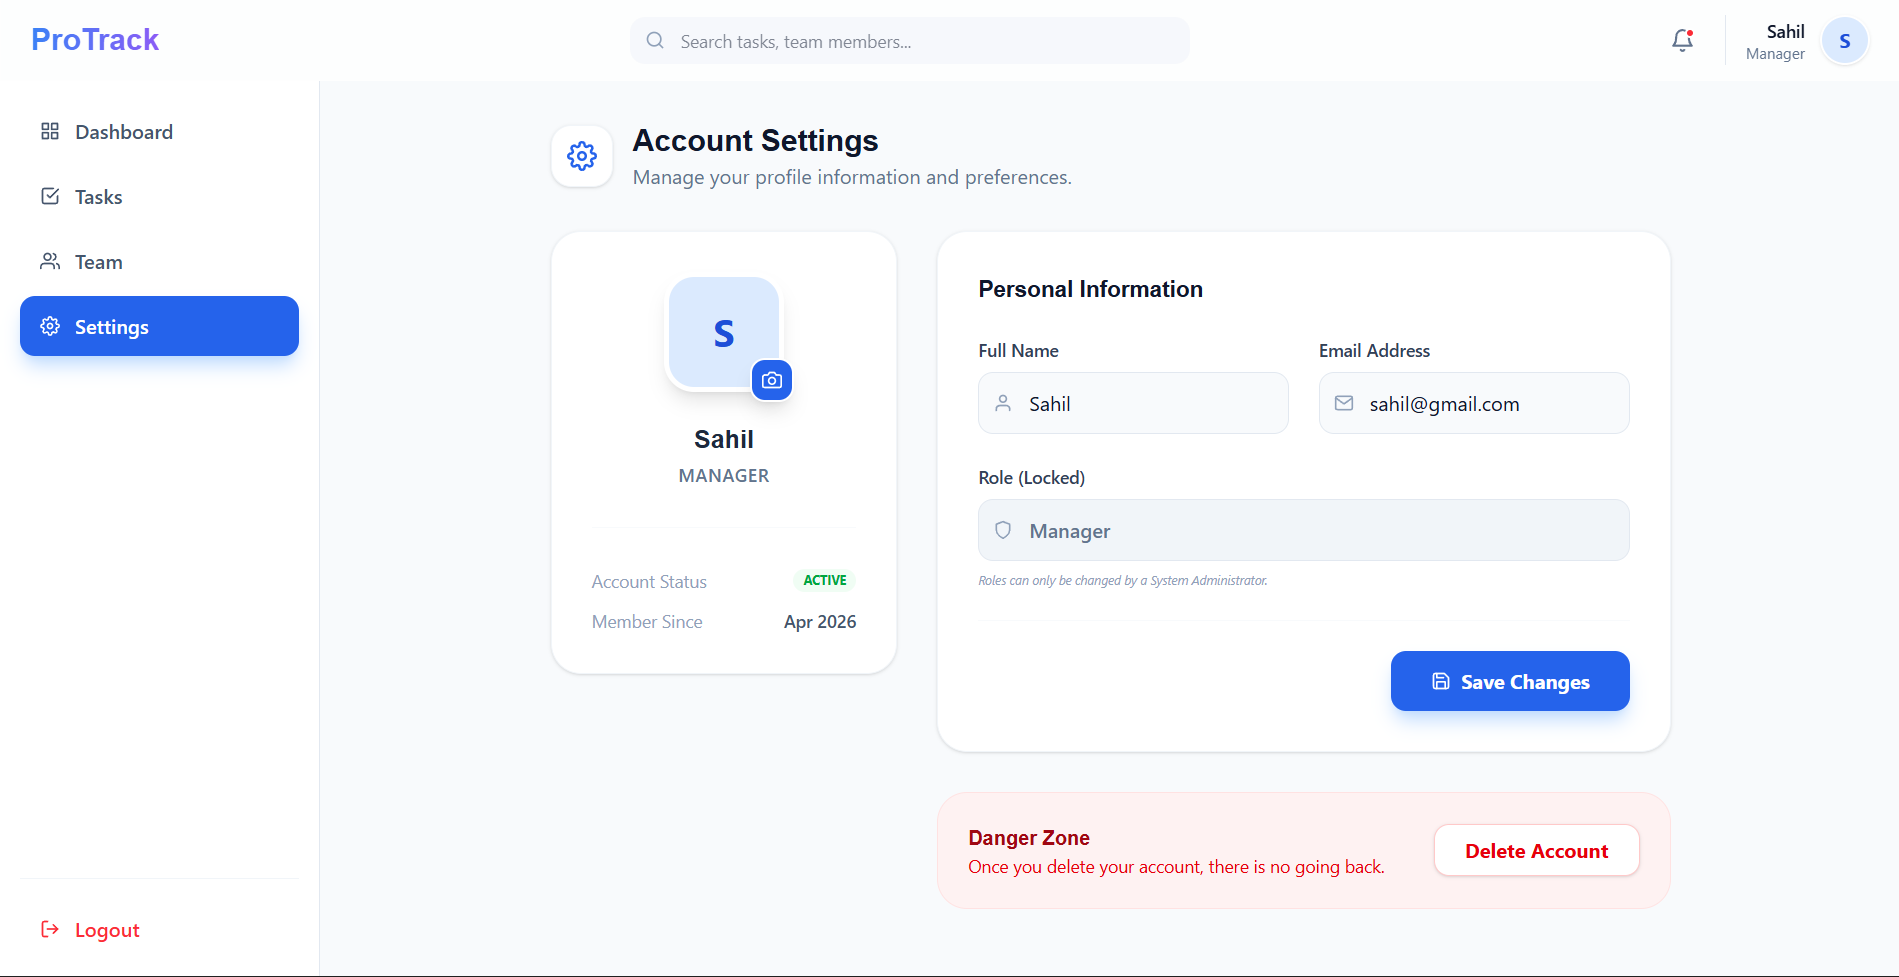
- Personal Profile Management: Secure account settings where users can manage their identity.
Functionality
- For Manager:
- Task Assignment: Create tasks and assign them to specific employees via dynamic dropdowns.
- Full Oversight: View all tasks across the organization to monitor bottlenecks.
- CRUD Operations: Full control to edit or delete any task in the system.
- Team Management: Access a full directory of all employees and their roles.
- For Employees:
- Task Assignment: Create tasks and assign them to specific employees via dynamic dropdowns.
- Full Oversight: View all tasks across the organization to monitor bottlenecks.
- CRUD Operations: Full control to edit or delete any task in the system.
- Team Management: Access a full directory of all employees and their roles.
Technology Used
- Frontend:
- React.js
- Tailwind CSS (v4)
- React Router Dom
- Axios
- React Icons
- React Hot Toast
- Backend:
- Node.js
- Express.js
- JWT (JSON Web Tokens)
- Bcrypt.js
- Dotenv
- CORS
- Database:
- MongoDB
- Mongoose (ODM)
Why This Project Is Useful
- Transparency: It eliminates the “black hole” of remote work by making it clear who is working on what and when it will be finished.
- Efficiency: Reduces the need for constant status-update meetings. The dashboard provides an instant “health check” of the team’s output.
- Accountability: By linking tasks to specific users, it creates clear ownership and encourages timely completion.
- Security: Protects sensitive organizational structures by ensuring employees can only modify their own work, while managers retain administrative control.
- User Satisfaction: The premium design and instant feedback (toasts/animations) provide a world-class experience that makes daily management less of a chore.
Deployment and Environment Setup
- Environment Variables Setup:
- backend/.env
- PORT: 5000
- MONGO_URI: mongodb_url_string
- JWT_SECRET: your_jwt_secret_key_here (if needed)
- frontend/.env
- VITE_API_URL: backend_url
- backend/.env
- Deployment Overview:
- Render or Railway for backend hosting
- Vercel or Netlify for frontend hosting
- MongoDB Atlas for the database
- Backend Deployment:
- Push your code to GitHub.
- Go to Render.com or Railway.app.
- Create a new Web Service and connect your GitHub repository.
- Choose “backend/” as the root directory.
- Add the following environment variables on Render:
- PORT=10000
- MONGO_URI=your MongoDB Atlas URI
- JWT_SECRET=your JWT secret
- Start command: npm start (Ensure your backend/package.json includes “start”: “node server.js”)
- After deployment, note your backend URL, e.g. https://your-backend-name.onrender.com
- Frontend Deployment:
- Go to Vercel.com or Netlify.com.
- Create a new project and connect the GitHub repo.
- Select the “frontend/” folder as root.
- In environment variables, set:
- VITE_API_URL=https://your-backend-domain.com/api (or REACT_APP_API_URL if using CRA)
- Deploy.
- MongoDB Atlas Setup:
- Go to https://cloud.mongodb.com
- Create a free cluster.
- Add your current IP address in Network Access.
- Create a database user and password.
- Copy the connection string and replace username, password, and database name in MONGO_URI in backend/.env
Download Source Code
Project Setup Instructions
Note: This project is for educational purposes only. Not for commercial sale.


