Project Overview
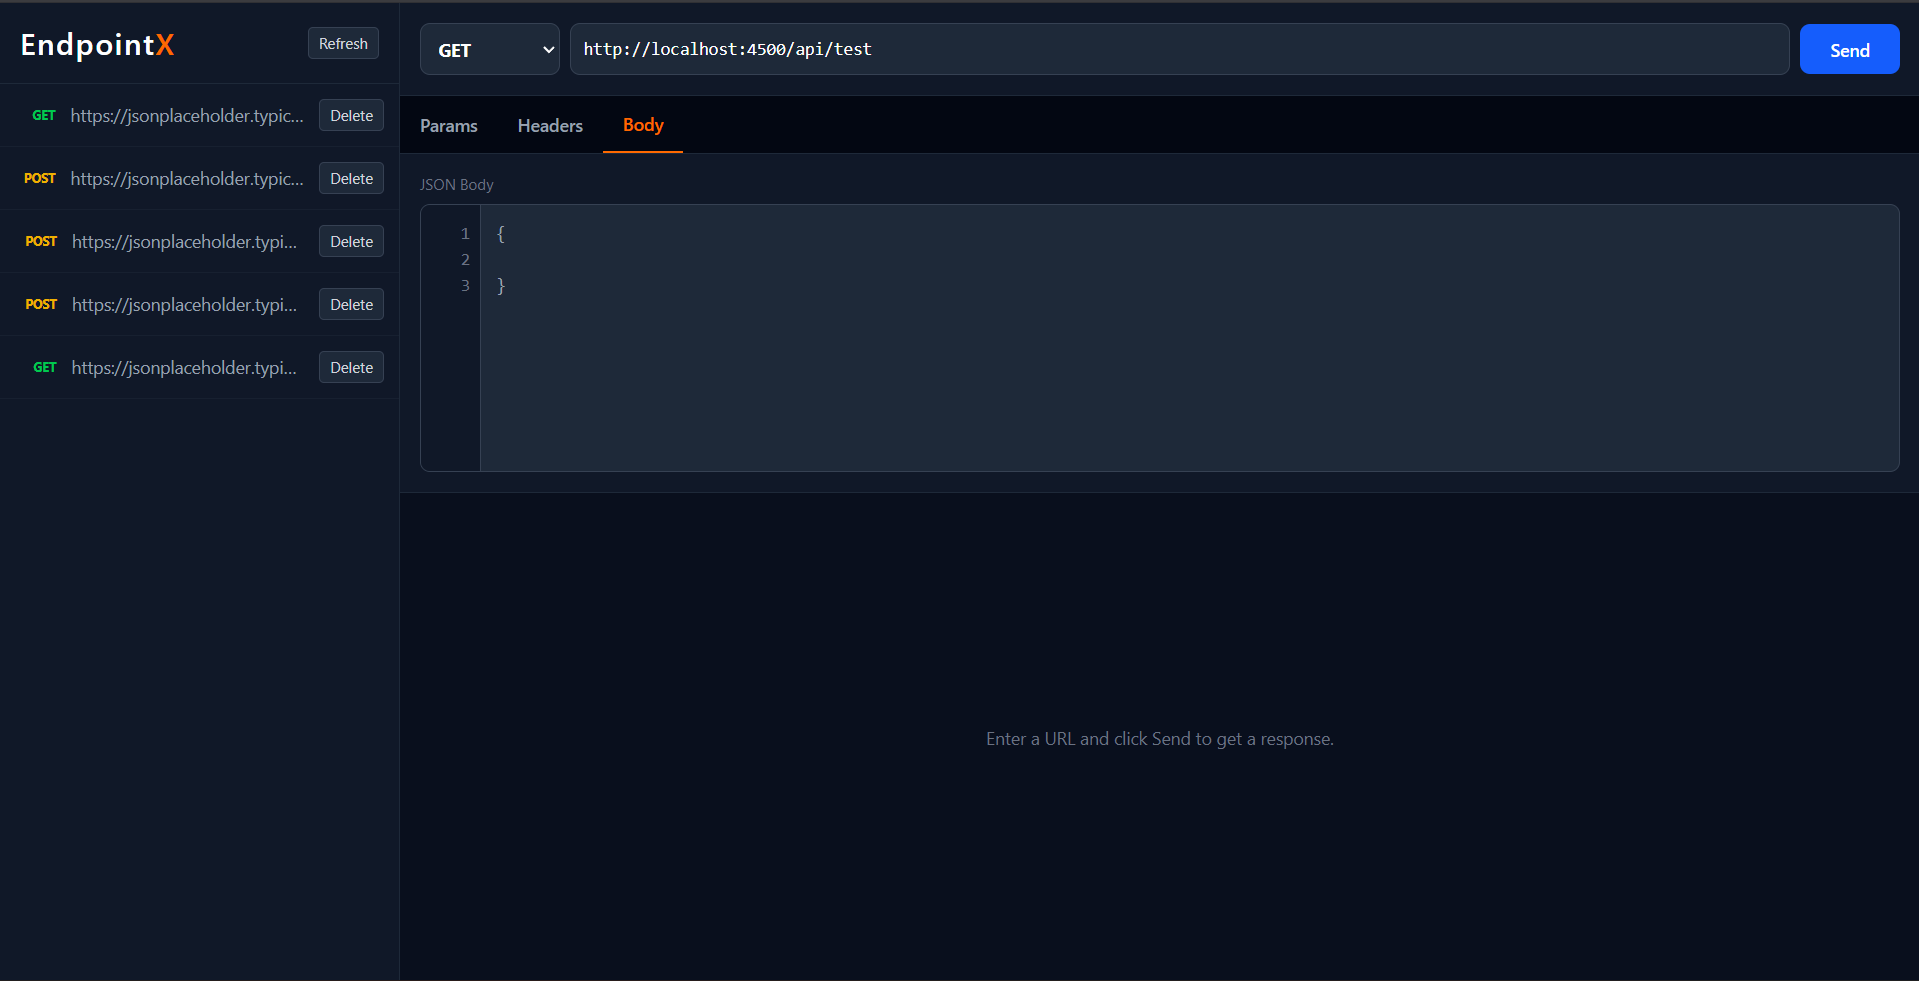
EndpointX is a modern, web-based API testing application designed to provide a seamless and professional experience similar to industry-standard tools like Postman and Thunder Client. It allows developers to send HTTP requests, inspect responses, and manage request history through a clean, dark-themed user interface.
Screenshots
Key Features
- Intuitive UI: A 3-pane layout featuring a Sidebar (History), Request Panel, and Response Panel.
- Method Support: Supports standard HTTP methods: GET, POST, PUT, DELETE, PATCH.
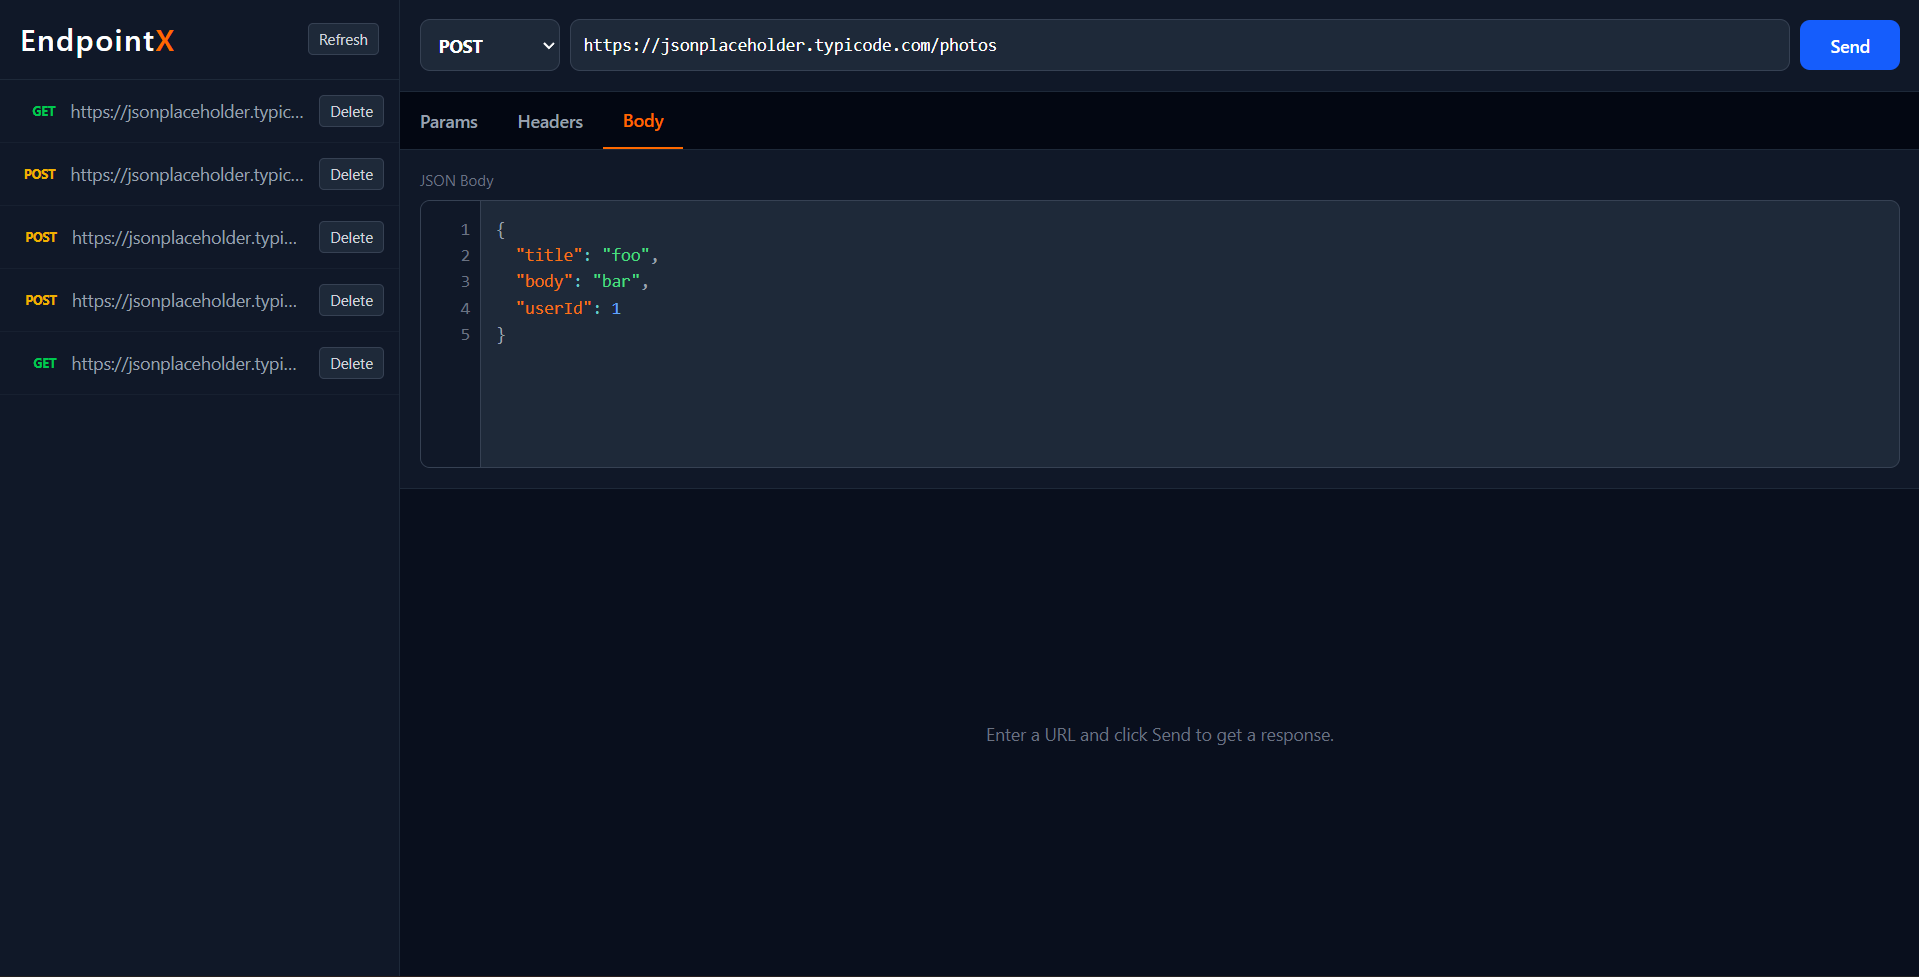
- JSON Editor: Integrated code editor with syntax highlighting (PrismJS) and line numbers for easy JSON manipulation.
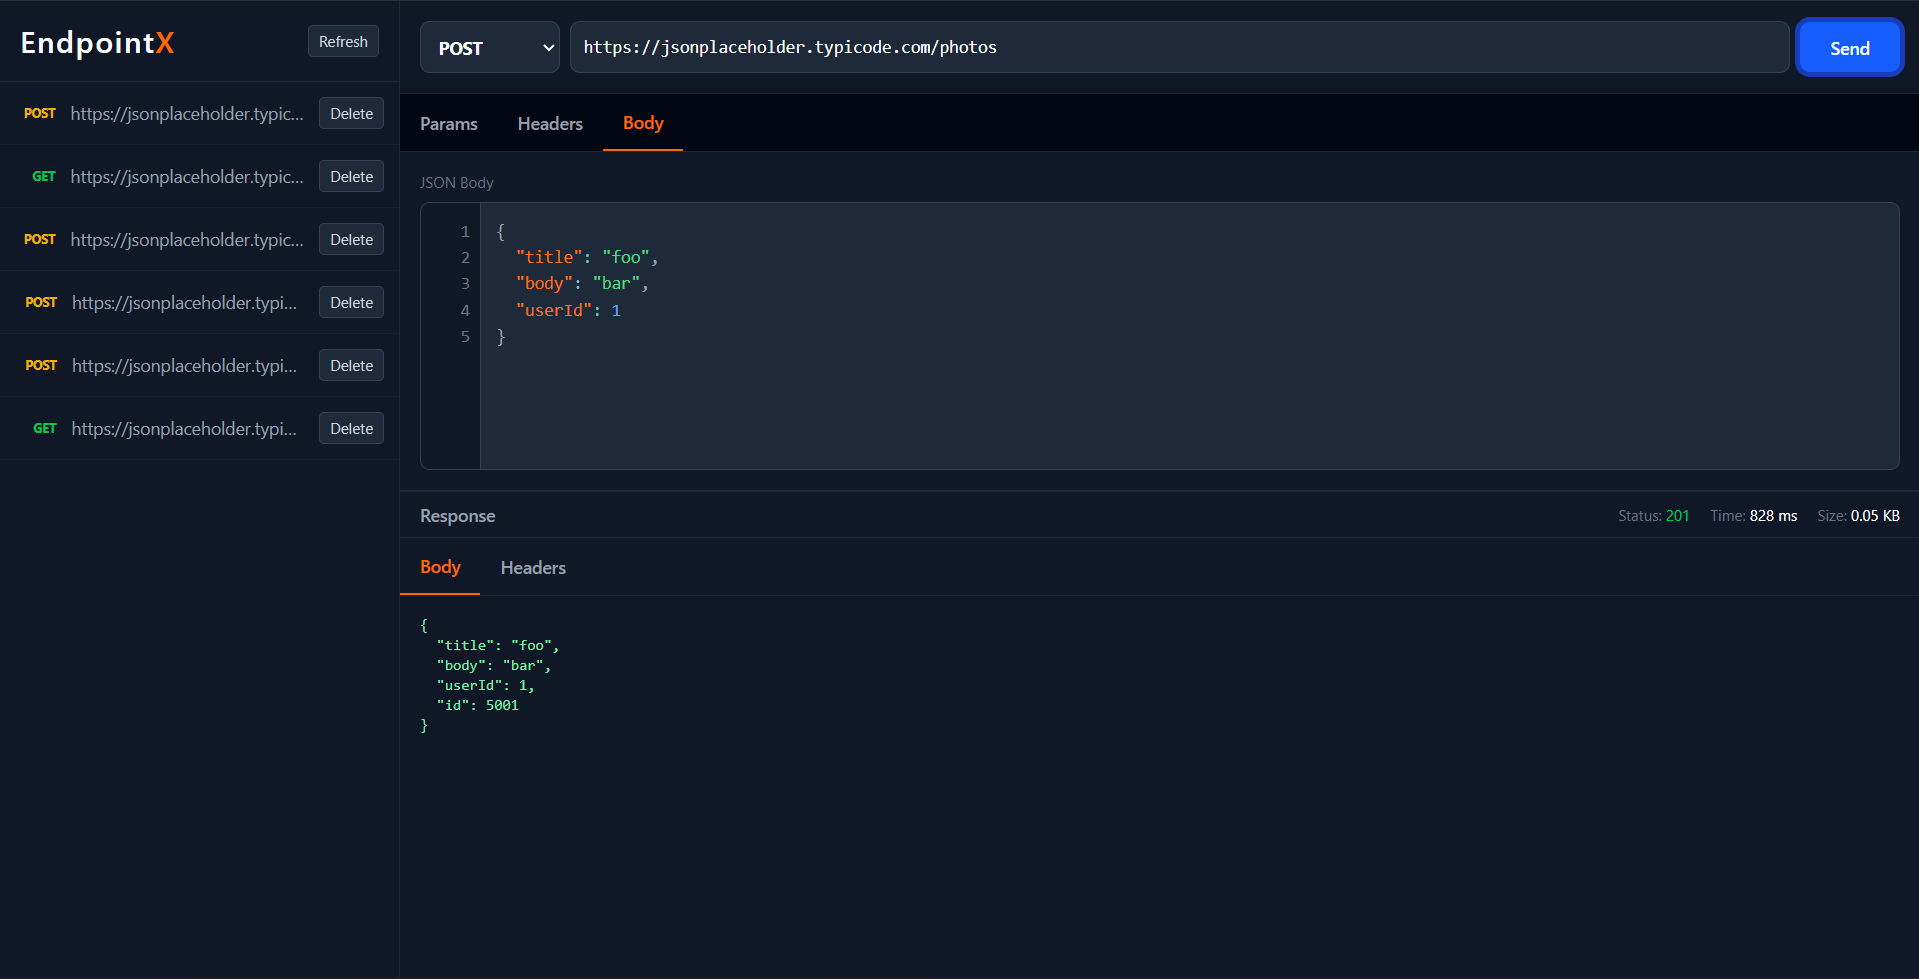
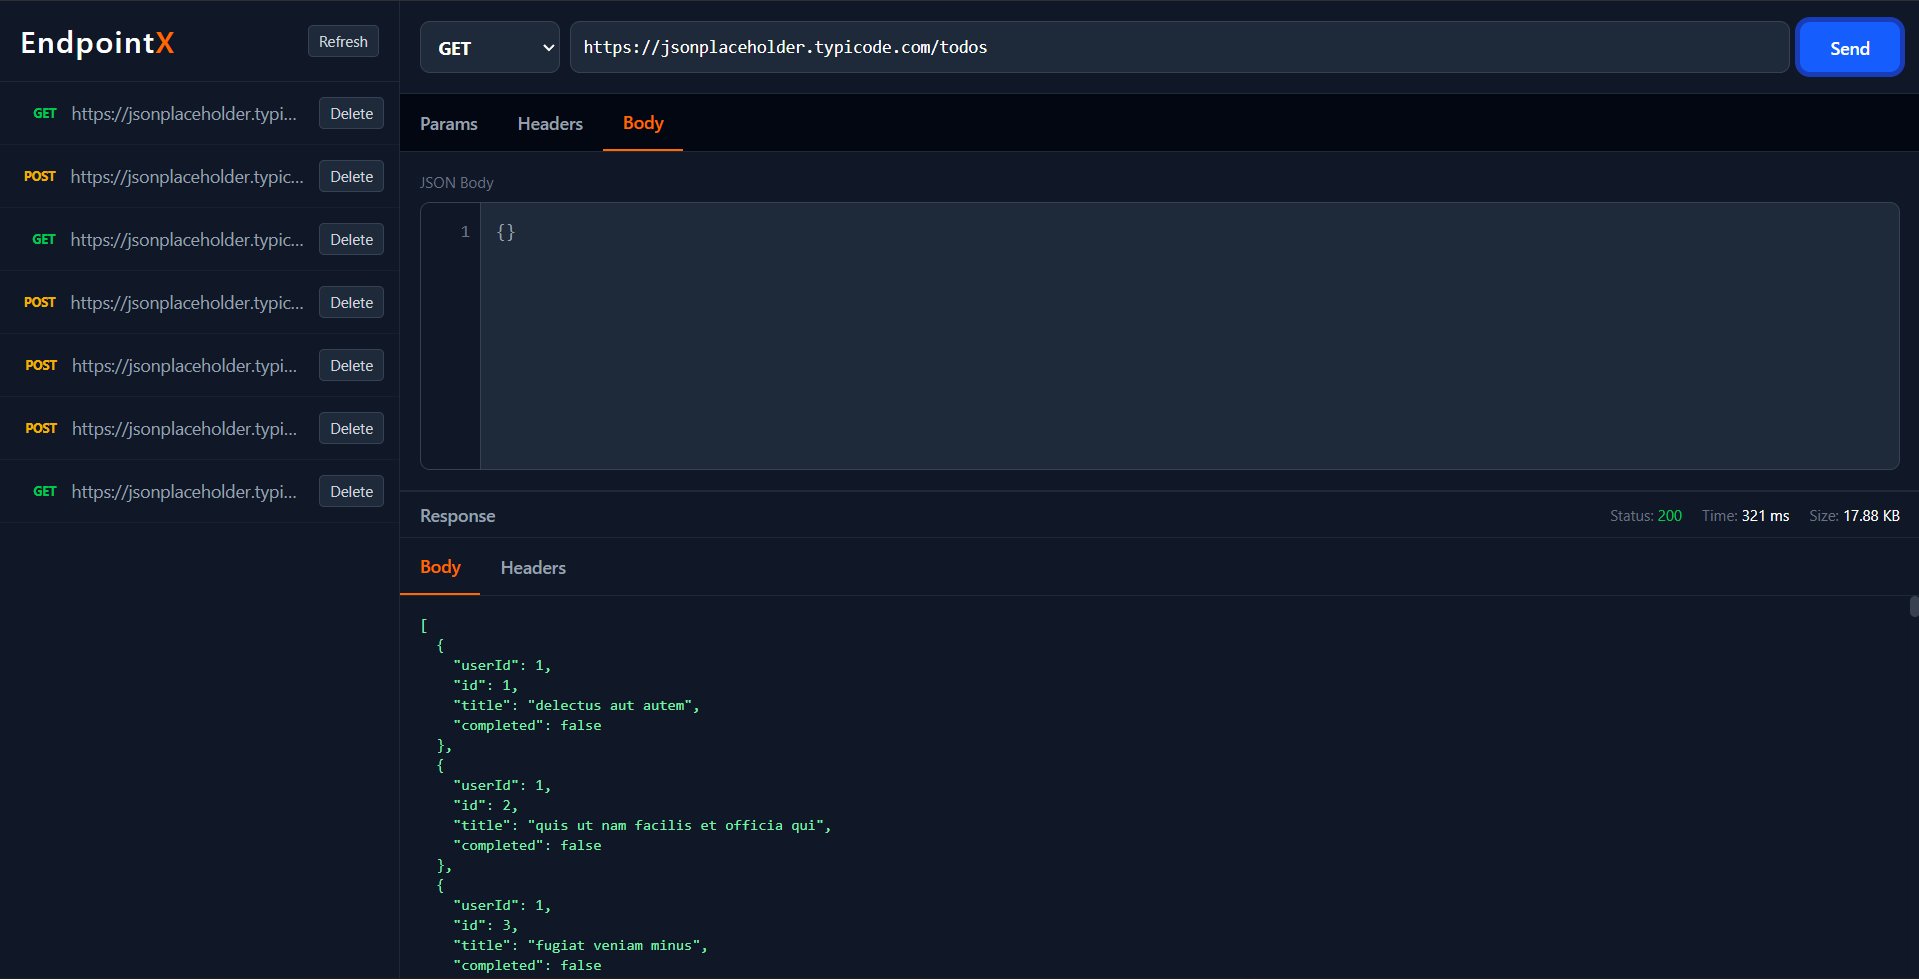
- Response Metrics: Automatically calculates and displays response time (ms), size (KB), and status code.
- History Management: Automatically saves requests to a history list. Users can revisit previous requests or delete them.
- Dark Mode: A professional, high-contrast dark theme optimized for long coding sessions.
Functionality
- Request Composition: Users can manually enter an API URL, select an HTTP method (GET, POST, PUT, DELETE, PATCH), and provide a JSON body for the request.
- Response Analysis: The application displays the response status code, execution time, and response size. The response body is strictly formatted for readability.
- History Tracking: Every request sent is automatically saved to the history sidebar. Users can click on any history item to reload the request details into the editor.
- Request Management: Users can delete individual requests from the history to maintain a clean workspace.
- Syntax Safety: The JSON editor provides real-time syntax highlighting and line numbers, helping users avoid format errors in their request bodies.
Technology Used
- Frontend:
- Framework: React (Vite)
- Styling: Tailwind CSS (v4)
- HTTP Client: Axios
- Code Editor: `react-simple-code-editor` + `prismjs`
- Backend:
- Runtime: Node.js
- Framework: Express.js
- Database: MongoDB (via Mongoose)
- Proxy: Uses a backend proxy to handle CORS and request forwarding.
Why This Project Is Useful
- Backend Developers: Quickly testing API endpoints during development without switching contexts.
- Frontend Developers: DebuggingAPI integrations and inspecting response structures.
- QA Engineers: verifying API behavior and performance metrics.
- Learning: serving as a practical example of building a full-stack developer tool with a complex UI state.
Deployment and Environment Setup
- Environment Variables Setup:
- backend/.env
- PORT: 5000
- MONGO_URI: mongodb_url_string
- JWT_SECRET: your_jwt_secret_key_here (if needed)
- frontend/.env
- VITE_API_URL: backend_url
- backend/.env
- Deployment Overview:
- Render or Railway for backend hosting
- Vercel or Netlify for frontend hosting
- MongoDB Atlas for the database
- Backend Deployment:
- Push your code to GitHub.
- Go to Render.com or Railway.app.
- Create a new Web Service and connect your GitHub repository.
- Choose “backend/” as the root directory.
- Add the following environment variables on Render:
- PORT=10000
- MONGO_URI=your MongoDB Atlas URI
- JWT_SECRET=your JWT secret
- Start command: npm start (Ensure your backend/package.json includes “start”: “node server.js”)
- After deployment, note your backend URL, e.g. https://your-backend-name.onrender.com
- Frontend Deployment:
- Go to Vercel.com or Netlify.com.
- Create a new project and connect the GitHub repo.
- Select the “frontend/” folder as root.
- In environment variables, set:
- VITE_API_URL=https://your-backend-domain.com/api (or REACT_APP_API_URL if using CRA)
- Deploy.
- MongoDB Atlas Setup:
- Go to https://cloud.mongodb.com
- Create a free cluster.
- Add your current IP address in Network Access.
- Create a database user and password.
- Copy the connection string and replace username, password, and database name in MONGO_URI in backend/.env
Download Source Code
Project Setup Instructions
Note: This project is for educational purposes only. Not for commercial sale.


